


There are a lot of machines that openbuilds sells that work with the all in one laser bundle, as long as you are using the openbuilds spindle mount. It is also super easy to hook it all up. It basically is:
- Connecting the mount
- Routing the extension cables
- Connecting the laser driver
- Setting up Lightburn
- Let start now and go through some of the steps.
Let’s start now by going into the steps in detail.
You can check out the compatible machines here in the OPENBUILDS PART STORE.
Openbuilds Installation Video
The guys over at Openbuilds have put together this nice video showing how to set up the laser and the black box controller. Check it out!
Check out the Openbuilds page Here
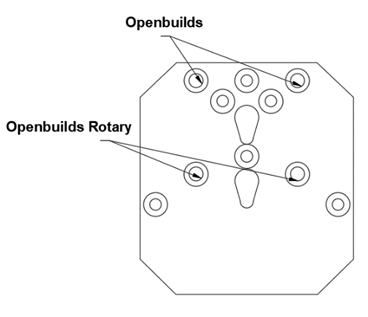
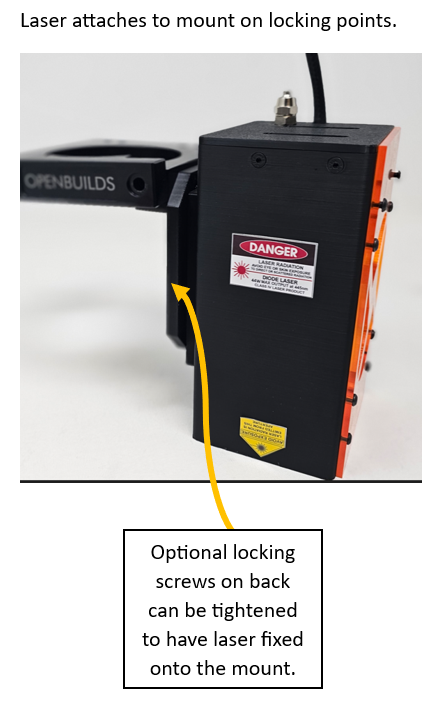
Mount the laser to the spindle holder
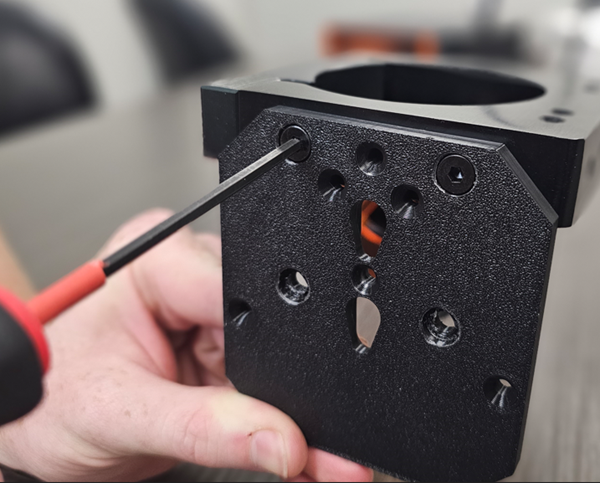
44W Metal Mount Installation
Install the metal mounting plate on either the front or the side of the router holder. Use the two screws included in the kit for this.

Older Style Kits
The standard kit comes with the following for mounting your laser:
- Laser Quick Connect Magnet Mount
- 3 foot Mini Molex Jr. Input Cable
- Mounting Screws
- Driver Mounting Sticky Squares
- 10 foot Laser and Fan Extension Cables
- Zip Ties and Zip Tie Holders

The magnet mount has two longer 30mm M5 screws to replace the screws you have on your spindle already. Start by taking the existing screws out of the spindle mount. They are in the front of the spindle on your machine.

Replace them with the two 30mm screws and put the mount in front of the spindle mount. You will be doing this with yours attached to your machine. We have ours off just to show the pictures better.
This is what it will look like when you have it installed with the new screws.
Your laser will then fit on the front with magnets. The shrouded laser is focused at 1/8″ below the shroud.
Run your laser and fan extension cables
In the newer kits, you will have one cable for your extensions. It will be 4 pin Molex that will run through from the Safety Interface Module to the Gantry. Make sure before you run it that you run the correct end of the cable.
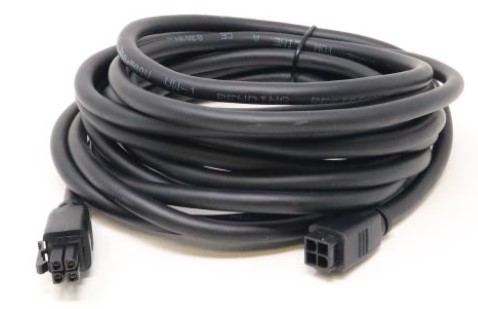
In the older kits, the two cables in your mounting kit are the laser extension cable (thick wire) and the fan extension cable (thin wire). Depending on which machine you have it might look a bit different than the pictures here. It will still be the same idea.
Make sure you keep the end that connects to the laser by the Z Gantry as shown in the picture. Hold it in place with a zip tie.
Start with your female ends of the cables. You can check this by looking at the laser from the last step and seeing which needs to connect to it. They look like this from the picture below:

If you plan to put the extension cables in the cable chain, Make sure your put tape on the end you are pulling so they don’t get stuck.
We just put ours on the outside and just zip tying the cable to the outside like in the picture:
Go along the entire X axis cable chain:
Then, go along the Y axis cable chain over to where you have your electronics hooked up.

Connect the laser driver to the controller
Depending on which controller you purchased this section might be different from what you have. Normally, you can get the openbuilds machine with either a Spark Concepts X Pro or the Black Box controller. Our GRBL controller we sell also will work with many of the NEMA 17 machines from openbuilds. We will cover the CNC X Pro right now here.

Simply connect screw terminal D11 using the input cable in the mounting kit.
Original Black Box Controller Hook Up:

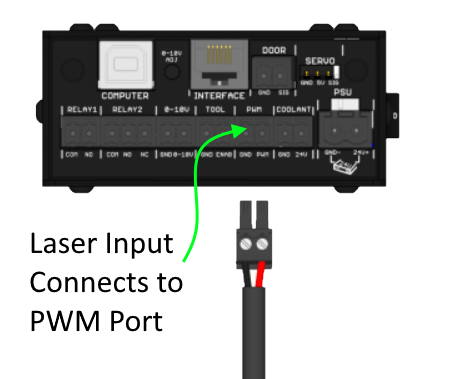
Newer 32 Bit Black Box Controller Hook Up:
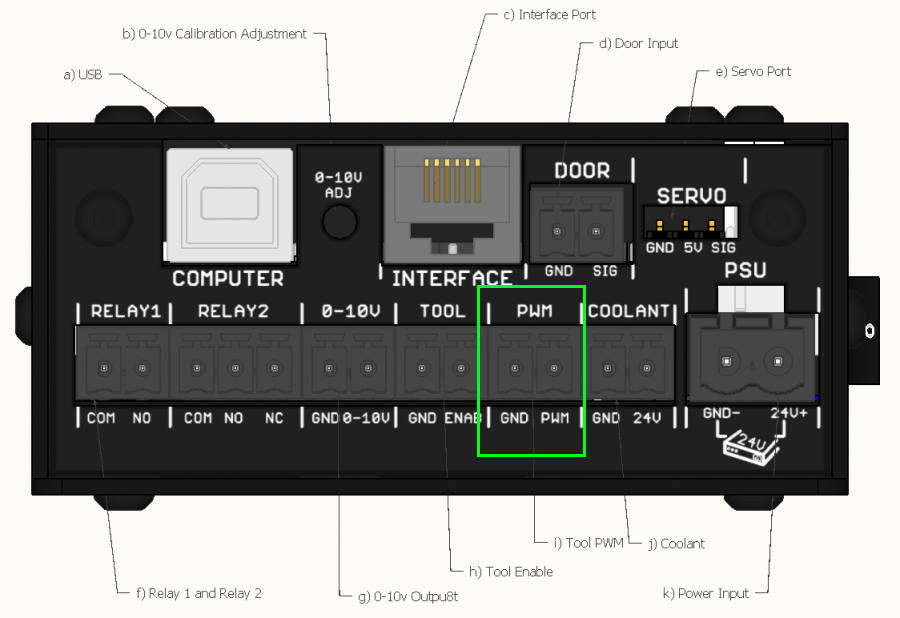
Just Make SURE you have the input correct on the laser driver. It will be the middle molex connection with the black dot or black connector on it and the smaller wire with the black molex connector.
The laser extension wire will be the thick cable. Hook it up to here:

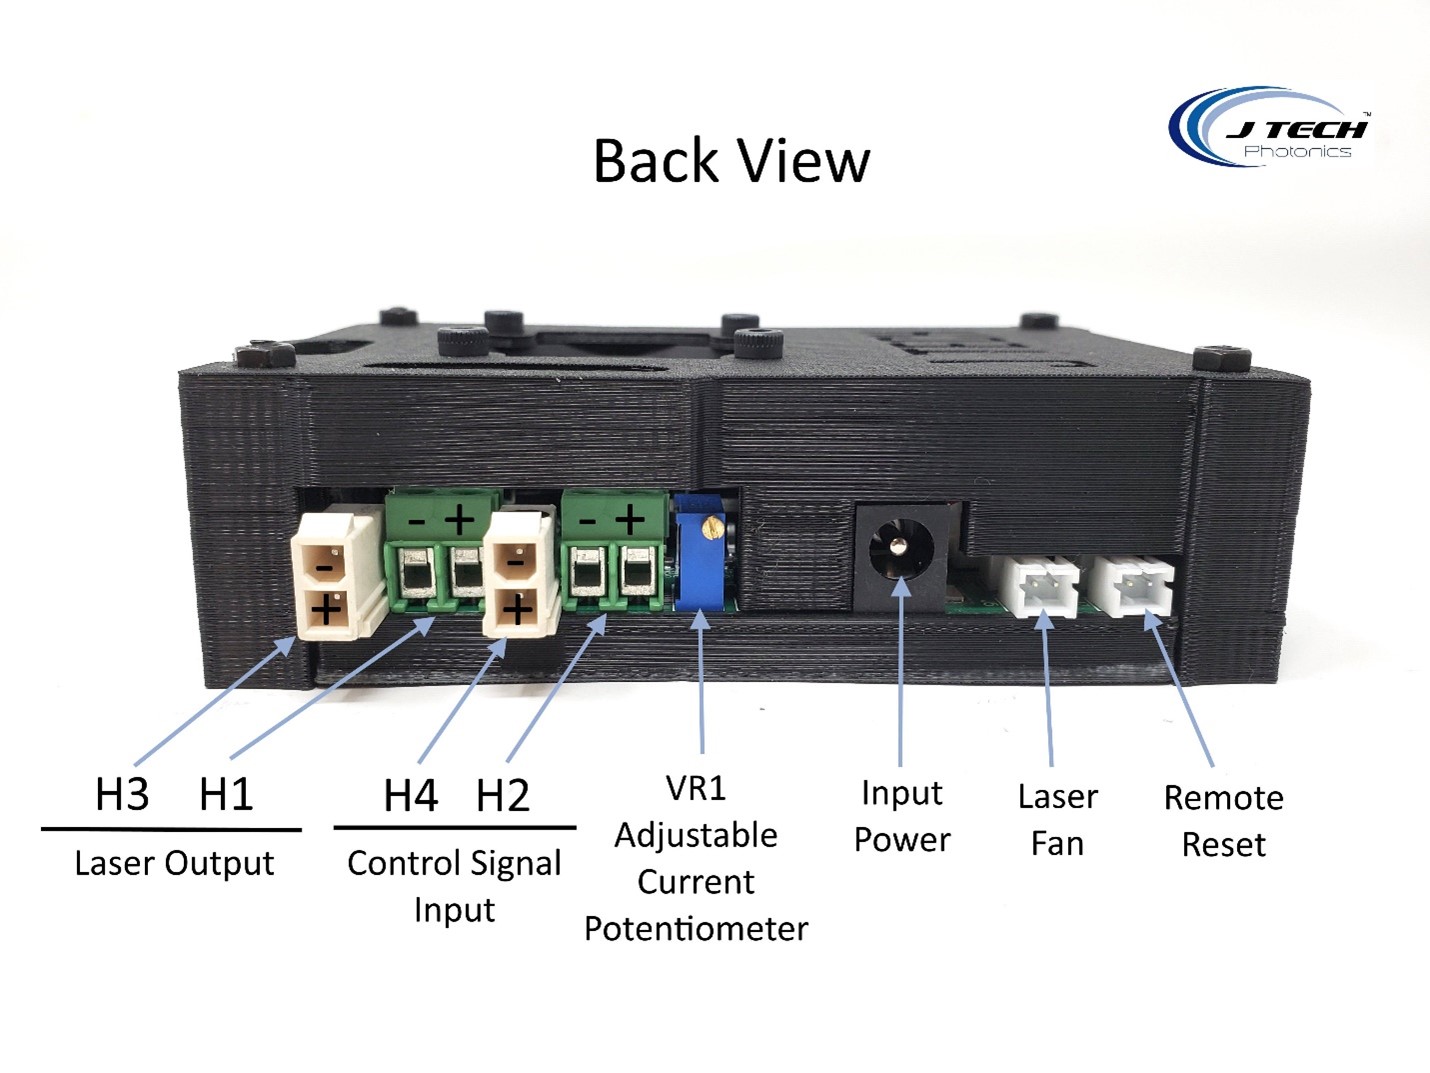
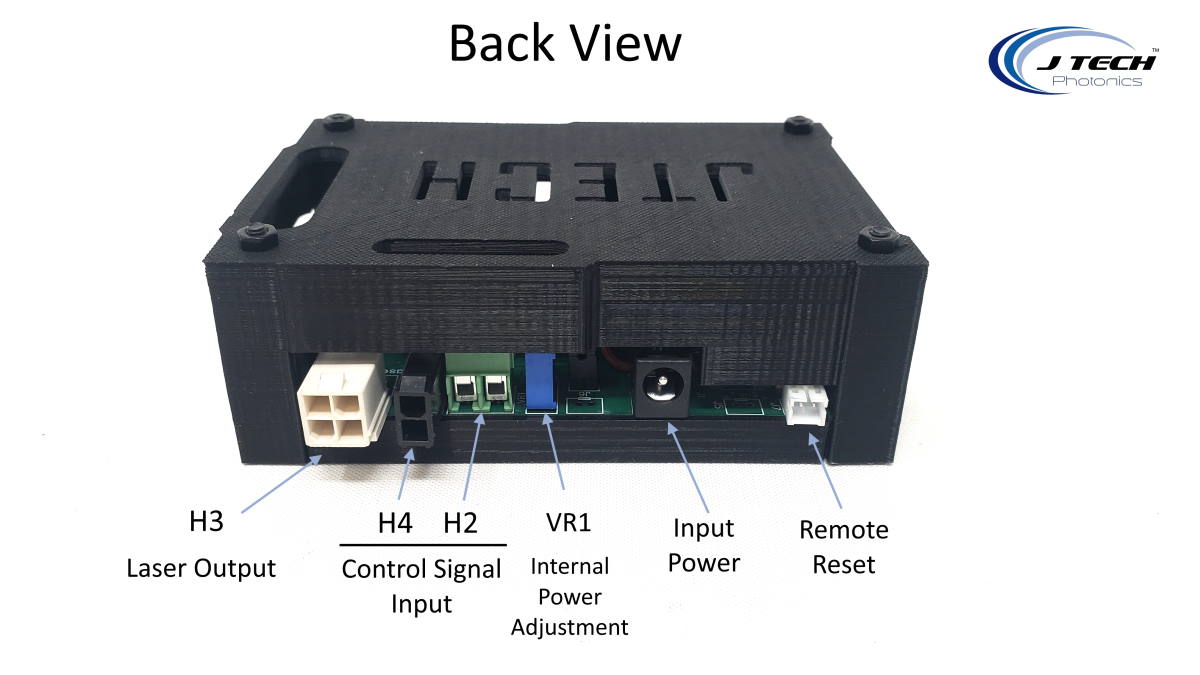
Back View of Safety Interface Board
You can use the sticky pads to hold down the laser driver near your controller or you can mount it using the screws.
Plug in the power and the cable to the laser driver and you are ready to start.
Running your laser
We recommend using lightburn software to run your laser machine. In order to set it up, follow the instructions here.
Lightburn With the 32 Bit Black Box
You need to enable “DTR” to have the communication work with the black box controller and lightburn. You can see it in the device settings here:

The first time you need to press the red reset button on the driver to get the fans working.
Your laser will now be ready to start. Now that you have everything running, start using your new laser machine!
Disclaimer
The laser used in this project is very powerful and all safety precautions must be taken. Use proper safety eyewear to prevent injury to eyes. This is a project and J Tech Photonics, Inc. is not responsible or liable for any and all damage or injury caused to people or property. The use of these instructions to make a laser cutter is under your own discretion and all safety precautions should be followed. J Tech Photonics, Inc. is not affiliated in any way with openbuilds and they may change hardware and software at any time making these instructions invalid.