
All-In-One Generic Laser and Mounting Kit Bundle is great for any machine not covered by one of our other mounting bundles. This will fit various machines like Mach3 and Mach4 machines, CNC Router Parts machines, and any other custom machine design.
It includes the Generic Magnet Mounting Plate that you can mount anywhere on your Z gantry for the laser.
It is available for purchase here:
Setup Instructions
Mounting the Generic Laser Plate
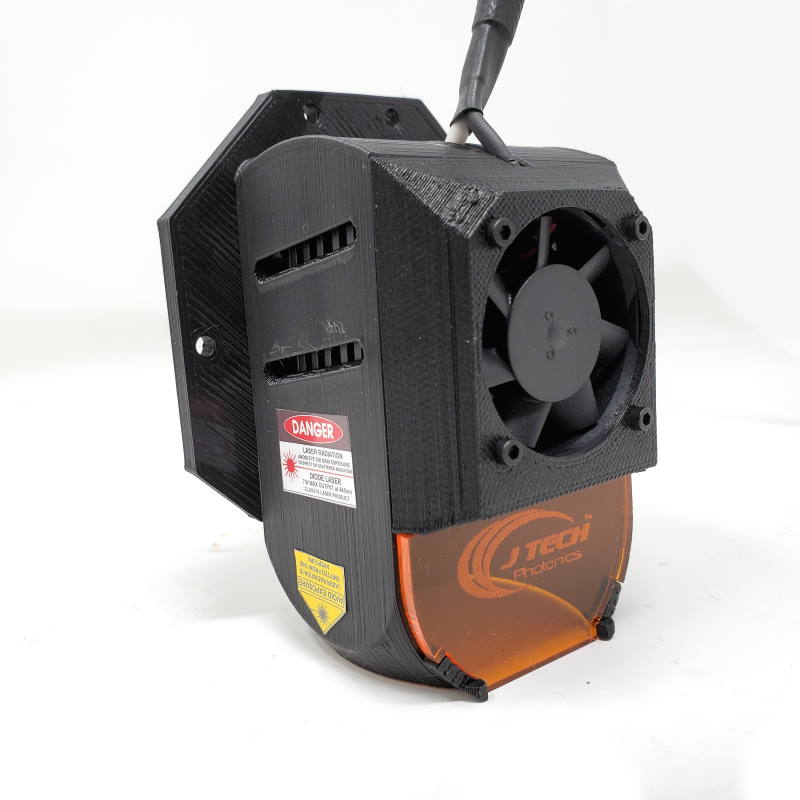
The bundle includes the laser driver, laser head, cables, and the generic mount to get started on any machine. When purchasing, you need to figure out how far your laser driver will be from the gantry to make sure you have the correct extension cable length. You will mount your laser driver close to the machine controller to get the “on/off” signal for the laser. Then, the laser controller will have the extension cables go from the laser driver through the cable chains up to the gantry where the laser head is mounted.
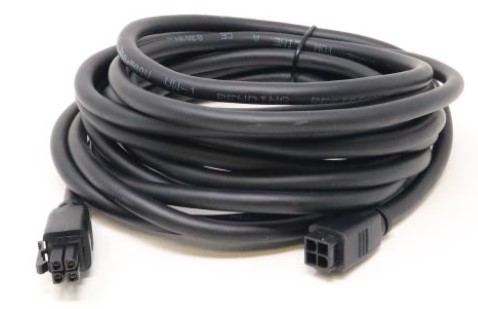
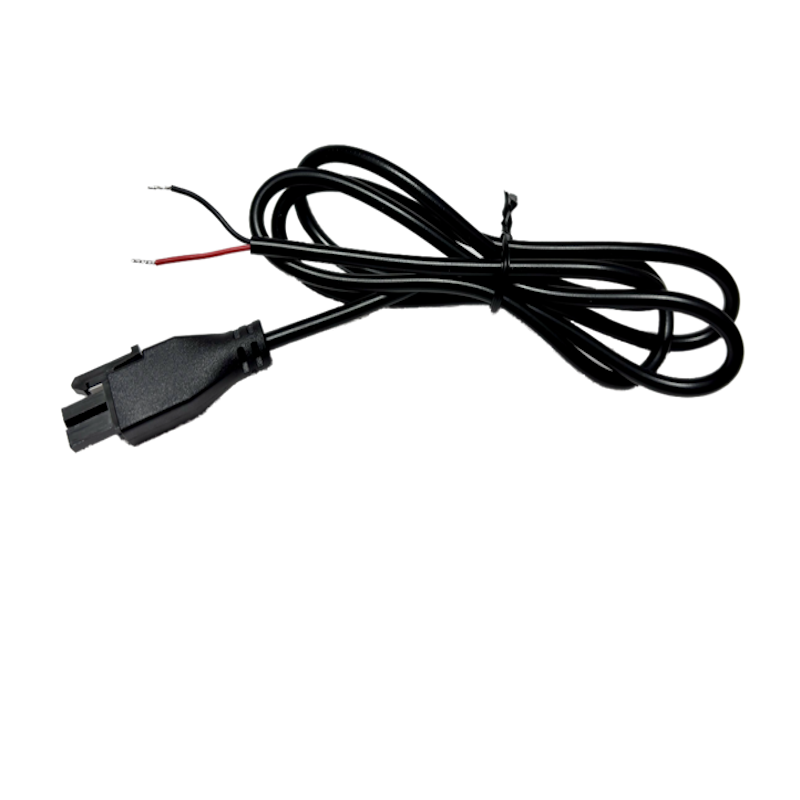
The kit will contain the following cables and mount.

You will need to first mount the generic plate to the gantry of your machine.
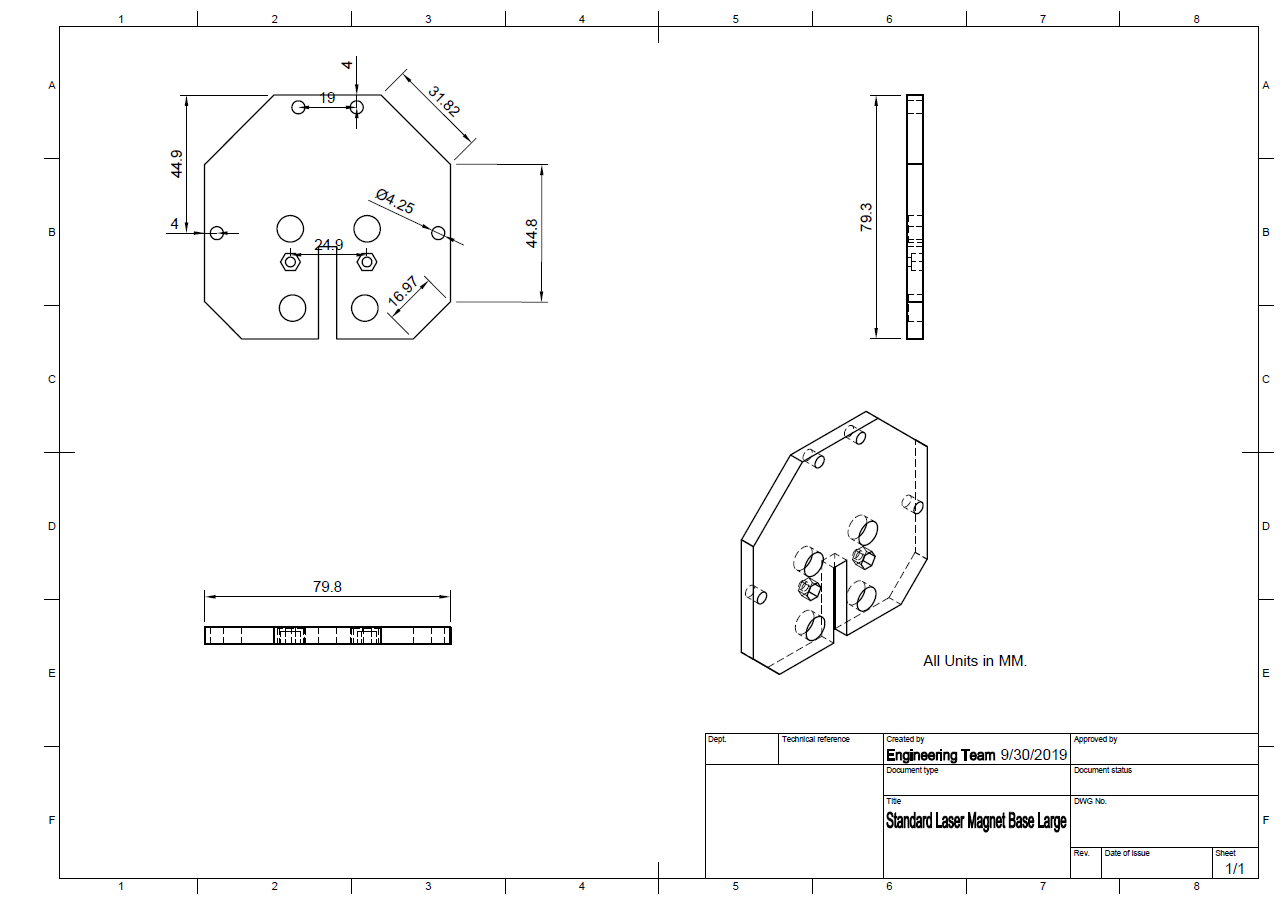

Most people will make a plate to put the laser mount on to fit either next to the spindle or in front of it. You can use the dimensions to put the magnetic plate onto this. Here is an example of a legacy maverick CNC with the a fabricated plate.

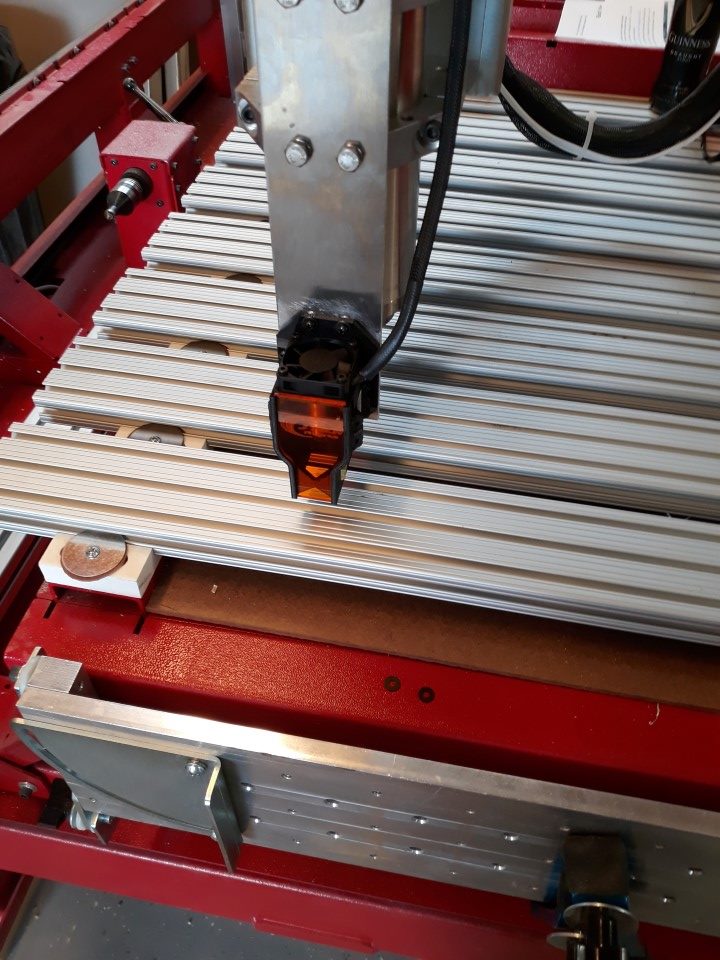
Make sure when you fabricate your plate to have it not go lower than the chuck collet. You can measure this to make sure the when you have the laser on the plate, it is lower than the collet and when the laser is off the plate the plate is above the spindle collet.
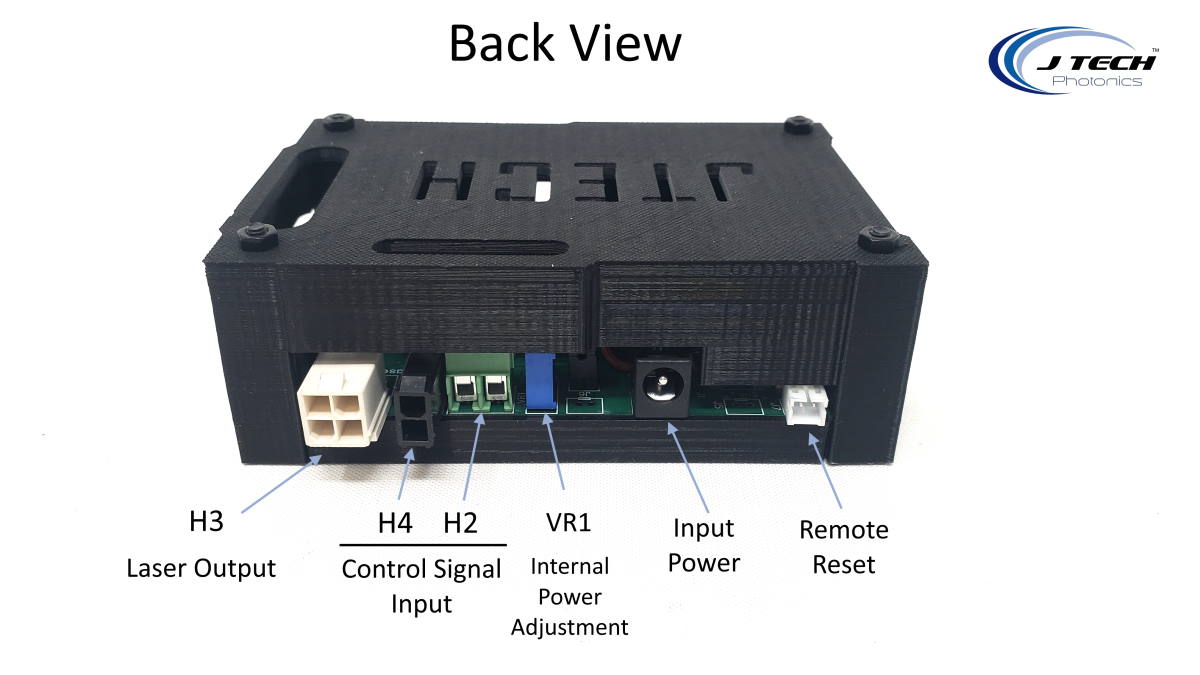
Mounting for the Metal Mount
Install the metal mounting plate Using the screw holes that work for your machine. There are four holes that are specific for the mount, but any can be used. Use the screws included in the kit for this.
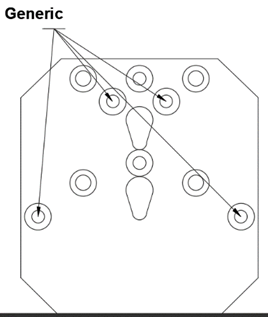
Wiring
The wiring consists of a few cables that need to be run. First, the laser and fan extensions go out of the lase driver through the cable chains up the gantry where they terminate with the connectors. The laser will plug into these connectors at the gantry. The input molex cable from molex termal H4 on the laser driver board will go to the machine controller “On/Off” laser signal. This will tell the laser to turn on or off when the machine says to. This signal can be 5V to 24V from the controller. The other cable is the power adapter which should be plugged into a known good outlet.
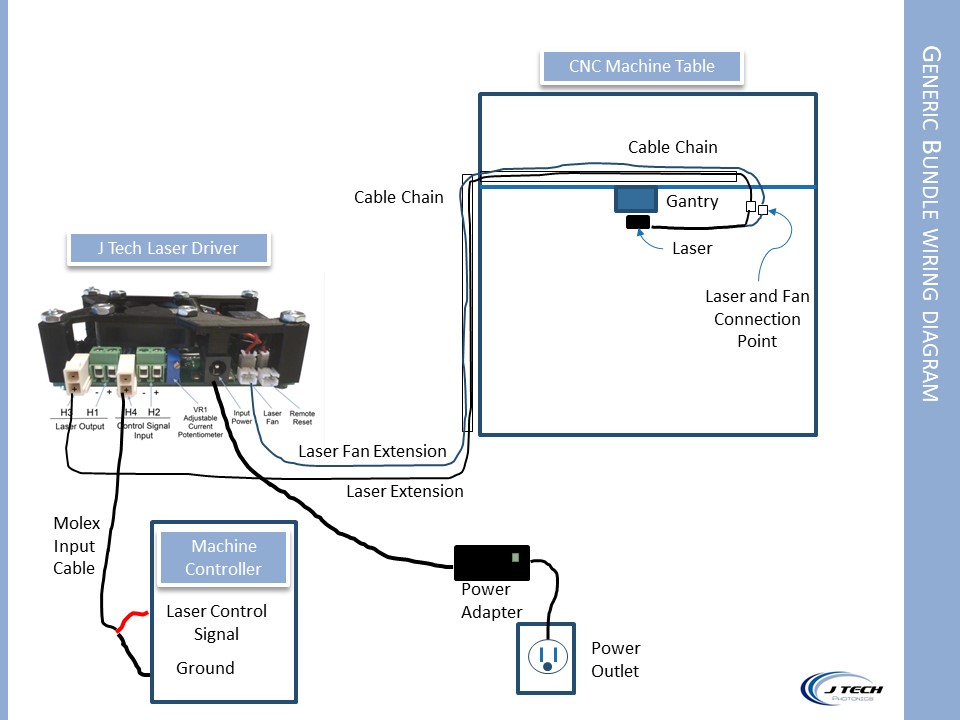
The connection on the laser driver are here:
Depending on your machine controller, the input signal instructions will be different. There are a multitude of breakout boards for all different controllers. If you have questions about how to get to your laser signal then email [email protected] and we can try to help.
Machine Configuration
There are a lot of different controllers for different machines. We have instructions for many of them, but not all. An example setup for Mach 3, Mach 4, Rich Auto, and Gecko are here:
These are only a few of the instructions we have. If you have a GRBL controller, then it will simply be the Spindle PWM signal that is the Laser On signal to the laser driver. Other boards for 3D printers can also be used as the controller.
Machines like the Shopsabre and Camaster are available with kits from the manufacturer, but if you want to upgrade an existing machine you will need some help from WinCNC. You can find them here:
https://www.wincnc.net/contact.php
Using the Laser
Now that you have the laser hooked up, you can start using it. You first need to decide on your software for creating your files. We have two choices we recommend. One is Vectric and one is Lightburn. If you are already using Vectric, then it might be easy to just to download our post processor here:
Vectric is the most common software to use with machines that don’t have a full bundle from us and are not standard GRBL controllers.
Some machines will be able to be set up with Lightburn and the “M3” device. You can find it at https://jtechphotonics.com/?product=lightburn-software