

The Longmill and Altmill CNC is a popular machine for CNC enthusiasts. This laser upgrade will allow these users to upgrade the machine to be an awesome laser machine as well with the J Tech high powered lasers. We will go over how to install the laser on this machine in a process that takes under an hour to get going. Let’s start!
Purchase the Longmill CNC Laser Upgrade

Bucky’s Customs Installation Video
Check out Dana’s video on how to install and use a J Tech Photonics laser on your Longmill machine. He shows just how easy it is to get up and running with our lasers on the Longmill machine.
Mounting the Laser
Depending on when you purchased your machine, you will have either holes for the laser in the front or also on the side. Where you choose to mount is up to you.
The mounting kit will contain the mount, screws, and all of the items needed to install the laser. Note, the newer higher power lasers will have just one extension cable to run.
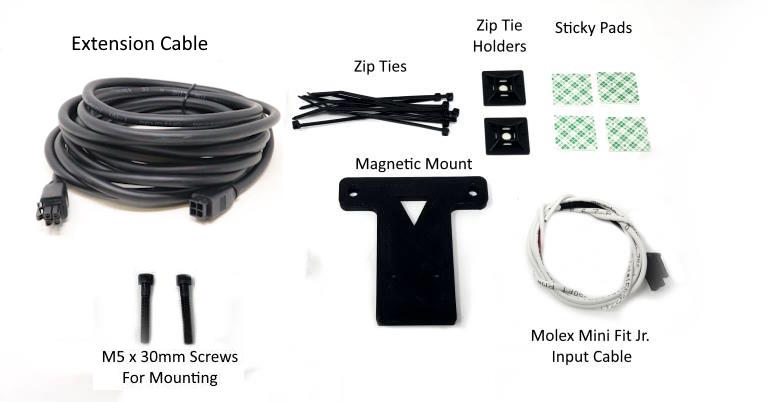
There will also be shorter M5 screws to be able to mount to the side as well. The newer lasers will have a black 4 pin molex extension cable that looks like this:
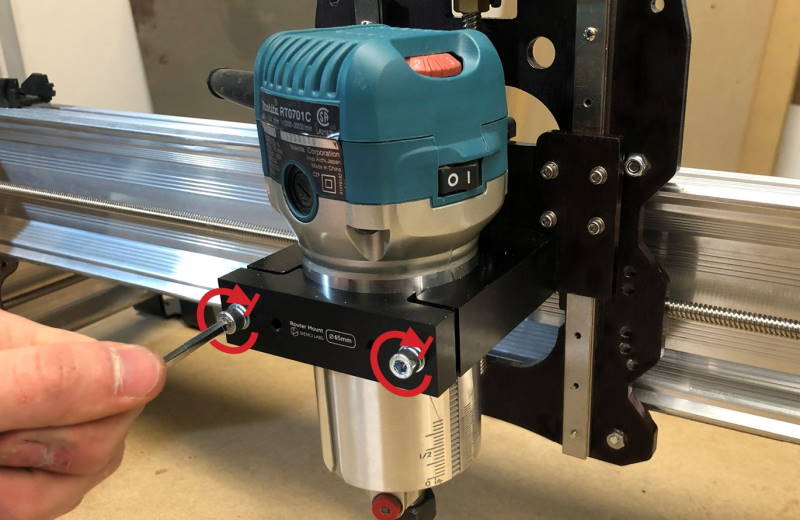
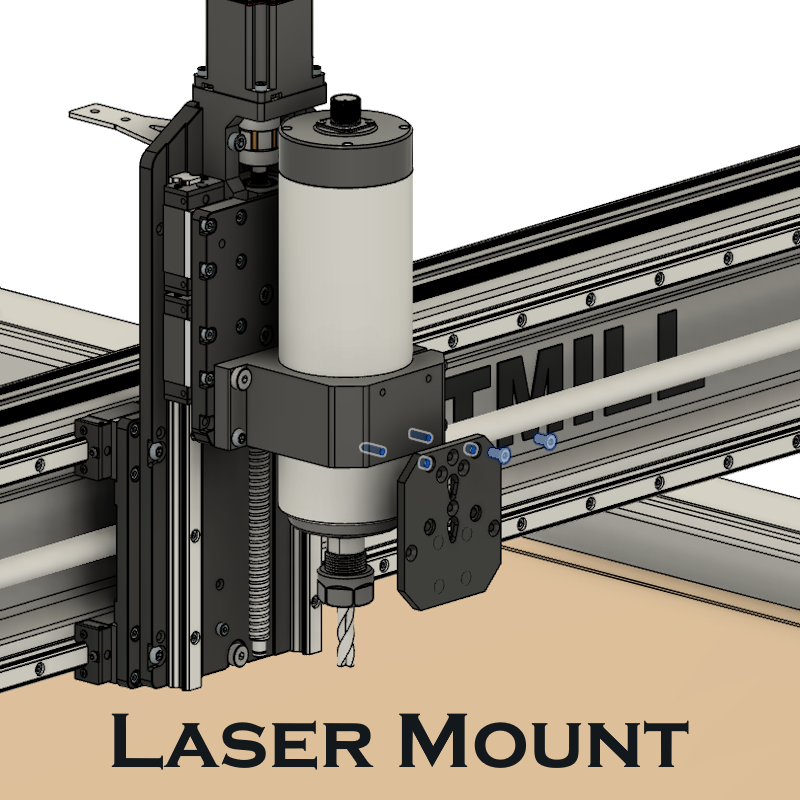
To mount to the front, you will remove the two bolts holding the router mount tight. Unscrew the two front bolts, put the mount on, and then use the new longer bolts provided to tighten back the router holder.
For the side mount, you can use the two tapped M5 holes on the left side of the router holder. Use the shorter M5 screws included in the kit to attach the mount to the side. They are located here:
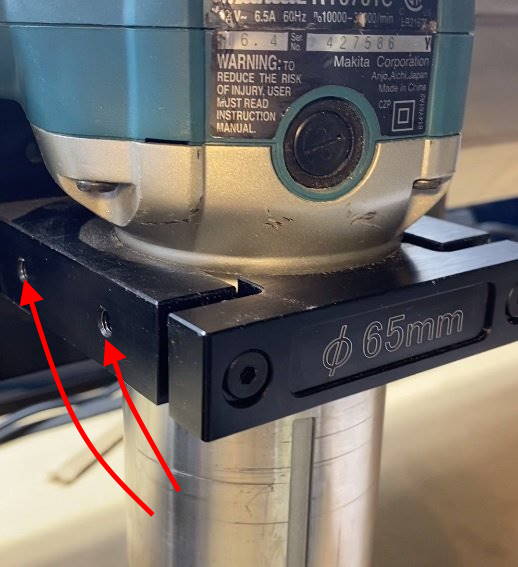
If you use the side mounting position, you will need to use the two inside screw holes on the mount.
44W and 64W Laser Plate
Install the metal mounting plate on either the front or the side of the router holder. Use the two screws included in the kit for this.
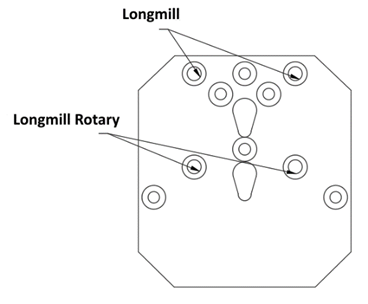
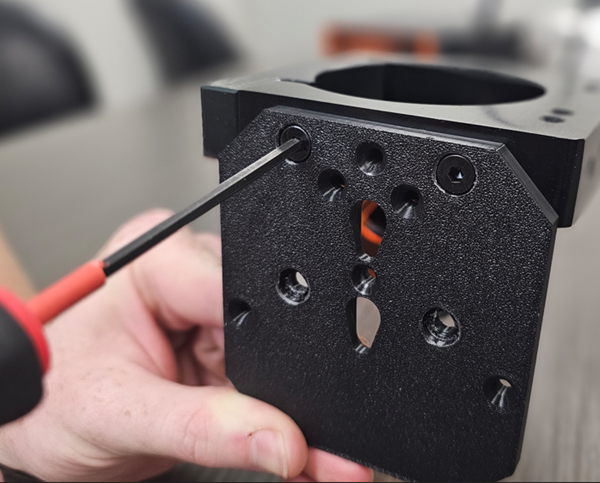
Laser attaches to mount on locking points. You can lock them in by tightening the screws on the back of the laser.
Altmill Mounting
The altmill will have four hole on the front of the spindle holder to mount the laser. You will use the BOTTOM of the four screws to mount the laser plate. You can leave the mount on the machine and then the laser will attach into the magnetic mount with locking keyholes.

Routing the Extension Cable
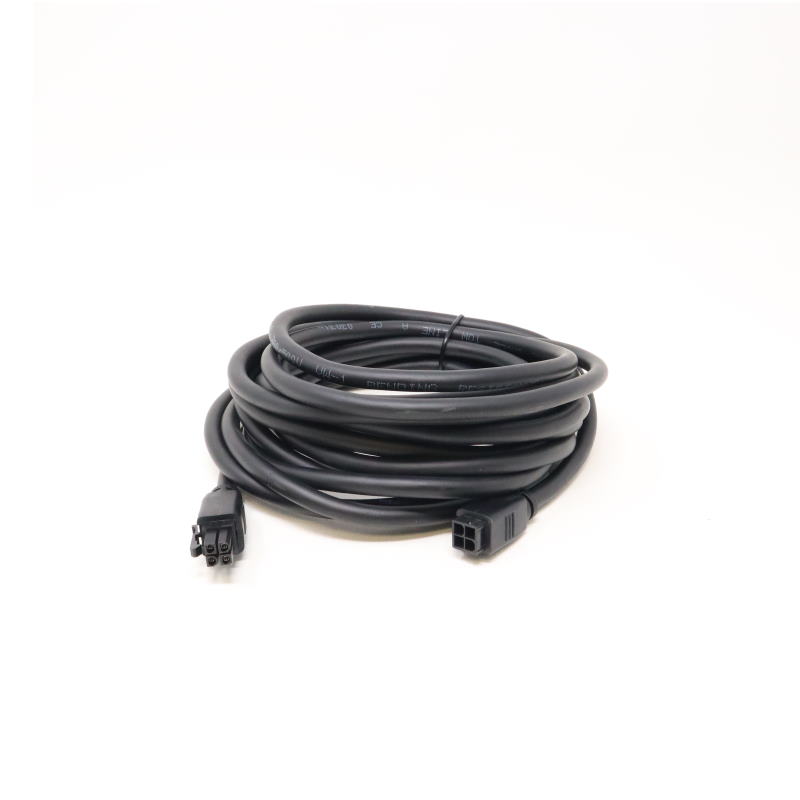
The kit will come with either a 10′ Molex extension cable for the smaller machines or a 15′ extension cable for the larger machine (48″ x 30″). You can either put it into the cable chains or you can zip tie it to the outside of the cable chains, either way. Just make sure you put the correct side for the laser before you put it in the cable chains otherwise you will need to do it twice.
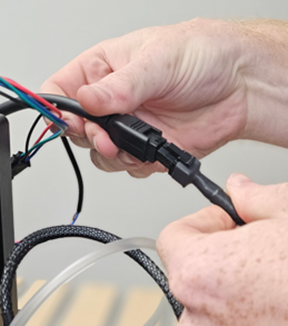
Attach the laser to the 4 pin extension cable you ran through the cable chains.
Electrical Connections
The Safety Interface board will have connections for the extension cable and the PWM input signal from the Longmill controller. Here is a description of the connections:
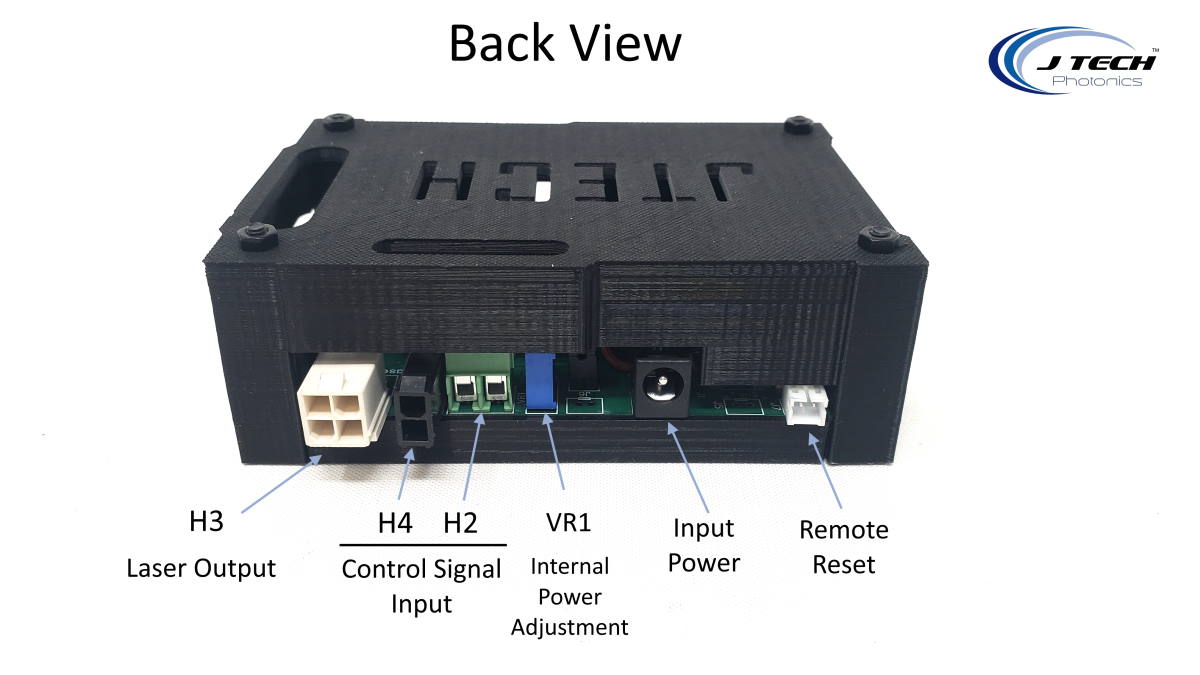
Connect the extension cable to the laser output port H3 and the input cable to the two pin molex port H4. The other side of the input cable goes to the Longmill or Altmill controller board.
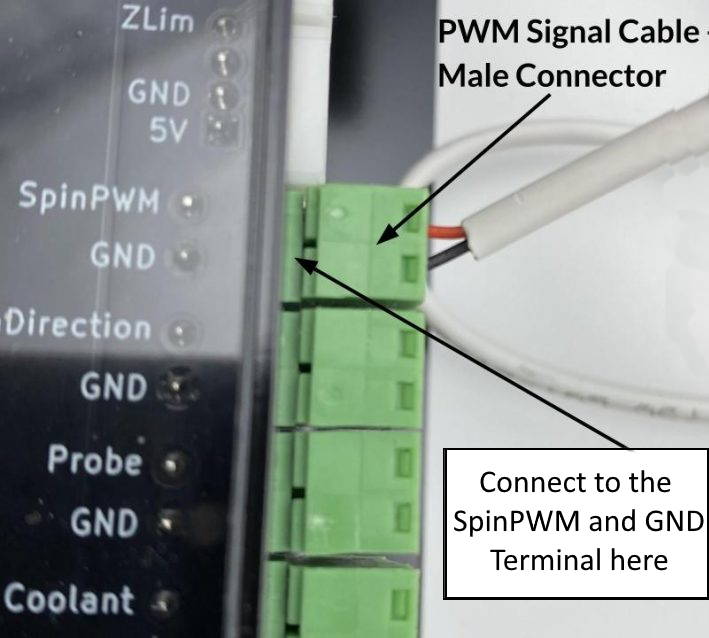
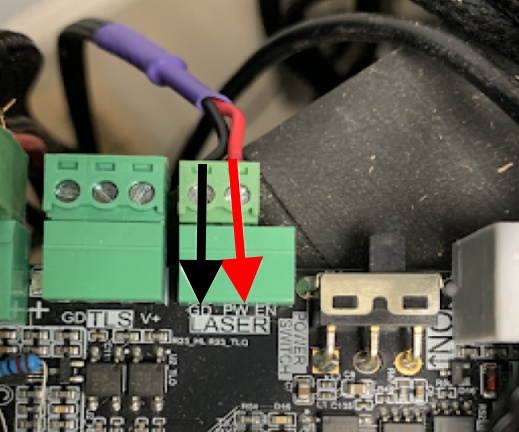
Connect to the SpinPWM port on the Longmill control board here:
Connect to the “Laser” port on the SLB or SLB-Ext board here:
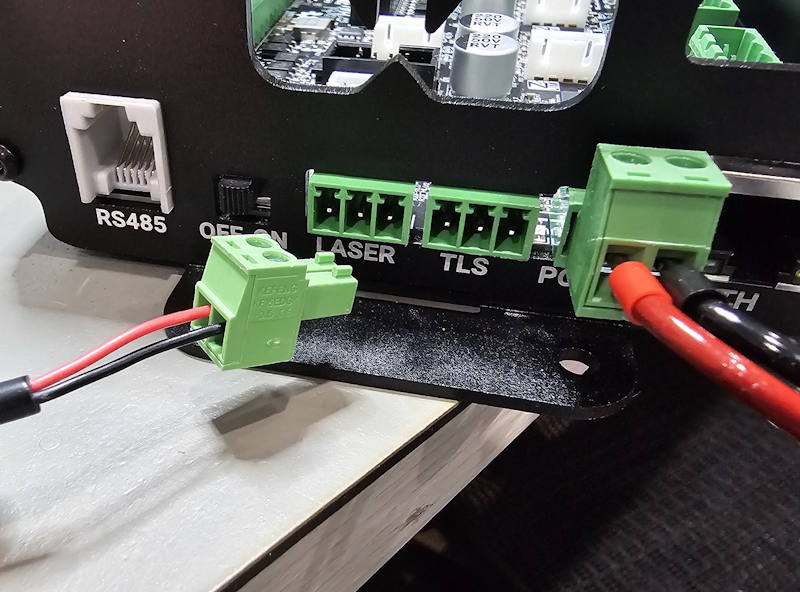
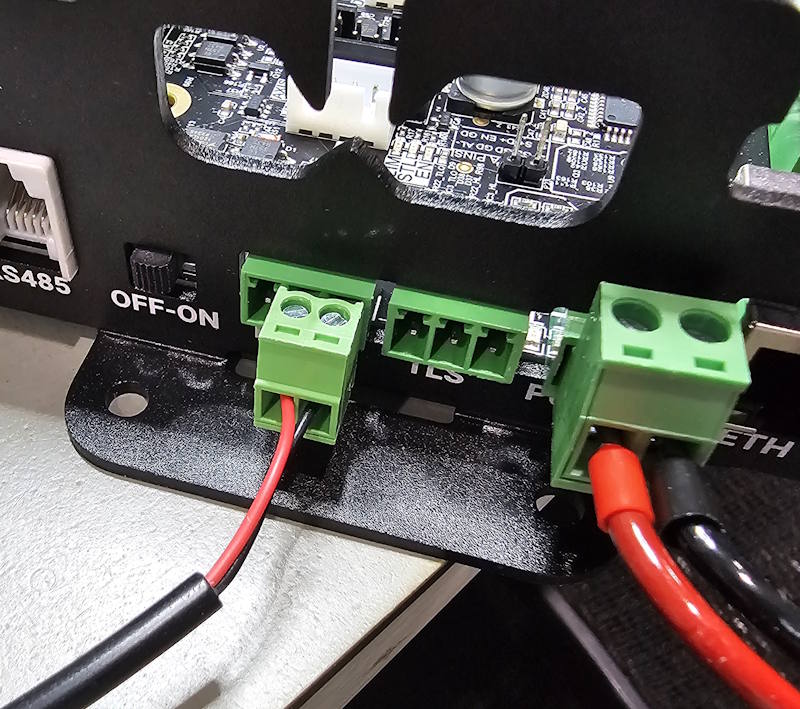
It should look like this when connected.
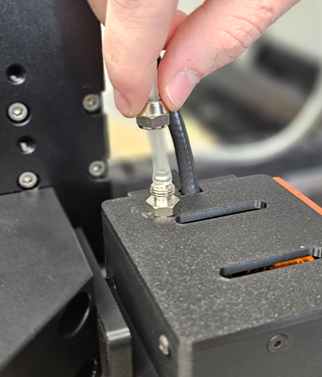
Air Assist
If you have a laser that has integrated air assist, then you ABSOLUTLY need to use it EVERY time you run the laser. You risk damaging your lens cover if you don’t. Here is showing on the 44W laser how to hook it up.
There are many air pumps available for adding air assist to the J Tech 7W, 14W, 24W, and 44W lasers. If you plan on just engraving, then a smaller pump is adequate. If you want to do more cutting, then the air pump should be larger. In our findings the 55W pump is the best for cutting and engraving. If you want to just engrave, then the lower power pumps are adequate down to 20W.
Aquarium Pump for Cutting and Engraving (Choose the 55W Pump)

(output adapter for recommended pump is HERE – M10 x 1mm x 6mm)
The tubing for the air assist is 3/16″ outside diameter. It is the standard “airline tubing” or “aquarium pump tubing”. Note, you may need to get an adapter for the output of your pump to fit the air assist tubing.
If you use an air compressor, use between 2 PSI and 15 PSI for the regulated air pressure. Do not use too much air pressure.
Software to Run Your Laser
We recommend using Lightburn to run your new J Tech laser. It is an all in one software that will be able to design and control the machine all in one. It produces excellent results for vector engraving, photo engraving, and cutting. To get your lightburn software license and free 30 day trial, click on the logo below:

Once you install lightburn you will need to set up your device. Set it up following the video below.
And there it is! There are many projects you can complete with your new laser. To see some application examples, look here at our photo gallery to get ideas!