

The PrintRBot is a cool printer that you can either assemble yourself or get an assembled kit. The machine uses the PrintRBoard which has been a part of the Rep Rap project for some time. The details are located here on the Rep Rap wiki: http://reprap.org/wiki/Printrboard
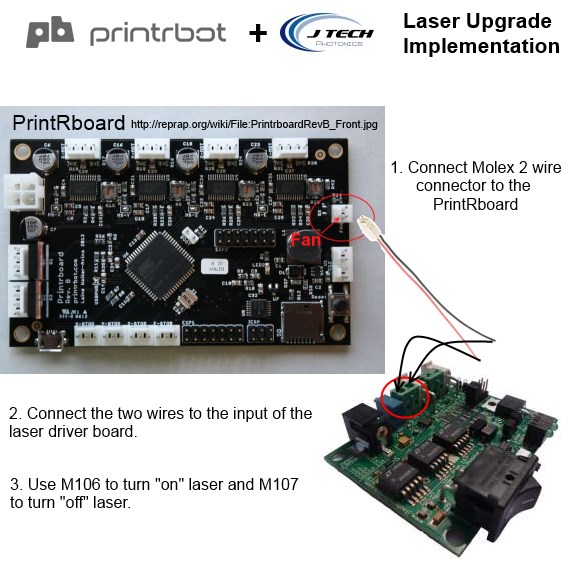
Just like the other upgrade implementations, the easiest way to upgrade the PrintRBot is to use the fan output from the control board. This way, the firmware is already done and you are ready to go. Simply attach new molex connector with wires (either found here in the shop or make your own) to the laser driver input. Just make sure to connect the wires to the correct side on the laser driver. Or to be super cool, put a SPDT switch on the positive side of the fan output and connect it to both the fan and the laser driver. Connect the ground and you are good to go. Easily switch between 3D printing and the laser with a flick of the switch!
Electrical connection
Here is the graphical version of the instructions:
Mechanical:
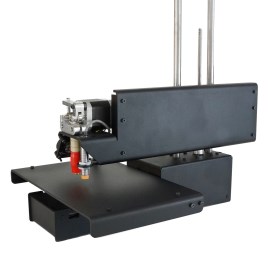
As for mounting, we put ours on the side of the printer towards the front just right of the extruder. The dimensions and solid models are located in the documents section of the website so you can check it out before you buy. We suggest drilling the holes with the printout of the mount (or the lase mount itself) to make sure your holes are correct. Just hold it up to the side and mark it with a marker through the holes. Drill and then install. This shows the fan mount as well attached to the top of the laser. This allows the metal frame to help with heat sinking and have a fan at the same time.

Software:
You shouldn’t need to change anything with the marlin firmware that ships on the motherboard of the printer. Use the following commands in our inkscape pluggin (or whatever G Code SW you want):
- M106 Sxxx – Turn the laser ON at power XXX, where XXX is a number between 0 and 255.
- M106 S0 – Turn the laser OFF
- M107 – Another way to turn the laser OFF
Examples:
M106 S127 (Turns on the laser at a power of 50%)
M106 S255 (Turns on the laser at a power of 100%)
M106 S25 (Turns on the laser at a power of 10%)
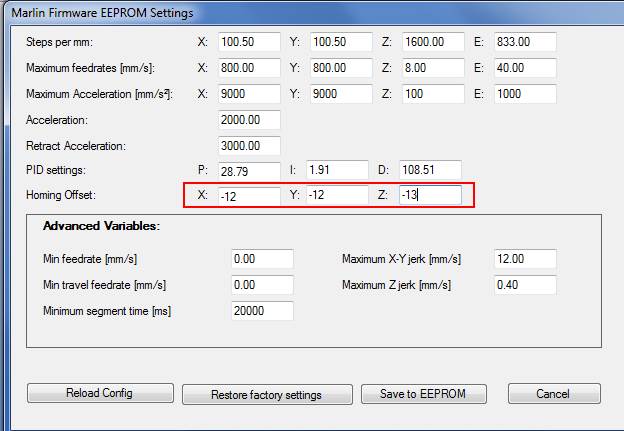
For running your programs, we generally like using Repetier Host software for our printer/laser control. It has a nifty preview window and good manual control. You can set up the offset for the laser in the EE Prom settings and move the 0,0 point by creating an offset as well. Here is where to put your offset:
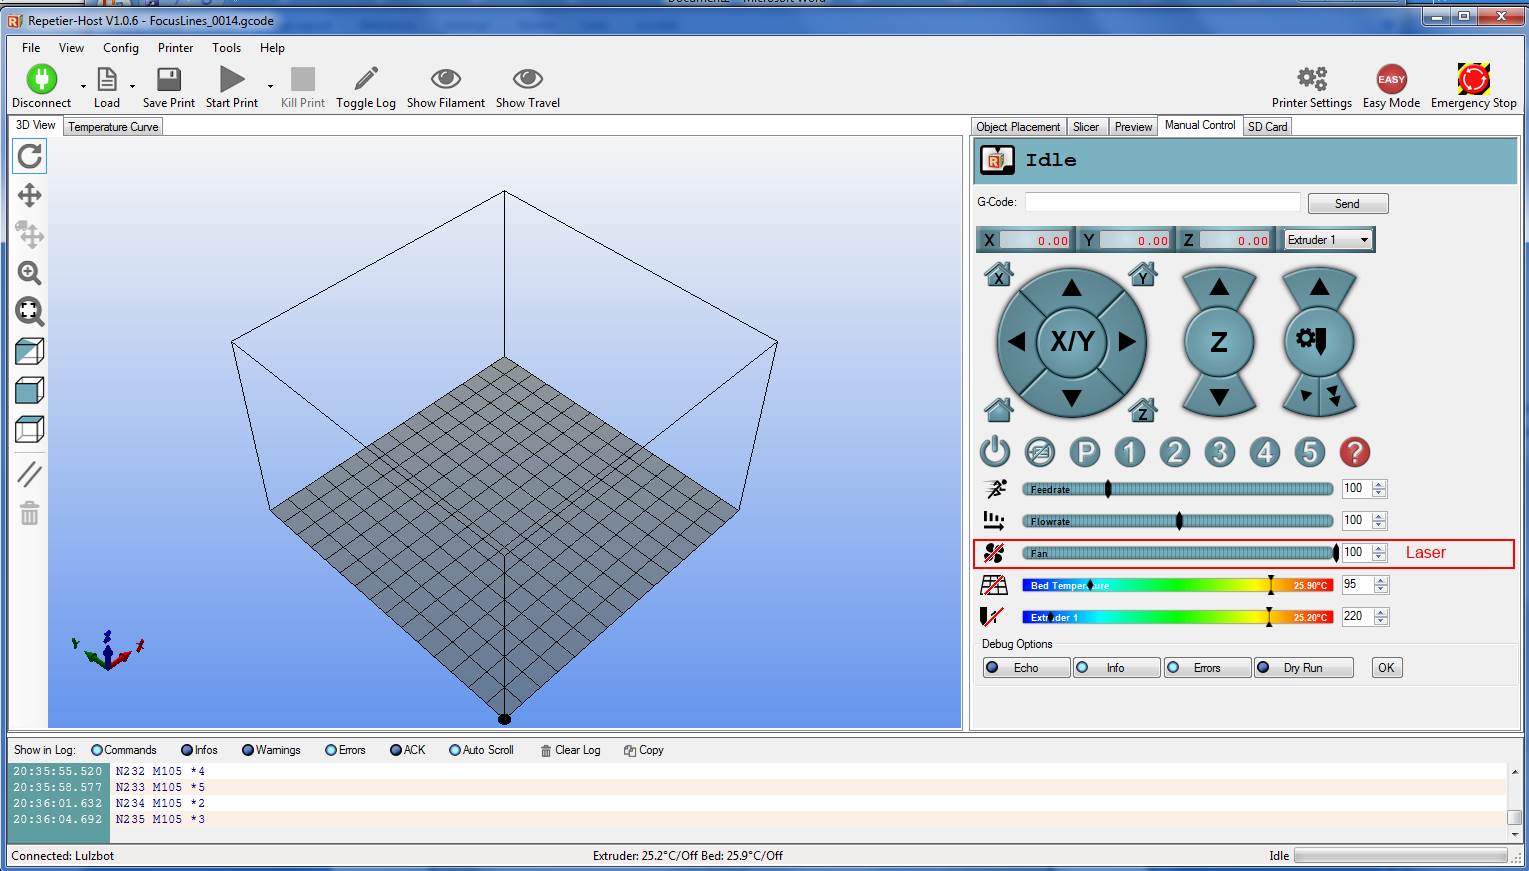
And then you can use the manual tab to control the laser to turn it down for focusing. Use the fan slider to adjust the power and turn it on by pressing the fan.
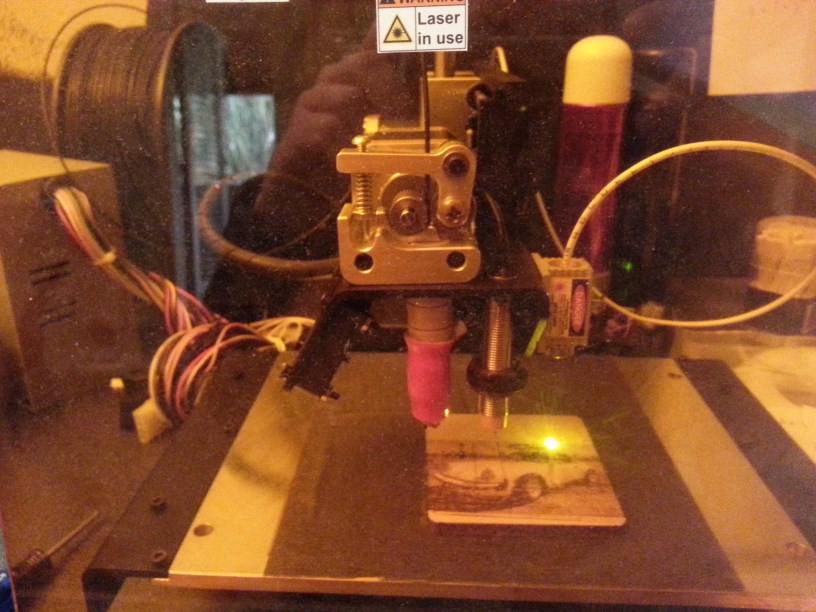
Check out our upgraded Simple engraving a picture on wood:


Buy your laser upgrade kit now!
Remember Safety First!

We sell laser shielding to block laser radiation and reflections!
Laser Goggles are also a must!
Disclaimer
The laser used in this project is very powerful and all safety precautions must be taken. Use proper safety eyewear to prevent injury to eyes. This is a project and J Tech Photonics, Inc. is not responsible or liable for any and all damage or injury caused to people or property. The use of these instructions to make a laser cutter is under your own discretion and all safety precautions should be followed. J Tech Photonics, Inc. is not affiliated in any way with Printrbot and they may change hardware and software at any time making these instructions invalid. (edit)
Hi,
I just purchased a printrbot play and would like to upgrade it with your laser kit.
1. is it possible as I found instructions only for printrbot play / simple
2. Can this be used to engrave pcb for prototyping ?
3. Can you ship to Germany and what will be the shipping costs ?
I will really appriciate if you could consult me on these two questions
I am eager to buy the kit.
kind regards,
Sachin Kumar
The PrintRbot Play uses the same electronics as the simple, so you can upgrade it just the same. Use the fan output and you will also have PWM control. We recommend using Repetier Host as your control software, but Cura will work as well. For your questions:
1. Use the same instructions as the simple. Use the fan output connector for the laser. You can either splice it, replace it, or put a switch between the two.
2. Yes, you can use this to engrave PCB prototypes using the “paint removal” method. It is in a blog post here: https://jtechphotonics.com/?p=2536
3. Yes, we ship everywhere in the world. In your cart, you can check shipping costs by clicking “calculate shipping”. There will be options available for USPS and UPS courier service. For more information on shipping go to our shipping FAQ here: https://jtechphotonics.com/?page_id=599
Hello, I was wondering if anyone had any luck upgrading a 2013 PrintRBot Simple. I see that you show a 2014, but I know the 2013 had more issues. Any info would be great.
Considering using your products to upgrade my Printrbot adding laser cutting features.
I use Simplfy3D software and do like it a lot.
Will I be able to use the Simply3D software?
Thank you
Alan