

We provide numerous instructions on upgrading many machines. In this, there are a lot of different software programs used to engrave. We have tutorials on several of these programs for different parts of the tool flow. We will cover the basics here and have pointers to the specific tutorials as well.
What are the Types of Engraving I can do?
Laser engraving is the process of taking an image or drawing and transferring it into a material via the use of a laser. There are two types of laser engraving:
- Vector Engraving – This engraving method will take the laser and follow a “path” that will outline the drawing.
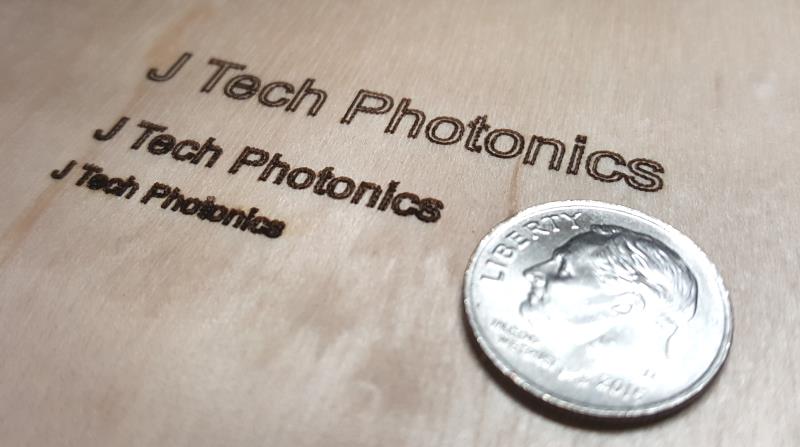
Example vector engraving of 8, 12, and 18 point Arial Font
2. Rastor Engraving – This engraving method will take the laser back and forth like a typewriter turning the laser on when there is a dark part of the image and off when it is white. This is good for images, logos, and anything you want to be “filled”.
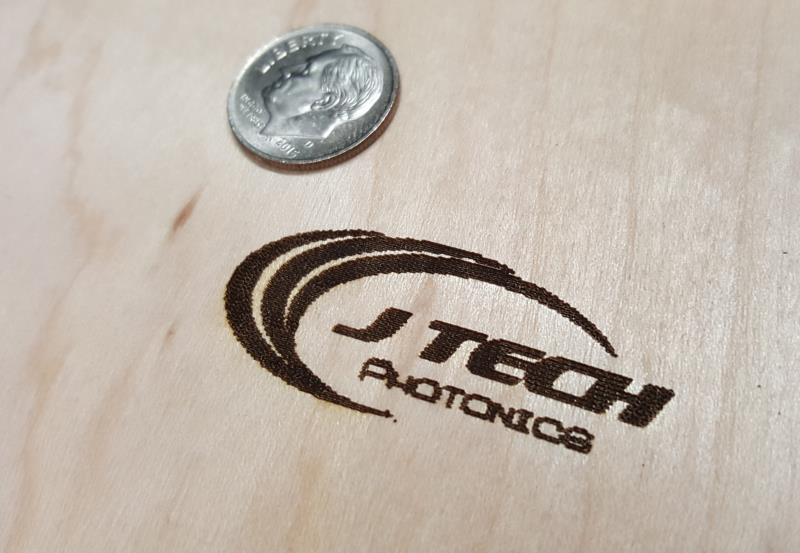
Example of a rastor engraving of a logo
How do I get from my Photo or Drawing to Laser Engraving?
There are a lot of ways to do this, depending on which machine you have. If you have a GRBL machine like the shapeoko3 or the X Carve, then we recommend using Lightburn. It is an all in one software package that can do design work and run the machine in one step.

To set up lightburn software on the Shapeoko3 and the X Carve, follow the instructions here:
For other machines, you will need to generate your g code and then run it on your machine.
The basic Tool flow for laser engraving is:
- Draw or create an image.
- Convert to G Code.
- Run the G Code.

Here are the details for each of these separate sections:
1. Drawing or Creating an Image
If you are doing a vector based (outline) engraving, then there are a lot of different programs you can use. Adobe Illustrator is a very popular tool for making Vector based drawings. It is a bit expensive for us, so we use the free tool of Inkscape. You can download inkscape here: www.inkscape.org
If you are doing photos or images (rastor filled) then you will need to make sure your photo is the proper size and resolution for engraving. There are plenty of image editing software programs out there. We like the free open source editor called “paint dot net”. You can download it here: www.getpaint.net/download.html
2. Convert to G Code
G Code is the “language” that your machine uses to know where to move and turn on and off the laser. Once you have your drawing or image from step 1 you now need to convert it to G Code to run on the machine. We have tutorials on how to do this for both Inkscape (vector) and Laser Etch (rastor). Click on the links below to follow the tutorials:
3. Running G Code on your machine
There are a lot of different machines out there and each one has it’s own control software to run the machine. The good news is they all accept G Code files. If you have a 3D printer you will be running software like Repetier Host or CURA to run your files.
If you have a Mach3 machine, you obviously will use Mach3 to control your machine…
For GRBL machines like the X Carve and Shapeoko 3 there are several “sender” programs. We like using Universal G Code Sender as the basic way to control your laser upgraded machine. We have a tutorial on how to use it here:
Universal G Code Sender Tutorial
There it is! While the software toolflow might be a bit confusing at first, it becomes pretty clear once you start using it. If you have difficulty in any of these areas please feel free to contact us at [email protected] with questions.