

We have been making upgrade kits for the Shapeoko line of machines since the first Shapeoko1 on kickstarter years ago. Carbide has now come out with the next version of the beloved Shapeoko machines, the Shapeoko4 and the Shapeoko PRO. Both of these machines have similar components which makes the kits work on both machines. The biggest difference between the PRO and the 4 version is the linear rails on the PRO version. Everything else is basically the same, so we made a kit to fit both. Now let’s get started!
Buy your kit now!

Video Instructions
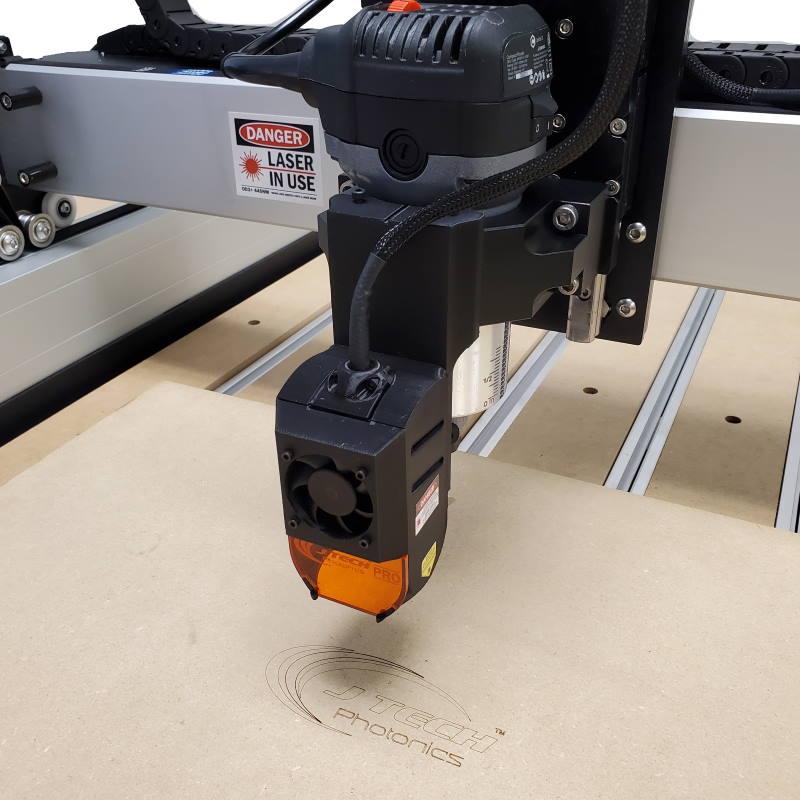
We have made a video showing exactly how to hook up the laser to the Shapeoko4 and Shapeoko PRO machines. In this video the machine is the XXL size, but it will be similar for the smaller sizes. The kit fits on all of the machines including the XXL. Check out the video to see how to install the laser. It is quick and easy!
We recommend using this video for instructions on how to install your kit. There are important details you will need to follow not to damage your machine.
Mechanical
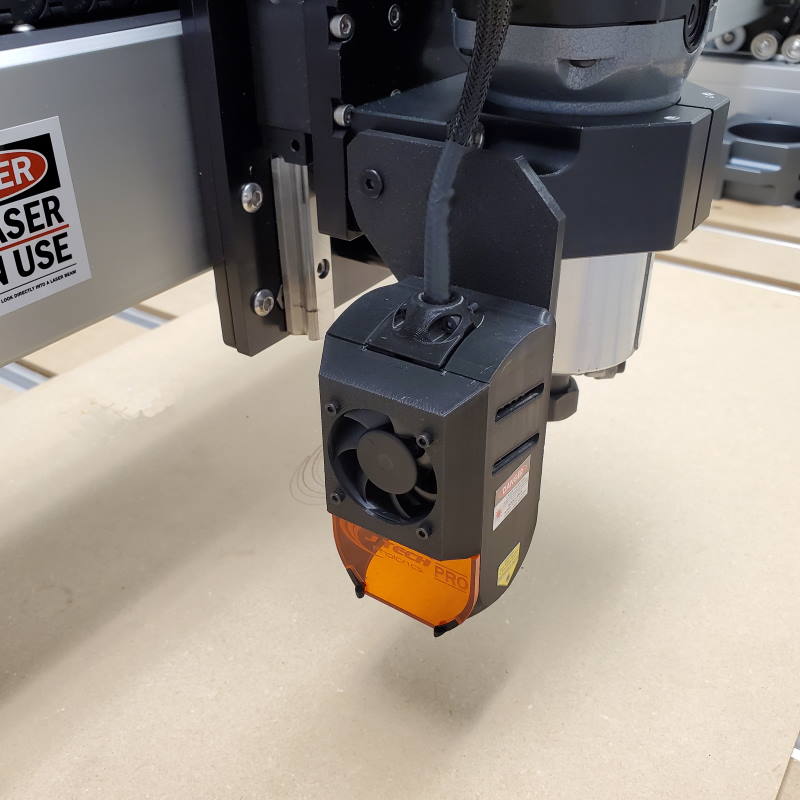
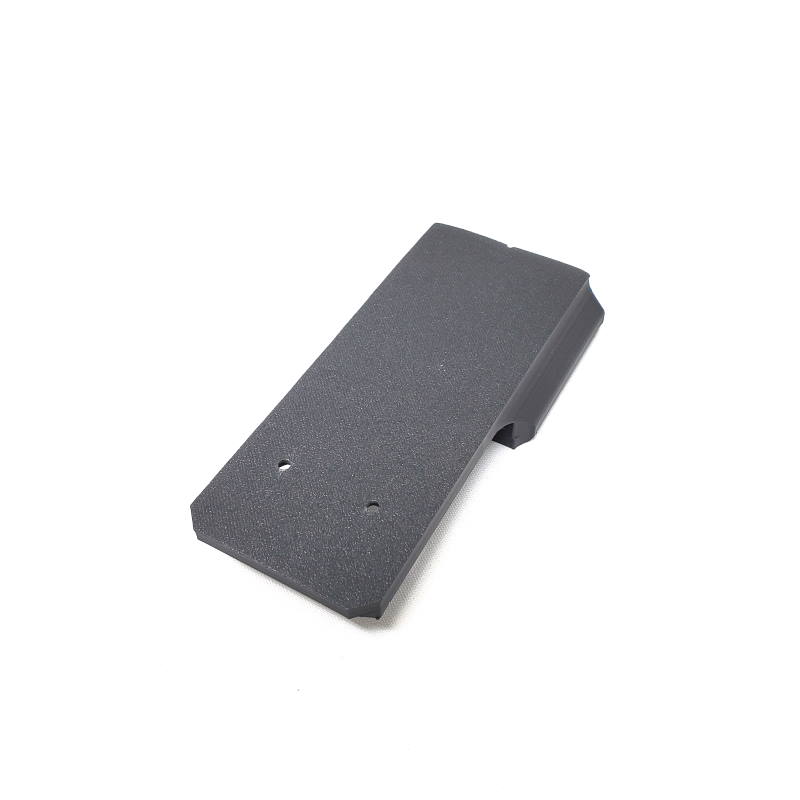
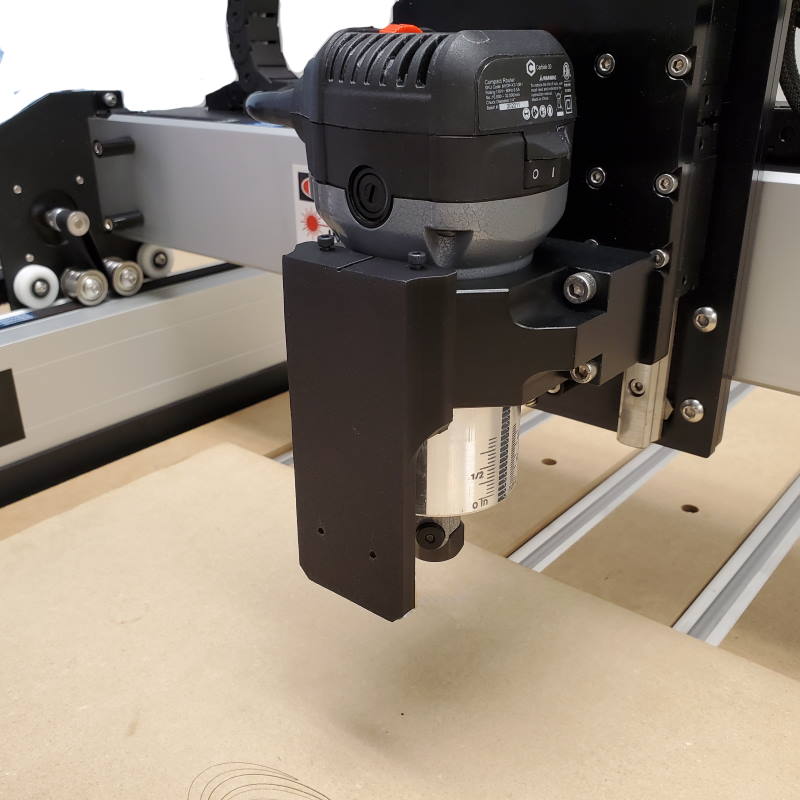
The Shapeoko4 and Shapeoko PRO laser upgrade kit includes a 3D printed mechanical magnet mount that attaches to the router/spindle holder on the Z gantry. There is a front mount that attaches to the front of the router holder and there is a side mount that attaches to the side M5 screw holes. The side mount is great because it can be left on all of the time and not interfere with the dust boot (if you have one).
Side Dust Boot Magnetic Mount Option
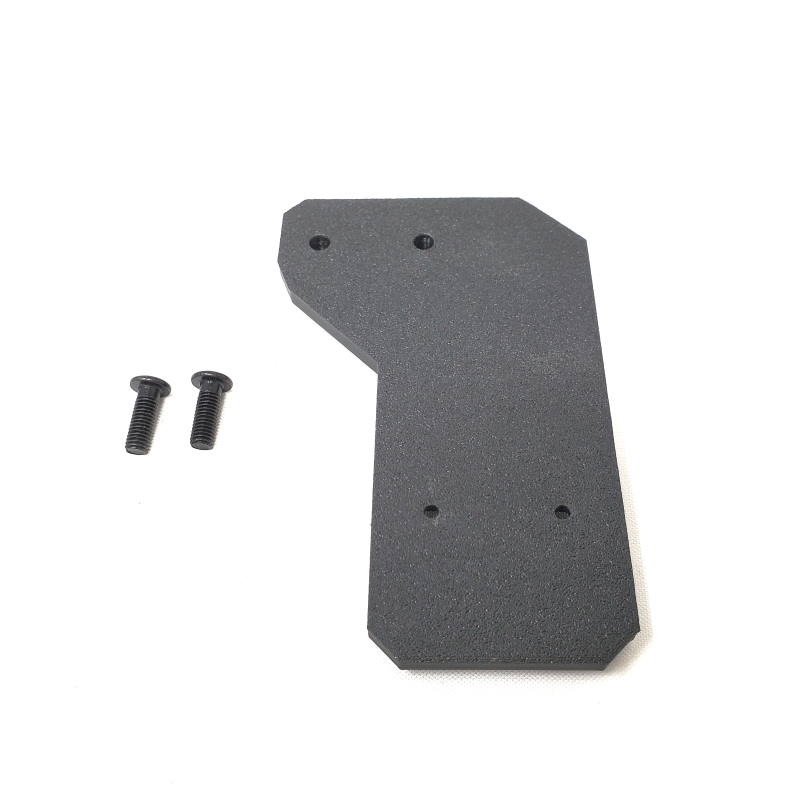
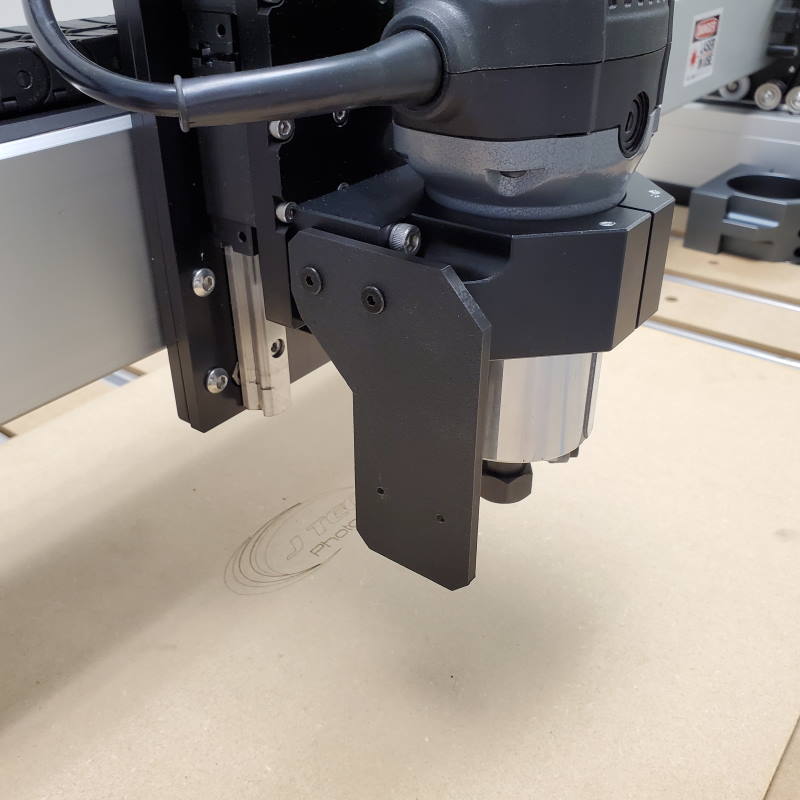
Front Magnetic Mount Option
Electrical
The Kit includes extension cables that will fit all of the different versions of the machine, including the XXL. The cables will run through the cable chains and back to the laser driver that sits by the Carbide Board electrical box on the side of the machine.
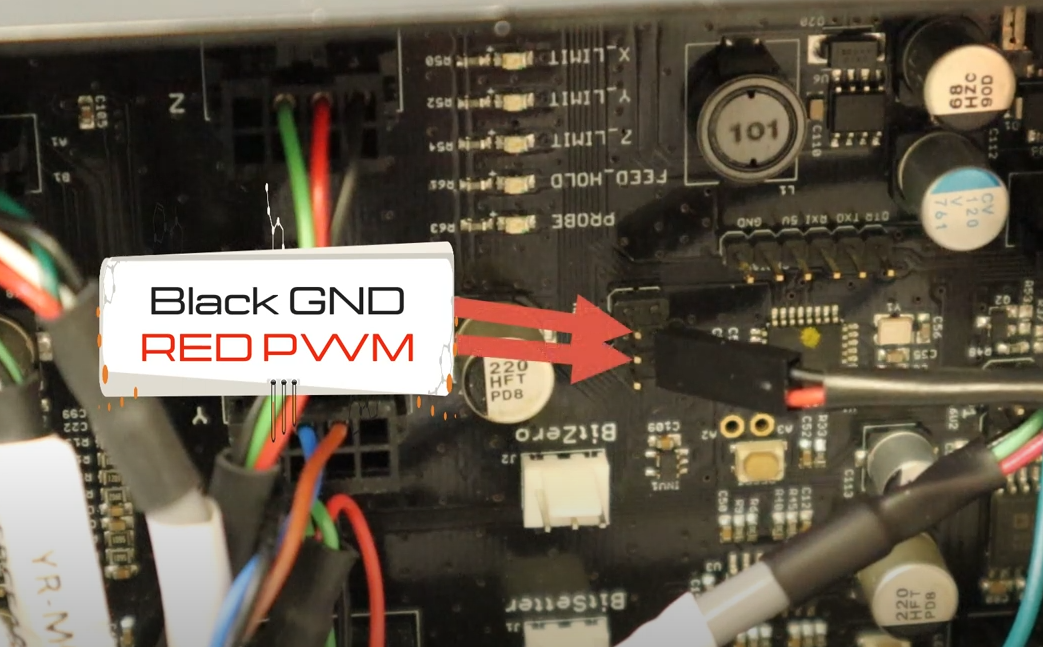
The laser driver will connect to the Carbide board via a 3′ cable that attaches either to the PWM connection using a “press fit” tool and connector, or on the ICSP header on the board. The video explains both of these connections.
The back far left molex connection is for the laser cable. The middle molex is for the input cable from the Carbide Board.

There are two places to put the input cable on the Carbide board. First is the PWM and GND connection. You will need to use the press fit tool to use this connection.
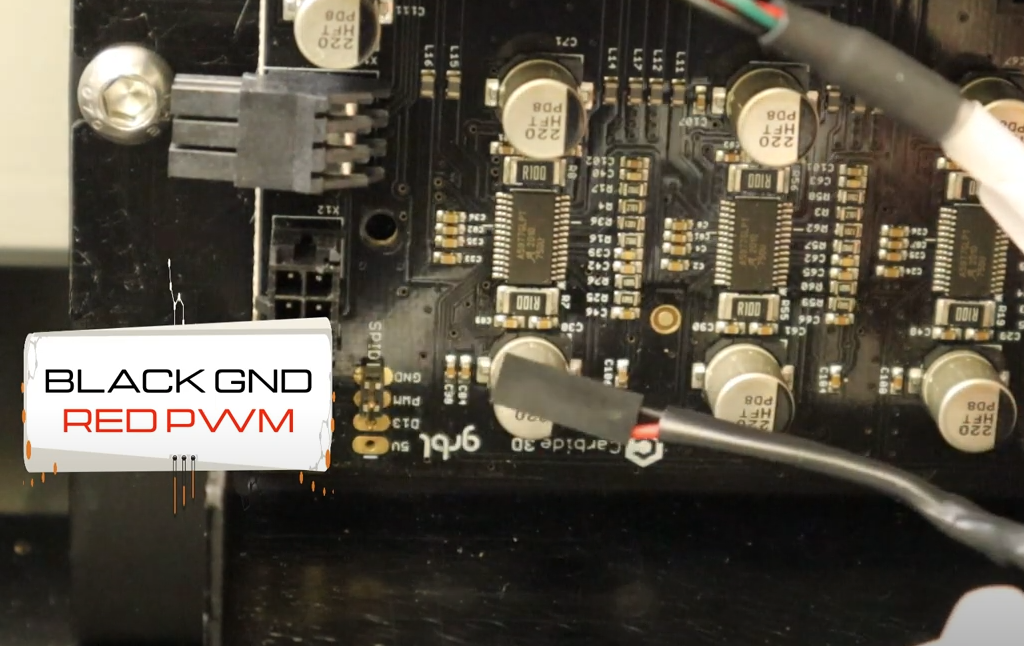
The second place will be the ICSP header on the top left two pins. Top left is Ground (black) and middle left is PWM (red).
Running Your Laser
To run your laser on your Shapeoko4 or PRO, we recommend using Lightburn. Lightburn is a very powerful tool that allows you to control all of the aspects of your laser to do engravings, cutting, and photos all in one location. It also will run your machine as well inside the program. If you choose not to use Lightburn, then you CAN NOT use Carbide motion to run the toolpath files. You will need to use another sender program like Universal G Code Sender. If you want to engrave photos using the Vectric laser module, then you will need to use a sender program that works with photos like the Vectric V Transfer program. In the end, we think Lightburn is the best program for creating your files and running them.
Here is the video on how to set up your Lightburn software to run your laser:
Purchase your Upgrade Kit Now!
If you haven’t already, you can get the all in one bundle for the Shapeoko4 and PRO here:

The laser used in this project is very powerful and all safety precautions must be taken. Use proper safety eyewear to prevent injury to eyes. This is a project and J Tech Photonics, Inc. is not responsible or liable for any and all damage or injury caused to people or property. The use of these instructions to make a laser cutter is under your own discretion and all safety precautions should be followed. J Tech Photonics, Inc. is not affiliated in any way with ShapeOko or Carbide 3D and they may change hardware and software at any time making these instructions invalid.