RUMBA Board Laser Upgrade
There are plenty of options for upgrading your reprap printer and it depends on which board you get. Most are easily upgraded by swapping out the fan connector to use to control the laser. This means you don’t have to change anything to the printer extruder so you can have the ability to switch between the two easily.
Details of this board can be found at:
Hooking the Laser Up
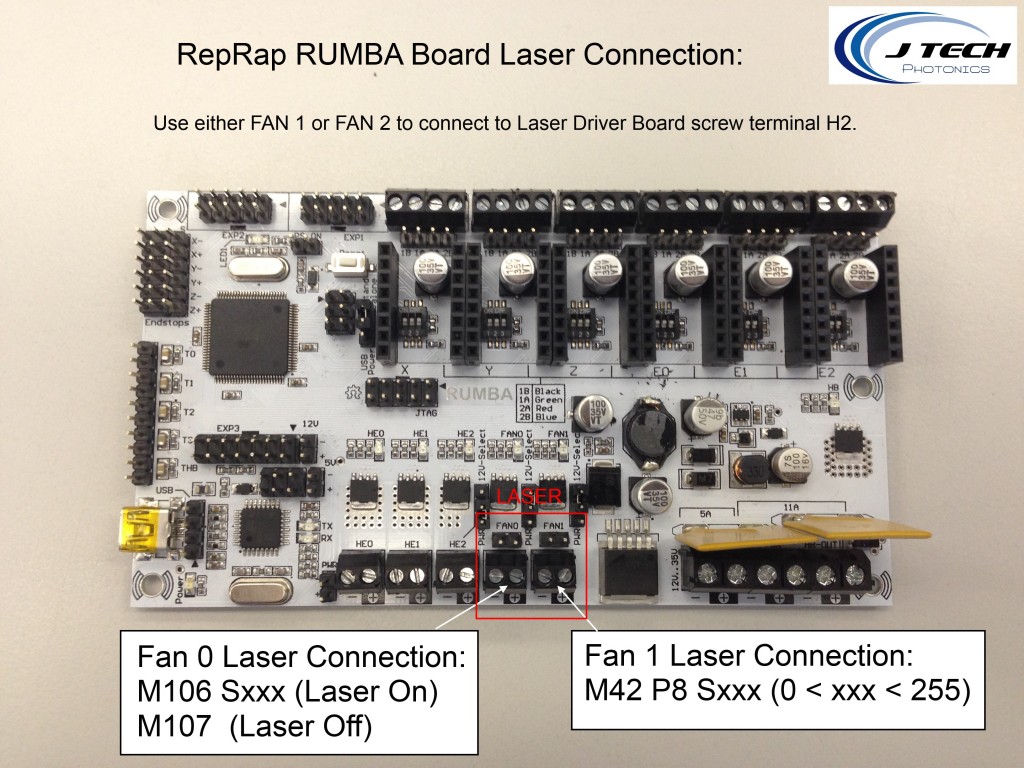
So it is pretty easy to do this upgrade because the terminal that is used already has nice screw terminals to connect wires. You have a choice between either using Fan 0 or Fan 1 to control the laser. Both of these have easy to use screw terminals so hooking two wires up should be a cinch! Simply connect the “+” wire from the Fan terminal to the “+” input of H2 on the laser driver board. Then, connect the “-” wire from terminal Fan terminal to the “-” input of H2 on the laser driver board. Make sure there is a jumper on the PWR select jumper to make it either 12V or input power. You are all ready to go!
Software
The software is dependent on which fan output you choose. The commands to turn on and off the laser are:
Using PWM to control the laser – FAN 0 Option:
You can have power control as well with the RUMBA board. Simply use “M106 Sxxx” command to turn on the laser where “xxx” is a number between 0 and 255. 255 is full power and 0 is off.
- M106 S255 = Turns the laser on at full power
- M106 S0 = Turns the laser off
- M106 S127 = Turns the laser on at 50% power
- M107 = Turns the laser off as well
Using PWM to control the laser – FAN 1 Option:
Simply use “M42 P8 Sxxx” command to turn on the laser where “xxx” is a number between 0 and 255. 255 is full power and 0 is off.
- M42 P8 S255 = Turns the laser on at full power
- M42 P8 S0 = Turns the laser off
- M42 P8 S127 = Turns the laser on at 50% power
Drawing Software with Inkscape
You can use Inkscape to do your drawings and then use the LASERENGRAVER plugging to convert it to G Code. Download the laserengraver pluggin that converts using the M106 and M107 commands. You can find them here on this page on the bottom: https://jtechphotonics.com/?page_id=602
Then simply run the file in whatever program your printer uses! Voila!
Click Here to Buy your laser upgrade kit now!
Remember Safety First!
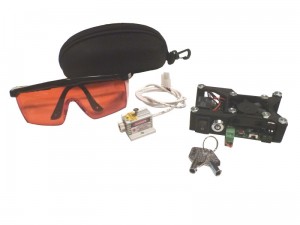
We sell laser shielding to block laser radiation and reflections!




If i use FAN 1 Option to laser
what the options in Inkscape Laser Tool Plug-in to power on and off
For 3d printing i use only Fan0
and i need use Fan1 for Laser Cuter
thanks
Wonderful work!
Just wondering what the P8 is for?
(M42 P8 Sxxx)
Thank you.