
e have been doing upgrade kits for GRBL machines like the X Carve and Shapeoko 2 and Shapeoko 3 machines for years now. Besides these machines, there are tons more that use GRBL for the base firmware to run the machine. One of the coolest things you can do with these machines is picture engraving. In the past it has been somewhat of a chore to get the machine updated with our custom version of GRBL that can run the laser, but now we teamed up with Sonny Jeon to get the laser firmware in the main branch of GRBL! We are super happy to be a sponsor of GRBL and to promote this great open source project. The new release with the laser code in it has been tested for over 6 months and has some new and exciting features that we will discuss here.
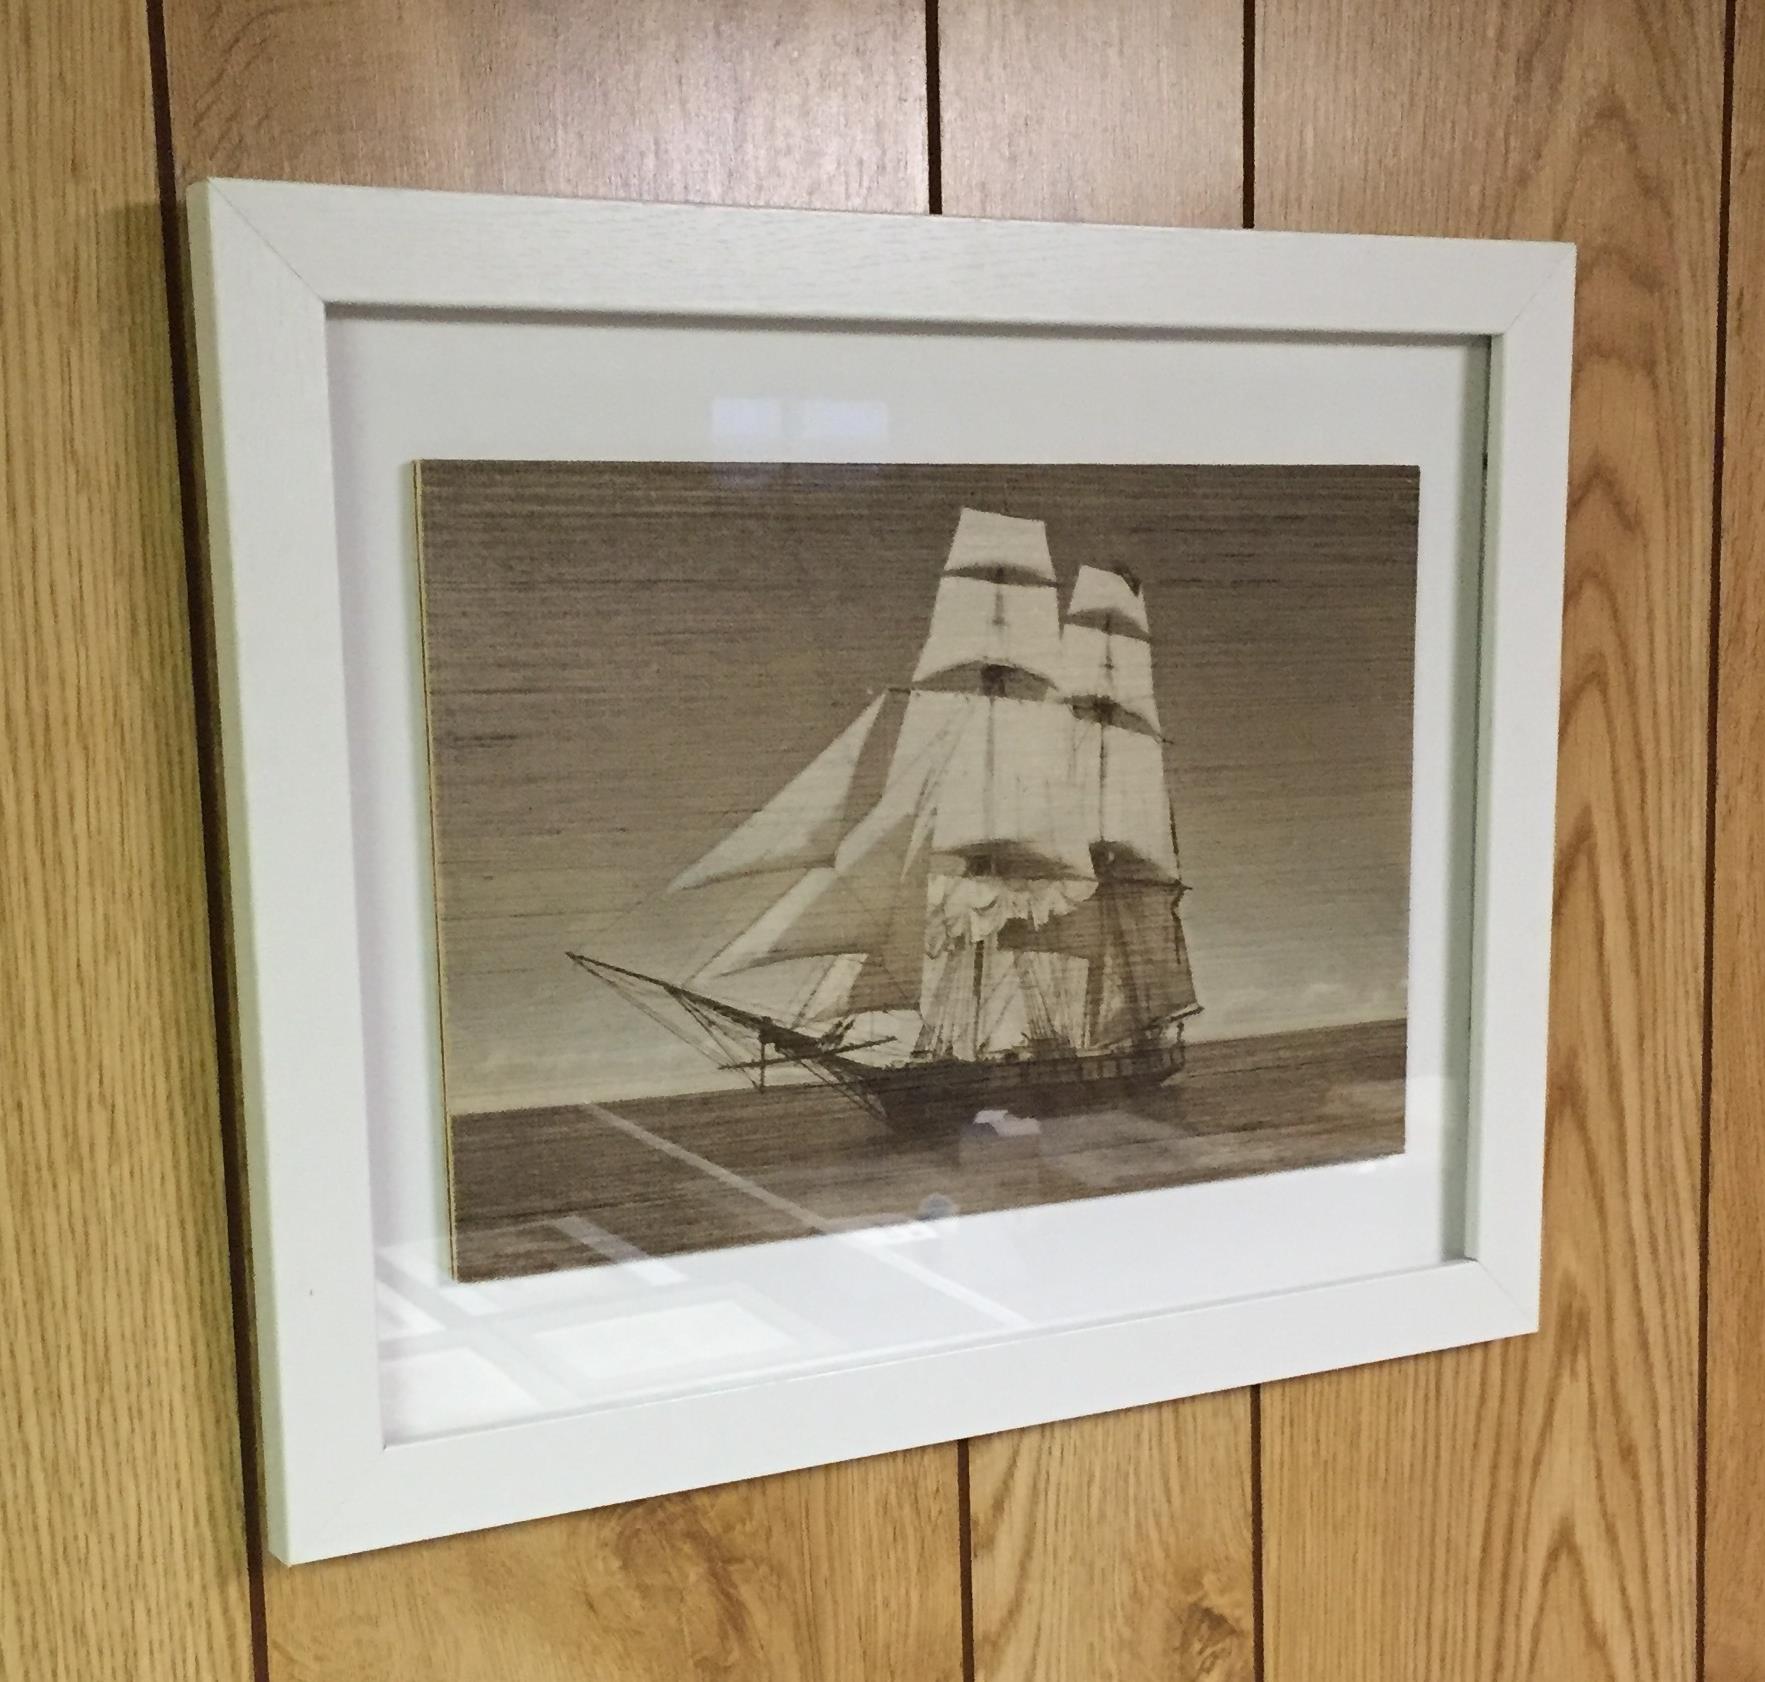
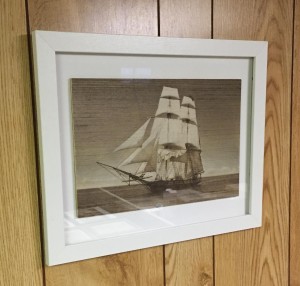
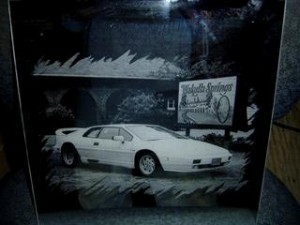
This post will take you through the entire process of getting your machine upgraded to do picture engraving and show examples of how to create beautiful laser engraved pictures!
Do I even need to upgrade my machine?
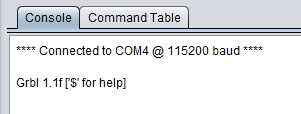
Good question. Since we now have our laser firmware merged into the main branch, many machine builders are either deciding to put the new version pre-loaded on the machine or already are shipping with the new 1.1 laser GRBL version. Shapeoko 3 machines will soon ship already with this version installed, so you can just skip to the example section of this post. The easy way to check the version on start up in the console window. There are tons of different sender programs, but most of them will show the version on startup. Here is an example using Universal G Code Sender:
 In this case, we already have the laser version installed. If your version is lower than 1.1, then you need to upgrade. We will now go over how to do this.
Which version do I need?
There are two different versions of GRBL for lasers right now. Our old 0.9g J Tech version and the new 1.1f version on the main GRBL website. We don’t recommend using the J Tech 0.9g version anymore, because it has been merged into the new 1.1f version on the main branch and has more functionality. So, if you don’t already have it on your machine, download the 1.1f version because it is the newest, best, and has the most features to use with your laser. If you want to also use Easel, then follow the instructions on downloading the newest drivers to work with it.
Now let’s now go through the process.
1. Download the Firmware
Recommended GRBL Versions to download:
- Download the new version: 1.1f ( Main Branch Merge – NEW)
If you want to check and see if there is an even newer version, then go to the main GRBL page here in the release section.
Now that you have your firmware downloaded and have extracted the .hex file, we will walk through the rest of the process.
2. Prepare to Upgrade
Now that you have your firmware ready, let get your settings on your machine saved. If you don’t do this step we will show you how to recover from it later if you have problems, but it is easier to have a copy of your working machine settings before you upgrade. If you send the “$$” command, you will get a list of all of your settings for your machine. If you are using Universal G Code Sender, then you can see your settings by doing the example picture below. You can either get a screen grab, cut and copy to a text file, or write them down on paper for later.
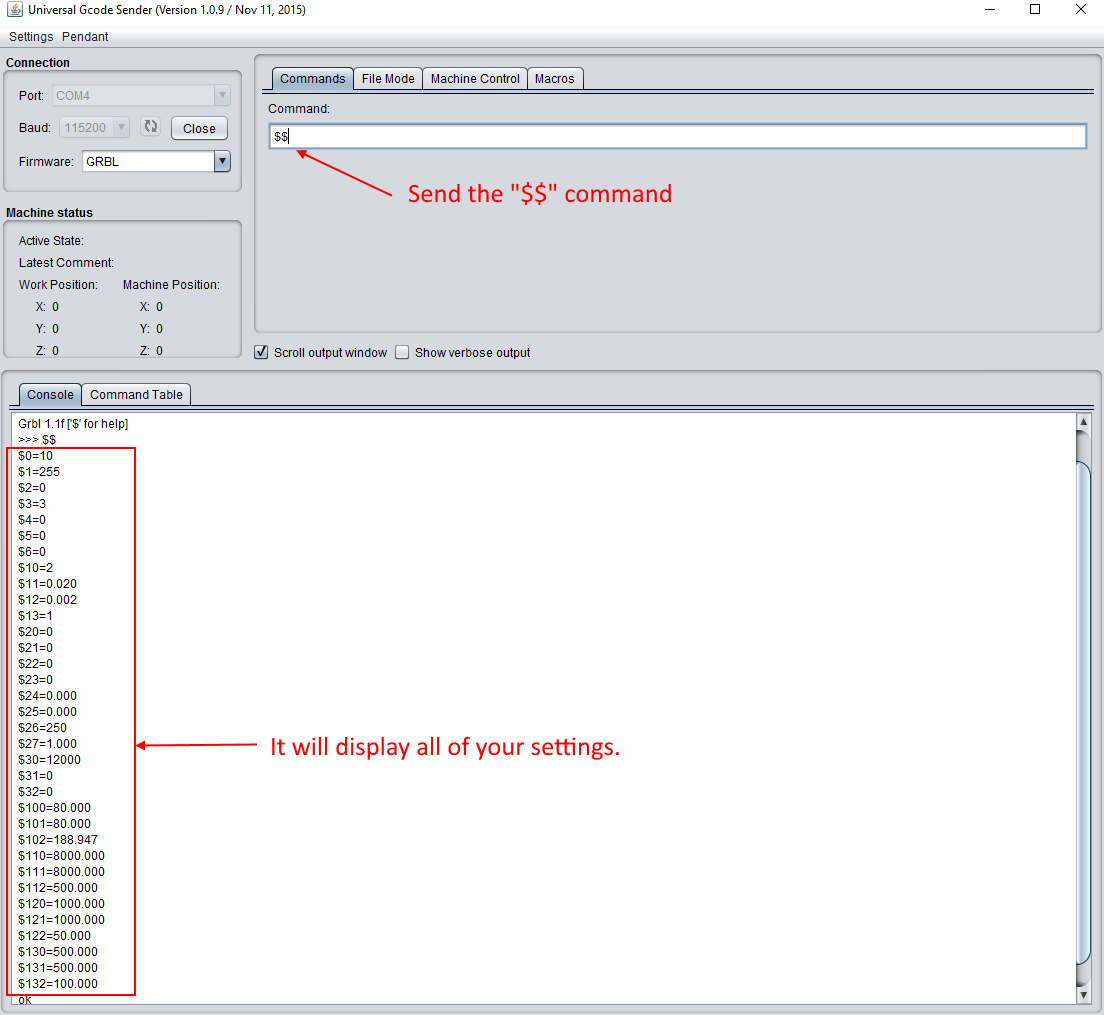
There are a lot of ways to get to these settings including in PicSender. There is a cool GRBL button in the program that lets you view, edit, and save your settings to a separate file. If you have PicSender then this is an easy way to do this.
3. Load Your Firmware
X loader is a cool program that makes it easy to load new firmware to your controller. You can download it here:
After you download the file, extract it and run the application. You should see a dialog box like the following:
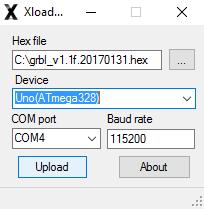
Browse for the GRBL “.hex” file. Choose “Uno (ATmega328) in the Device drop down. Select your COM port and put the Baud Rate at 115200.
Can’t figure out your COM port for your machine? Here are some videos to help:
Finding COM Ports in Windows 10
Finding COM Ports in Windows 7
Press the “Upload” button. It should say “uploading” for no more than a minute and then it will say “completed” and the size of the file uploaded. If it runs forever, you have either the wrong device chosen, the wrong COM port, or the wrong Baud Rate.
4. Check your machine is still working correctly
Now that you have new firmware loaded, let’s run the machine and see if everything is still correct. The easy way is to go into Universal G Code sender and change anything that is different from your settings that you wrote down, copied, or saved from step 2. You can simply go to the setting that is incorrect and send the correct one. For example, if $3 used to be =3 and now it is $3=4, then send the command “$3=3” to change it.
GRBL has a lot of settings. While you don’t need to know about all of them, it is neat to see some of them. All of the GRBL settings are on the main page here: GRBL Settings
The biggest problem people have with upgrading is that the axis’ might now be in the wrong direction. Before the upgrade, the X axis positive would be to the right, Y to the left, and Z up. If one of these (or all) are now backwards, you can fix this. The setting “$3” is the direction port mask.
| Setting Value | Mask | Invert X | Invert Y | Invert Z |
|---|---|---|---|---|
| 0 | 00000000 | N | N | N |
| 1 | 00000001 | Y | N | N |
| 2 | 00000010 | N | Y | N |
| 3 | 00000011 | Y | Y | N |
| 4 | 00000100 | N | N | Y |
| 5 | 00000101 | Y | N | Y |
| 6 | 00000110 | N | Y | Y |
| 7 | 00000111 | Y | Y | Y |
Look at your machine and which direction you might need to change. Look at the above table, and put in the correct number. It will be a value between 0 and 7.
The other settings that can be wrong would be $100, $101 and $102 ([X,Y,Z] steps/mm) and $130, $131, $132 ([X,Y,Z] Max travel, mm).
For a list of our settings on our 1000 mm X Carve when in laser mode, download this file: J Tech X Carve Settings
* 6. Optional Updating Easel Drivers for X Carve Users
If you want to still use Easel with your machine, then you will need to make sure you have the latest driver installed for Easel to work with 1.1f. You can download it by clicking here in Easel. Follow the instructions and you should then be able to use Easel. You might need to change $32 back to “spindle mode” before going back into Easel. You can do this by sending a “$32 = 0” command.
5. GRBL Laser Mode
In GRBL 1.1, there is a new mode called “laser mode”. There are some cool features in this mode, which we will cover in another post later. The overview of it is here: GRBL Laser Mode
For using in pictures, you set:
$32=1
to enable laser mode. As in our previous versions of the J Tech GRBL firmware, this will enable the laser to continuously update the spindle speed (laser power) command without stopping the motion. For the power settings, you have $30 (Max spindle speed) RPM and $31 (Min spindle speed, RPM). These setting for picture engraving should be:
$30=1000
$31=0
Once everything looks good, you are ready to start making pictures!
Get Lightburn
![]()
You can get lightburn to do your photo engraving! Follow this link to download the trial for the software or to purchase it. It is the best program to do photos. Here is a link on how to install the software.
Enjoy your picture engraving!


Can I use Lightburn as well to do this?
Sure can. Lightburn is super great to do pictures.
How do I send a picture and get in on GRBL?