


 Information on Openbuilds C Beam OX Upgrade
Openbuilds has created a nice kit available on their website for a standard machine based off of their slot system and rails that they sell called the C Beam. It is a very nice sturdy system that is not very expensive. Jürgen Pflug has created a design for the J Tech Laser to integrate into the standard build. We will go over this here.
Besides the mechanical portion, you have the choice of a lot of controllers for the electrical section and also the software control. An easy choice is to use GRBL and a GRBL based controller. This being said, you can also set this up as a mach 3 machine. So let’s get started!
You can check out the compatible machines here in the OPENBUILDS PART STORE.
Mechanical
The Z axis has a mount for the spindle that can also accommodate a laser. You can decide to put the laser in front of the spindle by tapping a couple of holes in the front of the spindle mount so you don’t need to remove the spindle or you can put the laser in place of the spindle. In this case, the machine is a dedicated laser machine, so the laser will accommodate the position where the spindle normally is. You can make your own mount or use the design that Jürgen created.
If you decide to make your own, the stl files for the laser and driver to create your mount are located on the product documentation page here: DOCUMENTATION
Laser Holder
There are two ways to mount your laser on the Openbuilds platform using their spindle holder. You can either make a mount to fit in place of the router or you can put it in the front of the router. We show both methods here. You can print them out with a 3D printer using the provided files, or you can buy the front mounted kit in our store here.
1. Front Mounted Laser Holder
We made a quick mount in sketchup to be able to mount the laser using the existing M5 screw holes in the front of the spindle mount.

Mounting Diagram (click to expand)
The picture shown below has the fan upgrade installed as well. We use 6-32 5/8″ screws to attach the laser to the mount. The screw head goes on the back and the nut is placed in the front. It is a very tight fit, so you might have to angle the screw slightly to get it into the nut on the top.
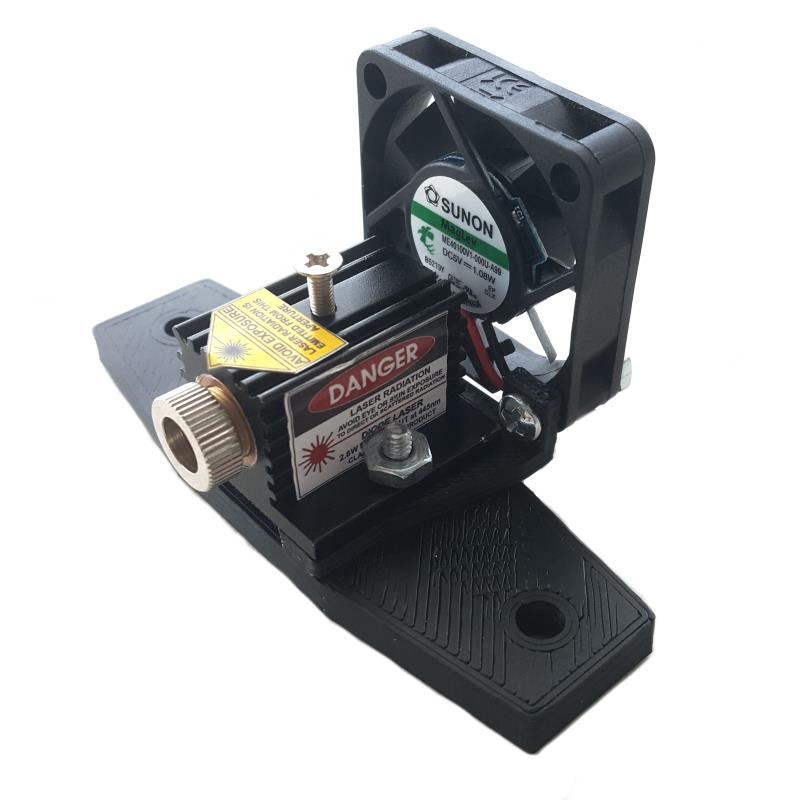
Finished holder with laser and fan upgrade attached.
You can download the mount here: OPENBUILDS_LASER_MOUNT.STL
Or you can buy it in our store here: OPENBUILDS LASER MOUNT
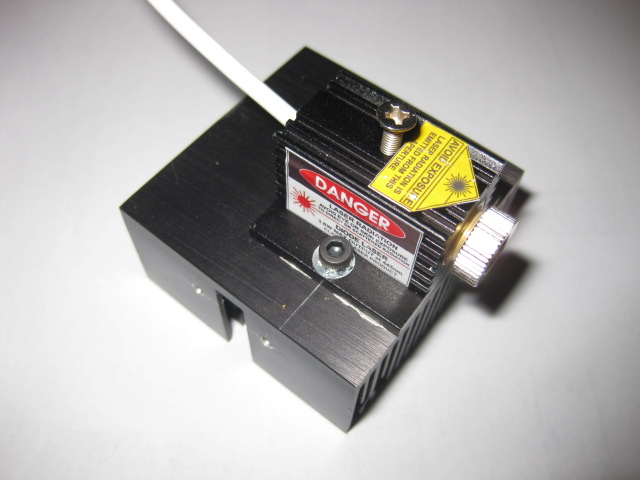
2. Custom Spindle Mount in Place of Router
This featured design includes the use of a CPU heat sink attached to the included laser heat sink. The heatsink dimensions are ~52mm x ~52mm with 27mm fin depth. It was a standard heatsink for a i486CPU that can be found online.
It also has a standard 80mm x 80mm fan attached to the back of the mount to direct airflow towards the work surface.
The link the the stl file is here: LASER HOLDER STL (or click on the picture)

If you want to make modifications to the mount, then the AutoDesk Fusion 360 file is here: Fusion 360 Laser Holder

Assembly instructions:
- Print out the LASER HOLDER STL
- Tap holes into the CPU heatsink.
- Place Laser onto heatsink using thermal paste and attach with screws.

4. Slide the new heatsink/laser assembly into the printed laser holder.

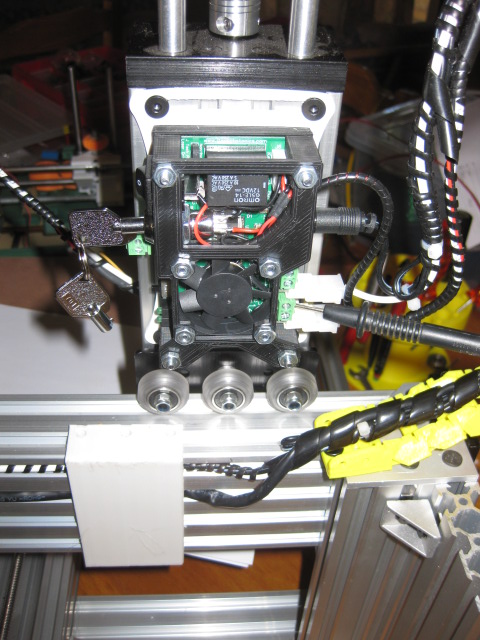
5. Put the laser holder into the spindle mount and mount the fan on top. Route the wires to the laser driver attached in the back.

Laser Driver Holder
You can easily mount the laser driver to the back of the Z Axis Gantry. You can make up you own file or you can use this one here. The STL file for the holder is here: Laser Driver Holder STL

Electrical
There are many controllers you can use with the openbuilds C Beam machine. Jürgen decided to go with the CNC-xPro V2 controller using GRBL for his machine build.
You can use the standard version of GRBL from the Github site, or our version HERE for photo engraving.
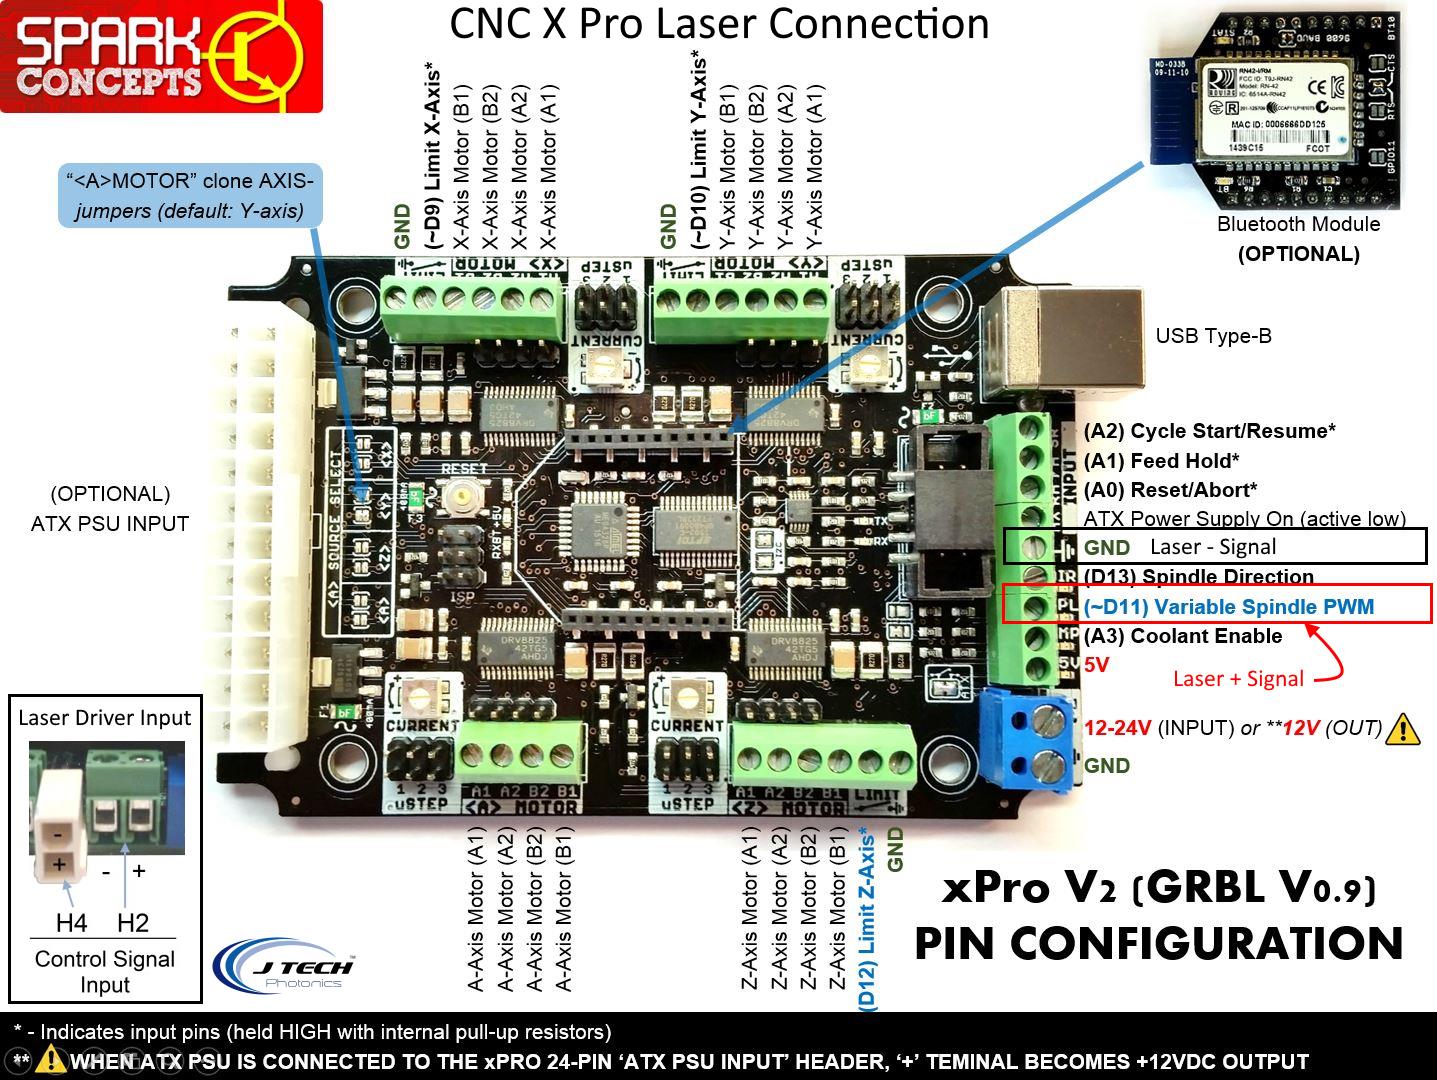
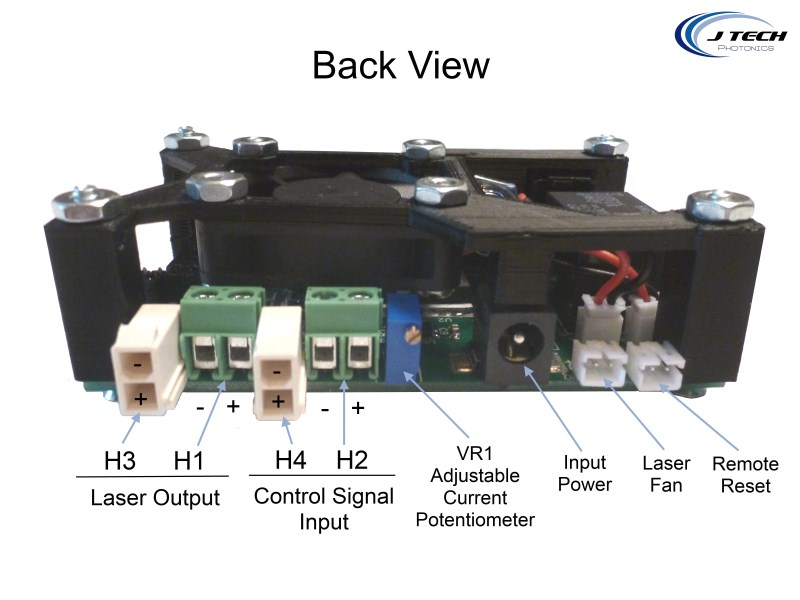
Simply connect screw terminal D11 on the CNC xPro V2 board to the laser driver input terminal H2 or H4.
Software
Using the GRBL version that is installed on the CNC xPro you can set your Min and Max RPM values (which control the laser intensity). Add the settings:
$30 = 255 (RPM Max)
$31 = 0 (RPM Min)
To control the laser, the commands will then be:
- Laser ON 100%: M03 S255
- Laser ON 50%: M03 S127
- Laser ON 10%: M03 S25
- Laser OFF: M03 S0 (or M05)
Obviously if you set up your machine with something other than GRBL (like mach3) then use the appropriate commands for that software setup.
Running The Laser Machine
You do not need to switch firmware between laser engraving and routing, all firmwares will work with both.
There are a lot of different “sender” programs that will work with your machine. In the inside of your machine is something called “GRBL” that directs how the machine moves and interprets the G Code file. The G Code file is the “instructions” and GRBL just needs some program to “send” it to the GRBL that is in the firmware of your control board.
Here is the wiki page with all of the sender program available:
http://www.shapeoko.com/wiki/index.php/Communication_/_Control
We like to use the “universal G Code sender” as it is the standard for the previous shapeoko machine and has a very large user base. It is located here:
https://github.com/winder/Universal-G-Code-Sender

If you are planning on doing pictures, then PicSender will work great to control the machine. You can get it here: PICSENDER PROGRAM
So there it is! The C Beam Laser machine!
Buy your laser upgrade kit now!
Remember Safety First!

We sell laser shielding to block laser radiation and reflections!
Laser Goggles are also a must!
You can check out the compatible machines here in the OPENBUILDS PART STORE.
Disclaimer
The laser used in this project is very powerful and all safety precautions must be taken. Use proper safety eyewear to prevent injury to eyes. This is a project and J Tech Photonics, Inc. is not responsible or liable for any and all damage or injury caused to people or property. The use of these instructions to make a laser cutter is under your own discretion and all safety precautions should be followed. J Tech Photonics, Inc. is not affiliated in any way with Openbuilds and they may change hardware and software at any time making these instructions invalid.