


Here in the shop we use several software solutions for the purpose of engraving. Laser Etch is a very practical method for etching black and white designs, logos, or PCB’s. This is simply because the G-code that is generated by Laser Etch will either tell your machine to turn your laser on (to the power setting that you have assigned it) or off, all while rastering over your material. In this tutorial we will explain what steps need to be taken to prepare an image for use with Laser Etch.
1. Choose Your Image Editing Software
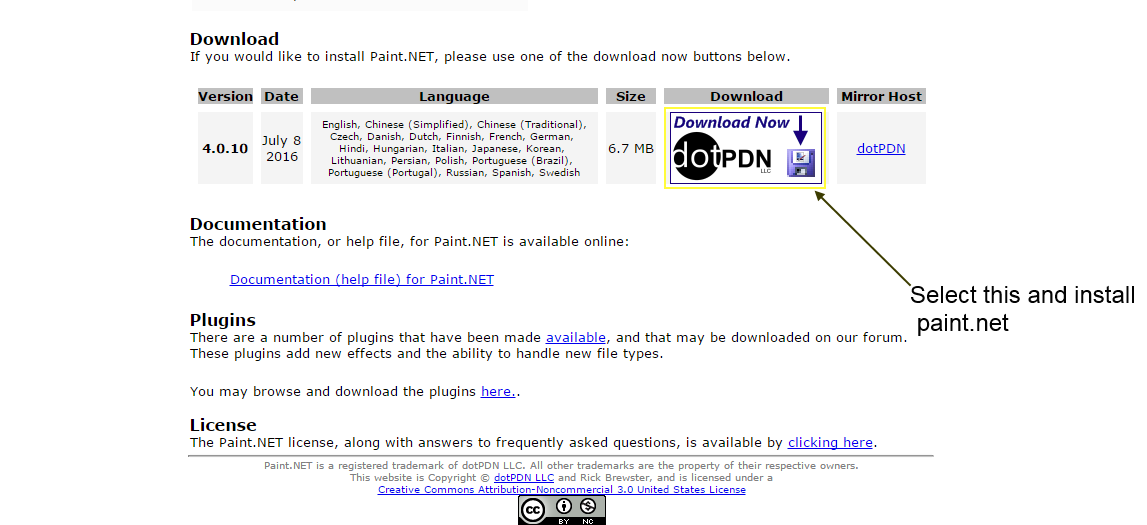
You will need an image editing software that is capable of resizing an image and changing the images resolution or number of pixels. While you are perfectly capable of doing this using numerous other image editing software products like Adobe Photoshop and Corel Draw, we will be using paint.net in this tutorial. This free software allows for you to easily resize and make adjustments to your image. By clicking the link below you will open a new window for the paint.net download page.
Paint.net download page: http://www.getpaint.net/download.html
2. Open Your Image to Resize
Once you’ve downloaded paint.net you may load a black and white image of your choice or simply copy and paste the image provided below. Since we just finished the Olympics we thought this image would be appropriate. Open this in Paint.net to start the resizing process.

*Note* Your Image needs to be all black and white pixels. If your image is grey scale it needs to be changed to just black and white. You can do this by adjusting the CONTRAST up and also the BRIGHTNESS so the image is only left with just black and white pixels. If you are creating text or a logo from scratch, then turn off “anti aliasing” as this will create a gradient effect on the edges of your drawing.
3. Resize Your Original Image to be the Size You Want on Your Engraving
Now that you have chosen a black and white image to prepare, on the paint.net interface select the “image” tab followed by the “resize” option.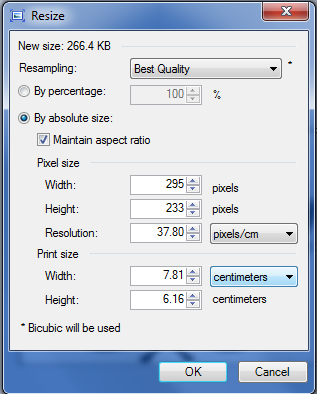 While this image may be 7.81cm×6.16cm on paint.net and would be this size if we were to print it using a standard printer this size is not an accurate representation of the dimensions that would be printed using your laser engraver and Laser Etch. This is because laser etch uses information specific to our laser so that it may operate properly.
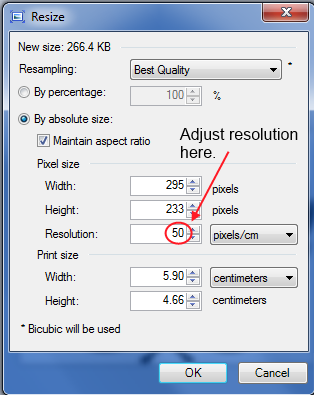
There are a few simple things we must know before adjusting the pixels of our image. First and foremost we need to know our lasers spot size. Each pixel is a location that our laser will travel to, so we can think of our above image as 295 spot sizes wide by 233 spot sizes tall.
Below we have listed general spot sizes of the lasers which we offer as well as their resolution. By imputing the TYPICAL RESOLUTION that corresponds with our laser and preferred units we will have an accurate width and height for the image you wish to engrave
[table id=6 /]
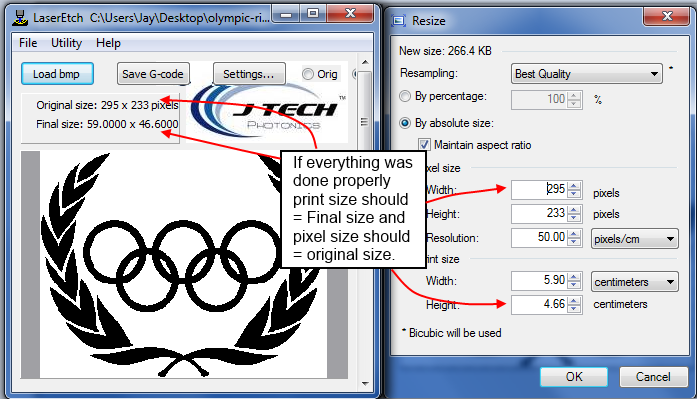
For more information about our laser diode In the image shown below we have adjusted the resolution to 50 Pixels/cm so that it will display the proper height and width for an engraving done by a 2W 445nm laser. If you are using the more popular 2.8W laser then enter 43.5 and for the most popular 3.8W laser enter 26.3.
Remember the equation for figuring out the Final engraved size of your image is:
spot size × number of pixels = Size of Final Engraving
Now that we have an accurate representation of our image we may change our image size by reducing the number of pixels in our image. Remember that the resolution of our image is predetermined by the spot size of our laser, so we do not want to adjust the resolution once it has been properly set. We are simply adjusting the image size by reducing more pixels. Check the “maintain aspect ratio box” or our image will be distorted.
*note* Always start with an image that has equal to the amount of pixels or more and reduce from there. Never start with a image with not enough pixels and try to increase it as it will “interpolate” what the pixel gaps are and make a blurry image in your engraving.
4. Save Your Image as a “.Bmp” File
Once the image has been properly resized to our desired size we will save the image as a .bmp file, this is the file type used for Laser Etch.
5. Load Image Into Laser Etch and Adjust Settings
Once the image has been saved as a .bmp file we will load it to Laser Etch and select “settings”. In the settings window we will select our preferred unit of measure and adjust the “travel per pixel” to match our spot size.
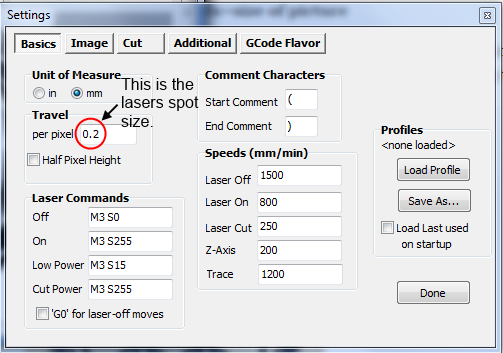
Once the settings for “Unit of Measure” and “Travel” have been set to the correct spot size regarding our laser and preferred unit of measure we may begin adjusting the settings for our machine.
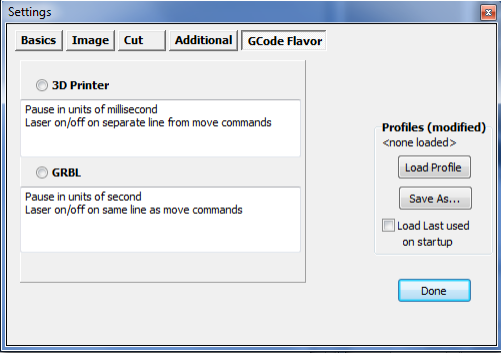
The first thing we’ll need to do it select a “GCode Flavor”. As shown above there is an option for both 3D printers and GRBL. If you are using a CNC machine you will select GRBL and if you are using a 3D printer you will select the option for your machine. This setting allows for the G-code to be written in a way that our machines firmware will understand.
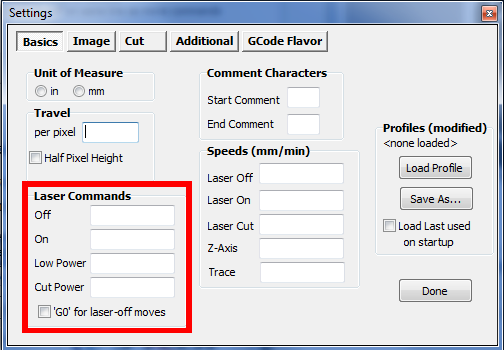
Once we’ve selected our G-Code flavor it is time to input our “Laser commands”. It is important the we input the proper commands for our firmware or our laser will not function. below we have listed three types of firmware with their G-code commands. These commands determine the power setting of your laser at any given time during a job. Engraving on different materials will require different levels of power. It is important that we experiment with the “On” command setting so that we may find the optimum power level for our given material.
Note: To engrave as fast as possible it is a good idea to set the “On” power to the maximum and compensate for this by increasing the “Laser On” speed.
Faster Engraving Speed = Lighter Engravings
Slower Engraving Speed = Darker Engravings
There will be a speed in which your machine might start shaking and causing a reduction in image engraving quality. In this case, adjust your speed down and also your laser power to get the correct burning in your material.
Typical Laser Commands based on Firmware Used:
[table id=7 /]
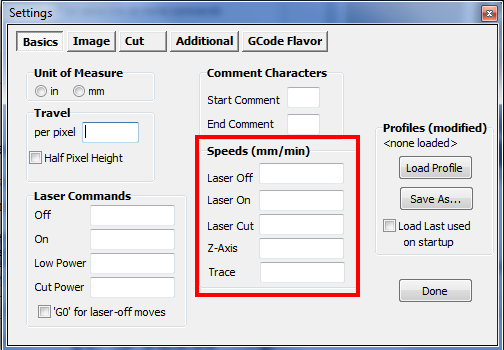
Now that we have input our laser commands it is time to set our machines travel speeds. This is going to be a large factor in determining the time it takes our machine to complete a job. That being said we’ll want to set our laser off command to as fast as possible within reason of the machines capabilities. The “Laser on” speed is also very important because this determines the time our laser spends over the material while engraving. Typically for an X Carve machine with a J Tech 3.8W laser engraving baltic birch plywood the Laser Off speed will be 3000 mm/min and the Laser On speed will be around 1500 mm/min. Mess around with these settings to get the best results for your machine and material.
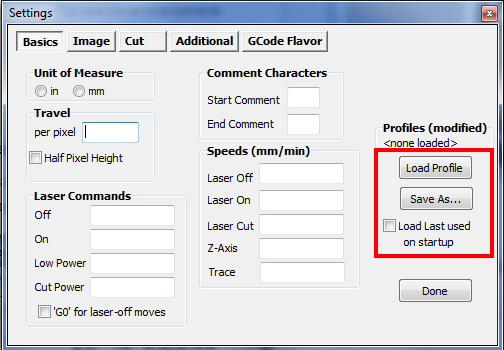
These setting will require us to do a bit of experimentation to determine what speeds and powers are required for different materials. You can save machine profiles while experimenting with different materials and methods so that we may easily make adjustments or reuse our settings at a later time.
6. Save G Code File and Run on Your Machine
Now we can convert and save the Laser Etch image as G-code and send it to our machine. Using a CNC machine like the X Carve or Shapeoko you will use UGS or PicSender to run your machine. If you are using a 3D printer, then you will be using Repetier Host, Cura, Simplify, or your other favorite printer controller.
The image shown below is what resulted from using a 2.8W 445nm laser with the settings in Laser Etch shown above.

That the code generated by the laser etch program I can run it from the universal program g code sender
regards
Edgar
Oaxaca, Mexico
Yes. You can use any sender program you want, including Universal G Code Sender.