

Air Assist Kit for Dual PRO 14W, 14W SI, 7W PRO, & 7W+ Forward Fan Lasers
CAUTION: Adding air to laser engraving is dangerous. Always pay attention to the work area to make sure you don’t have flare ups. When the laser is not moving, make sure to turn the air off. An IOT relay is advised when using the air assist.
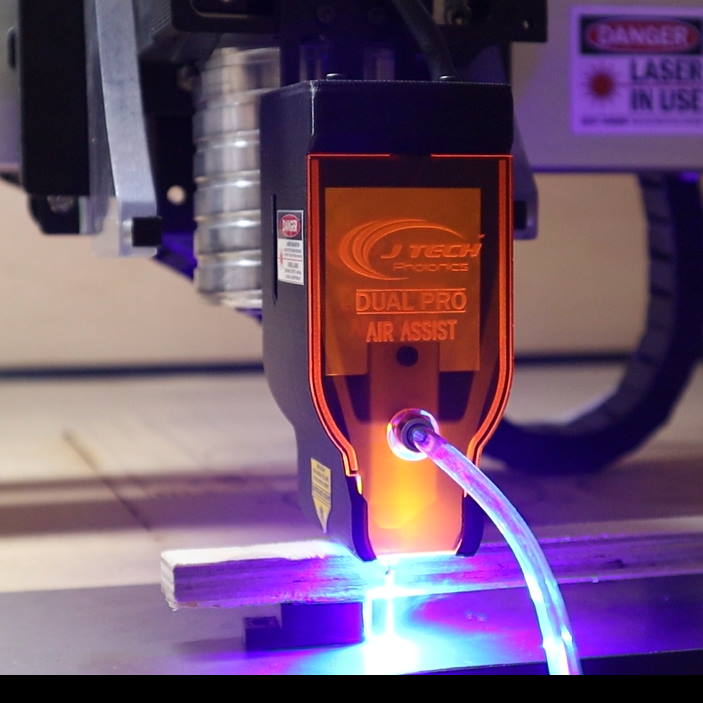
We have fully redesigned the air assist nozzle and kit for the 7W+, 7W PRO, 14W PRO SI, and the 14W PRO lasers to be easy to install and effective at removing smoke from the work area. The air assist will allow you to get cleaner engravings and cut more effectively. Use this air assist to clean up your engravings to remove the smoke lines that can be left on the wood when engraving or to increase the ability to cut through wood all the way.

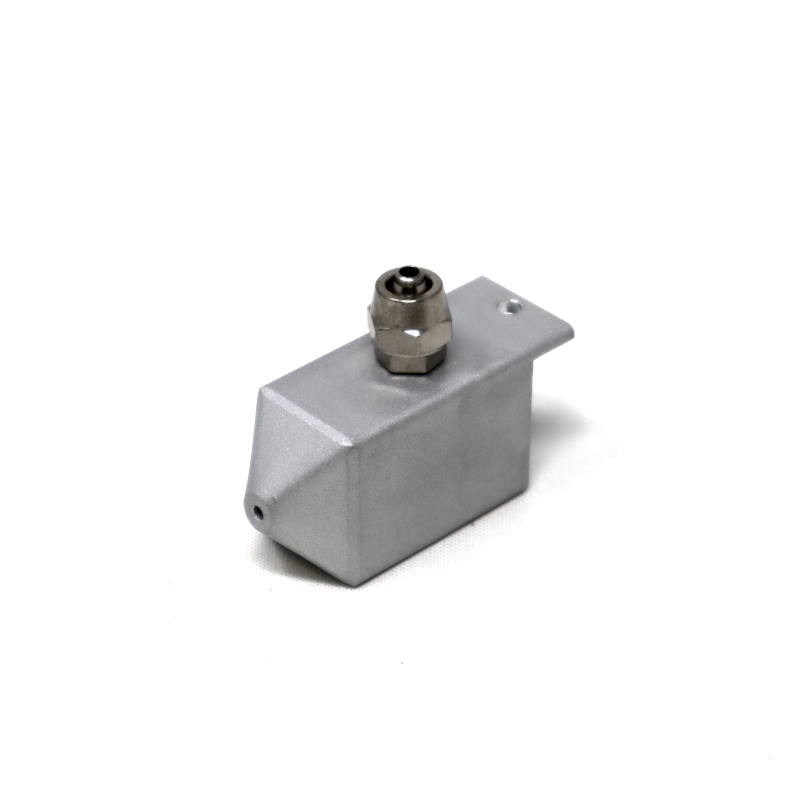
7W+ & 7W PRO Air Nozzle
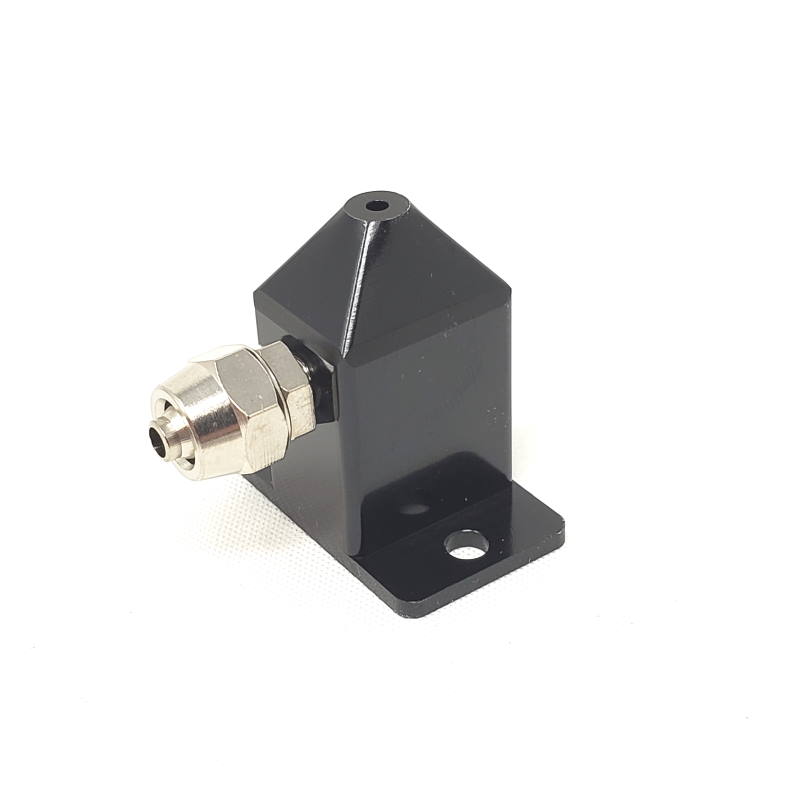
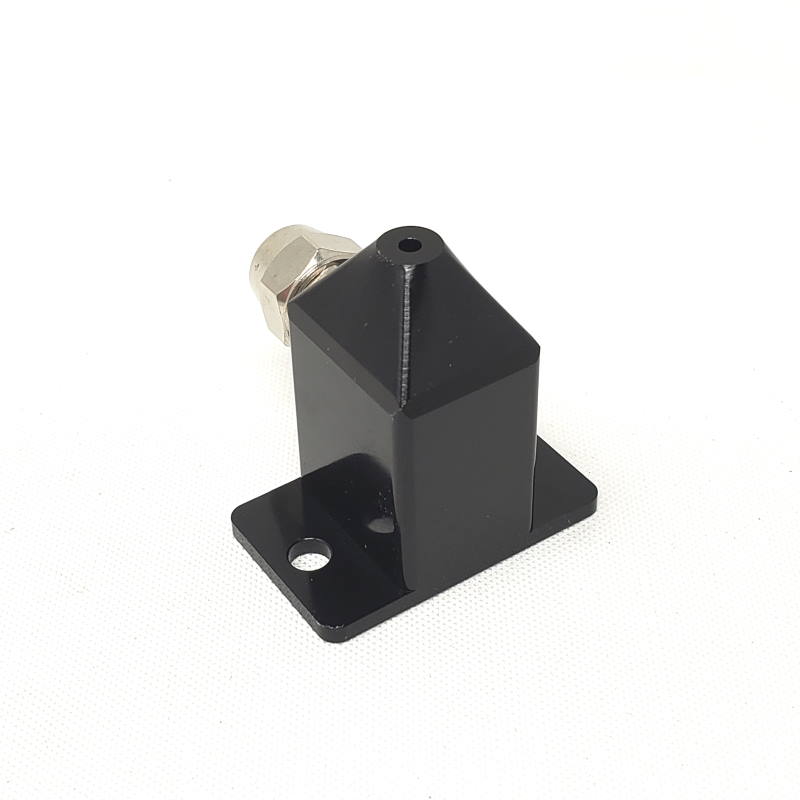
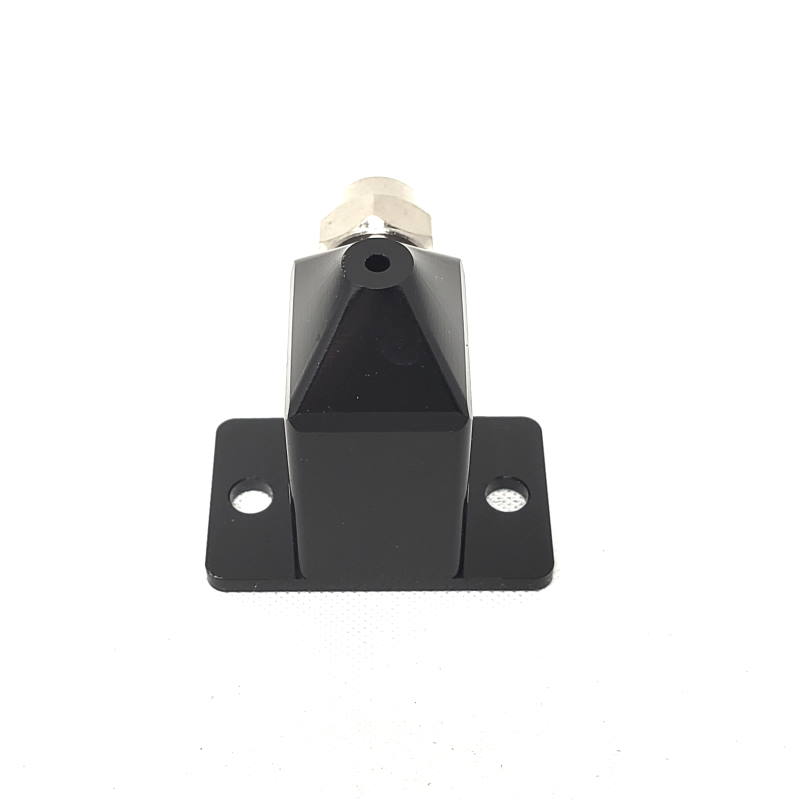
 Dual PRO 14W Air Nozzle
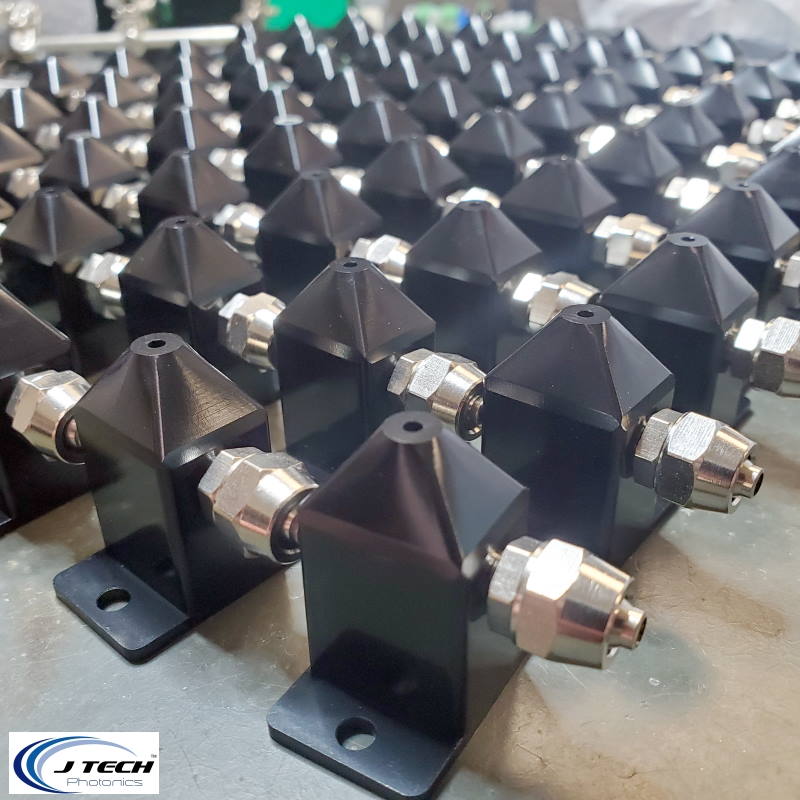
The kit includes a precision machined aluminum air nozzle with specific attention to increasing the air flow without obstruction of the laser beam. The nozzle has a 6mm air hose attachment that fits with the custom shielding cover. Changing between using the air nozzle and not using it is simple and easy.
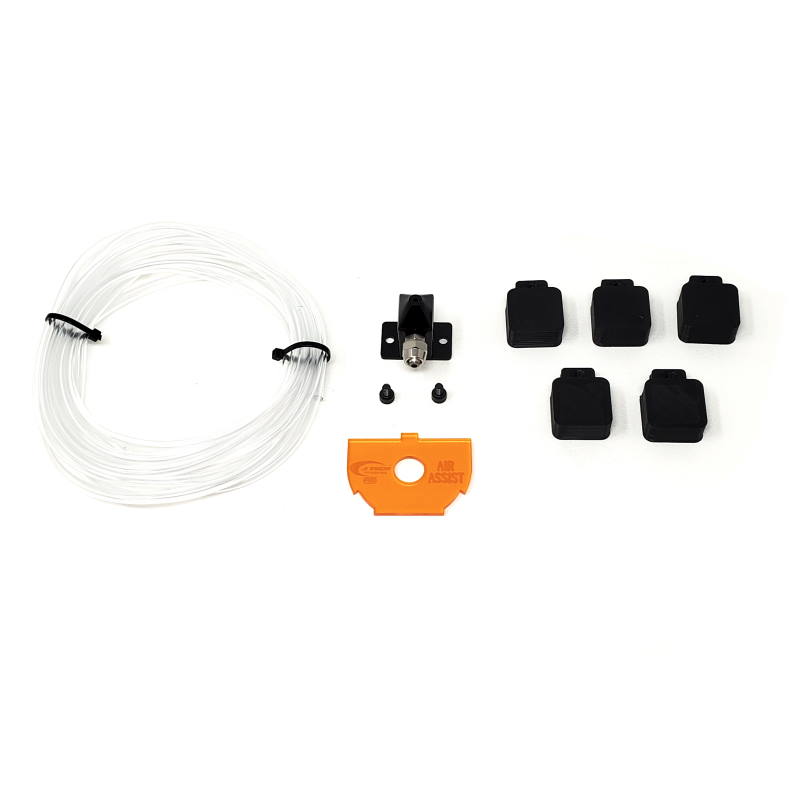
Kit includes:
-Precision Machined Aluminum Air Assist Nozzle
-M4 Screws (7W and 7W PRO Version)
-Air Assist Shielding
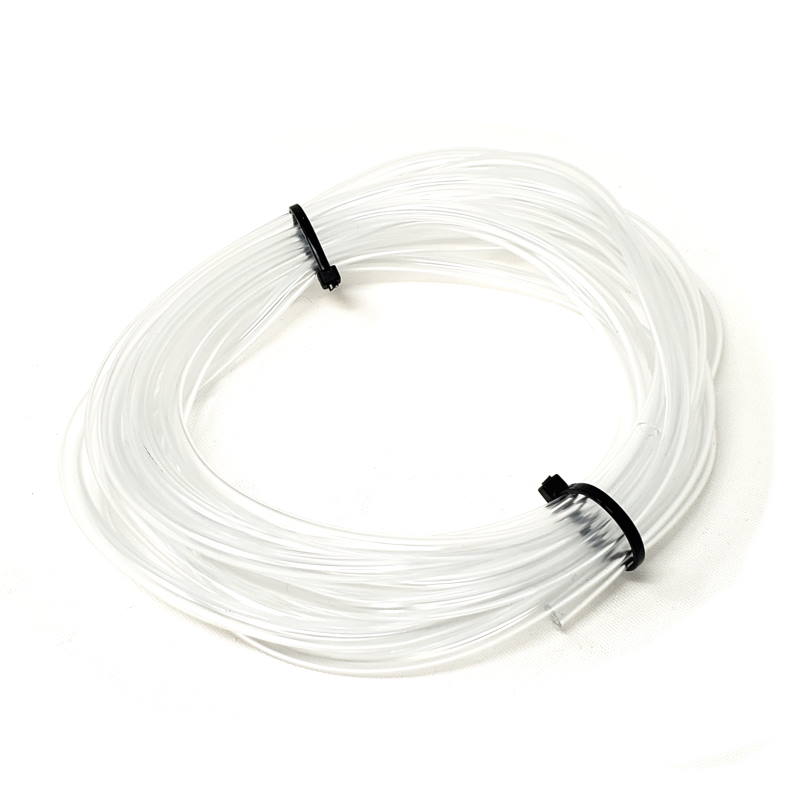
-12′ air tubing
-5 material risers 0.5″
DOES NOT INCLUDE AIR PUMP
Choose The CORRECT Air Assist for your Laser
Newest Laser Versions (Currently Shipping in Bundles)
The newest versions of the laser are going to be the 14W PRO SI and the 7W+ laser. Make sure you choose the correct nozzle for your laser. Your laser will look like this:
14W PRO SI Laser
7W+ Laser
Older Laser Versions
These lasers are now currently not shipping, but you might still need an air assist.
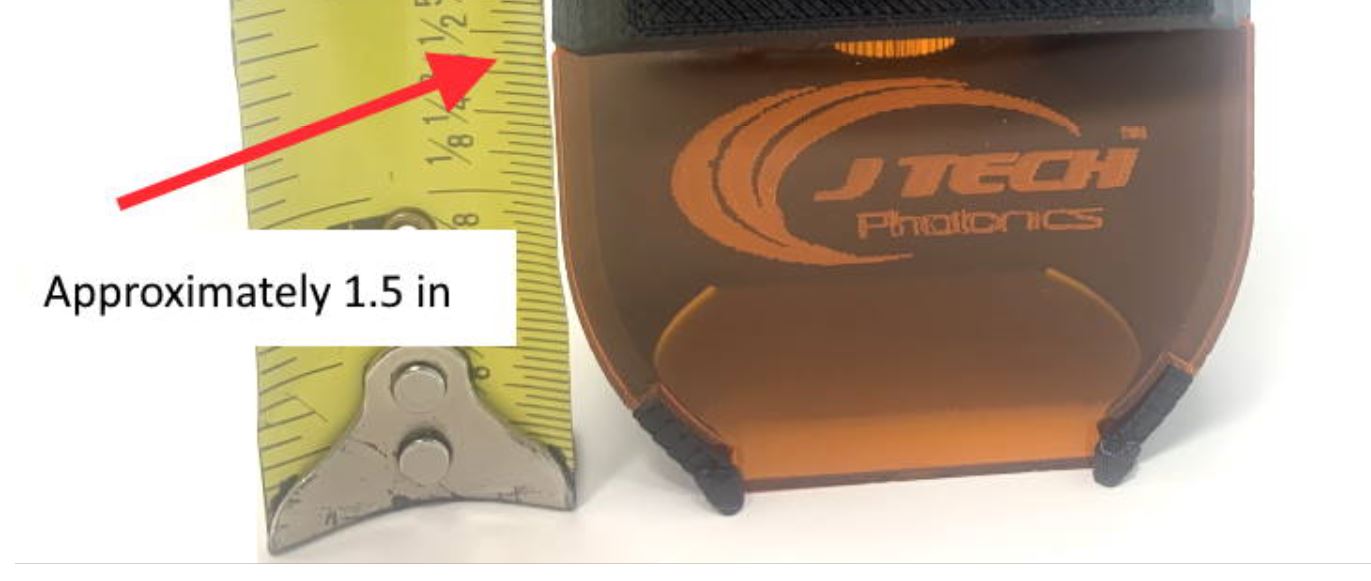
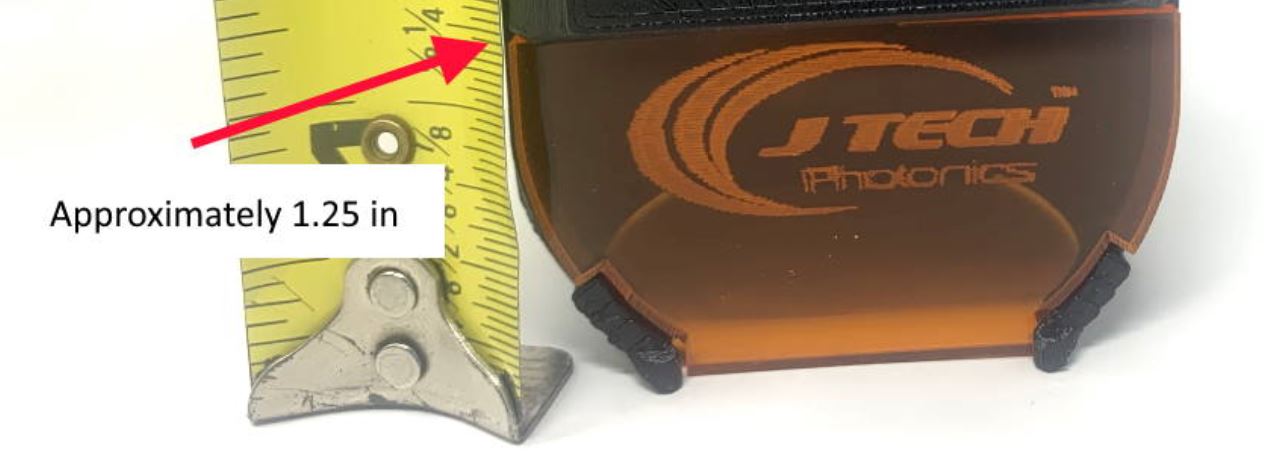
Some of the older 7W lasers will have a shorter housing and a smaller shielding piece. To tell which one you have, you can measure the distance from the top to the bottom. Note: all 7W PRO lasers will be the LONG version. Make the selection on the options box when ordering.
7W PRO and newer 7W lasers will be ~1.5″
Older 7W lasers may be ~1.25″
14W PRO Laser
Air Pump Selection

There are many air pumps available for adding air assist to the J Tech 7W, 14W, and 24W lasers. If you plan on just engraving, then a smaller pump is adequate. If you want to do more cutting, then the air pump should be larger. In our findings the 55W pump is the best for cutting and engraving. If you want to just engrave, then the lower power pumps are adequate down to 20W.
Aquarium Pump for Cutting and Engraving (Choose the 55W Pump)

(output adapter for recommended pump is HERE – M10 x 1mm x 6mm)
The tubing for the air assist is 3/16″ outside diameter. It is the standard “airline tubing” or “aquarium pump tubing”. Note, you may need to get an adapter for the output of your pump to fit the air assist tubing.
If you use an air compressor, use between 2 PSI and 15 PSI for the regulated air pressure. Do not use too much air pressure.
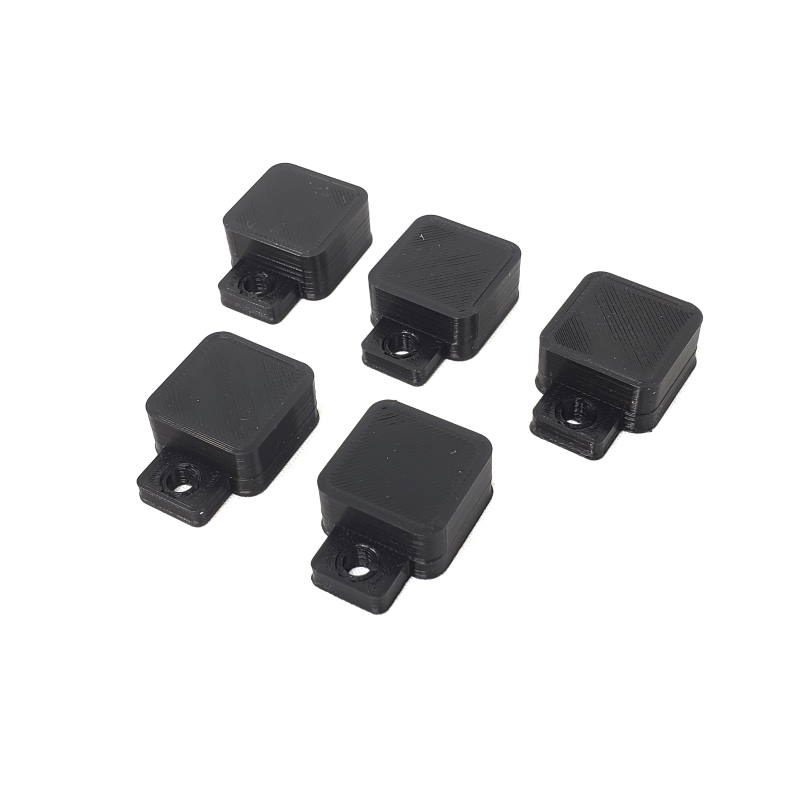
Material Risers
When cutting, it is important to have your material elevated off the worksurface for the laser to be able to penetrate the bottom of the material. Use these risers placed under your material to lift it off the waste board when cutting. They can also be screwed into the table if you have holes for clamps.
Air Hose
The included air hose is a standard “airline tubing” or “aquarium pump tubing” you can find on Amazon. The air hose for the air nozzle is 3/16″ outside diameter. Metric is 3.5mm inside diameter and 5.5mm outside diameter. We supply 12′ of this aquarium hose tubing but you can use silicone or other tubing as well. Place it in your drag chain for a clean look. Just make sure not to pinch it if running it in your chains as it will restrict the air flow to the work.
We recommend using a IOT relay. We use the one listed here: https://dlidirect.com/products/iot-power-relay
Installation Instructions
The air assist nozzle will work with the 7W and 7W PRO lasers with the fan in front of the laser heatsink.
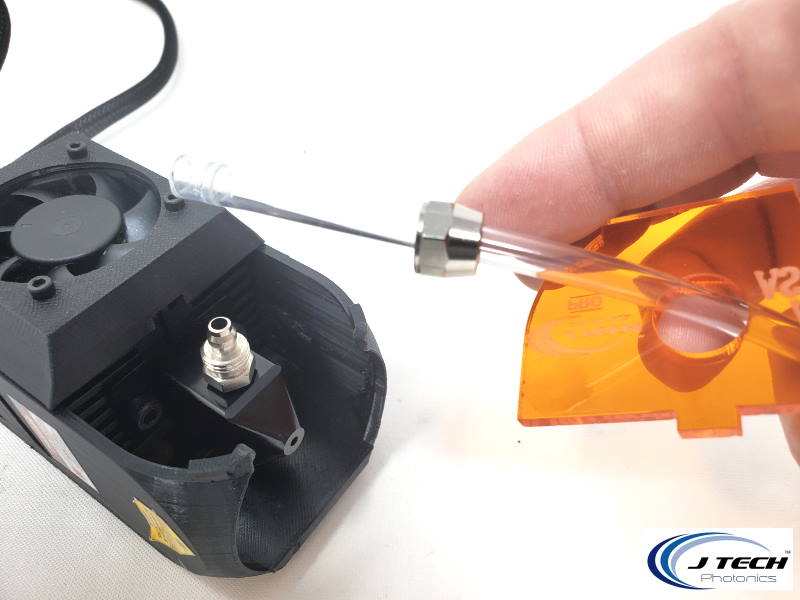
- First, we will start by taking off the nut on the air nozzle intake. Unscrew it and don’t lose it.
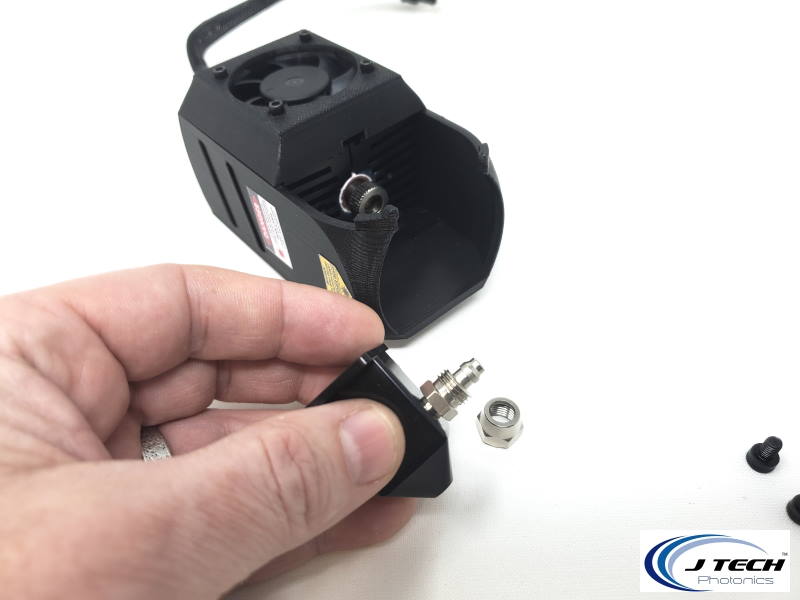
- Put the air nozzle over the lens with the air intake pointed to the front. Use the M4 screws and attach the nozzle to the front of the heatsink.
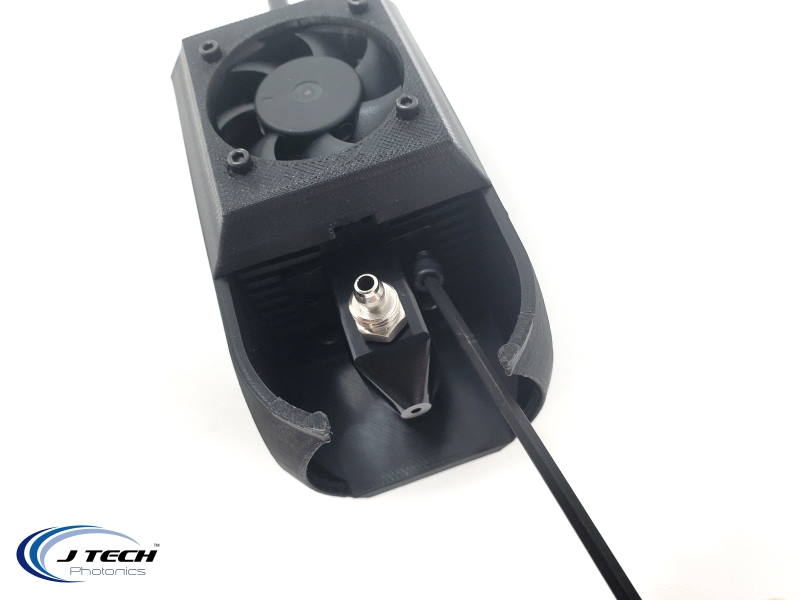
- Use the other M4 screw and finish attaching the nozzle to the heatsink.
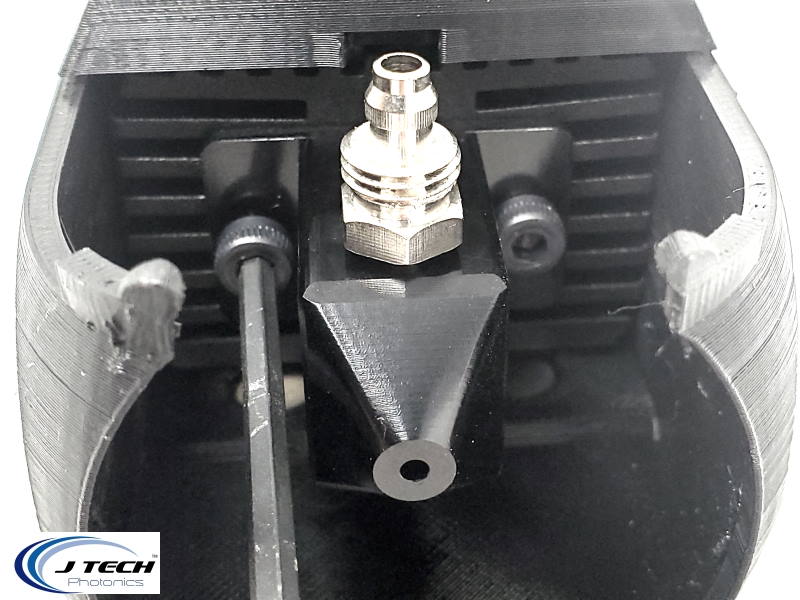
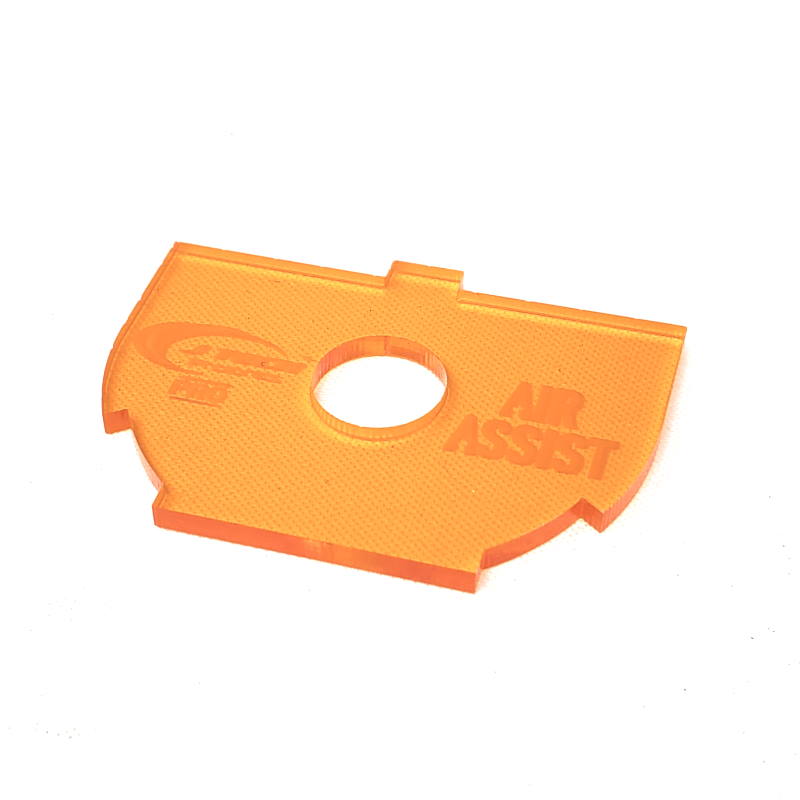
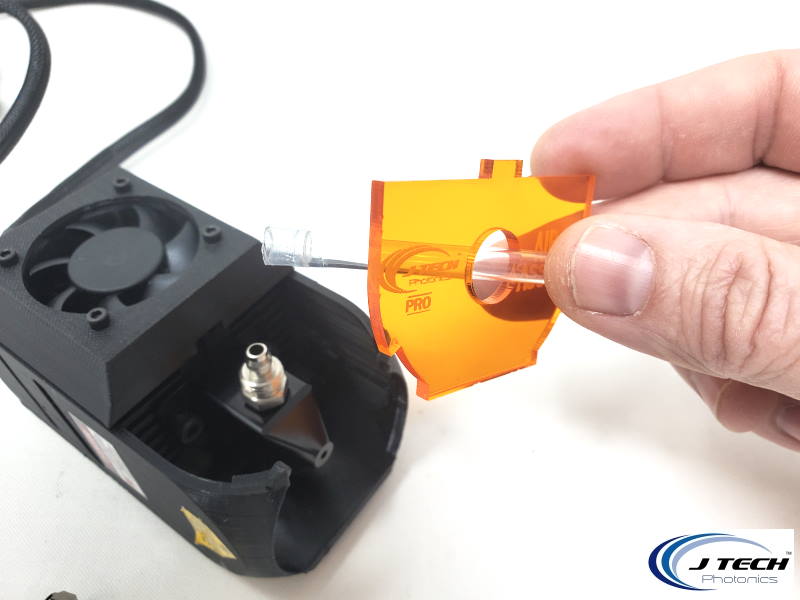
- Take one end of the air tubing and put the orange shielding acrylic piece on the tubing with the logo facing forward.
- Take the air nozzle nut that you took off in step one and put it on the tubing next. Make sure it is on the correct way as shown in the picture so you can screw it back onto the air nozzle.
- Take the air tube and put it on the hose barb of the air nozzle. Push it all the way on. If it sticks, then get some soapy water to make it so it fits on all the way.
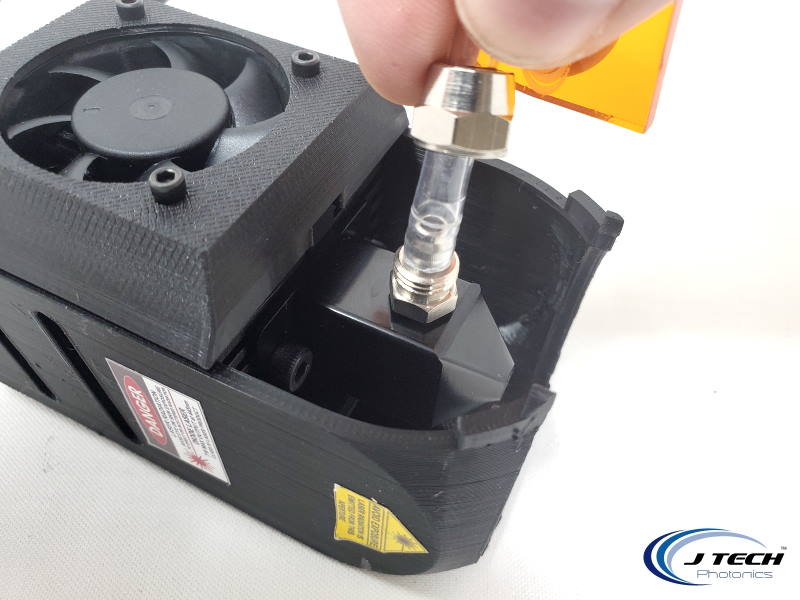
- Take the nut and put it down so it hits the threads. Screw it onto the air nozzle until it is tight. Hand tightening should be ok, but you can use a wrench to tighten it the last bit as well. Do not overtighten it though.
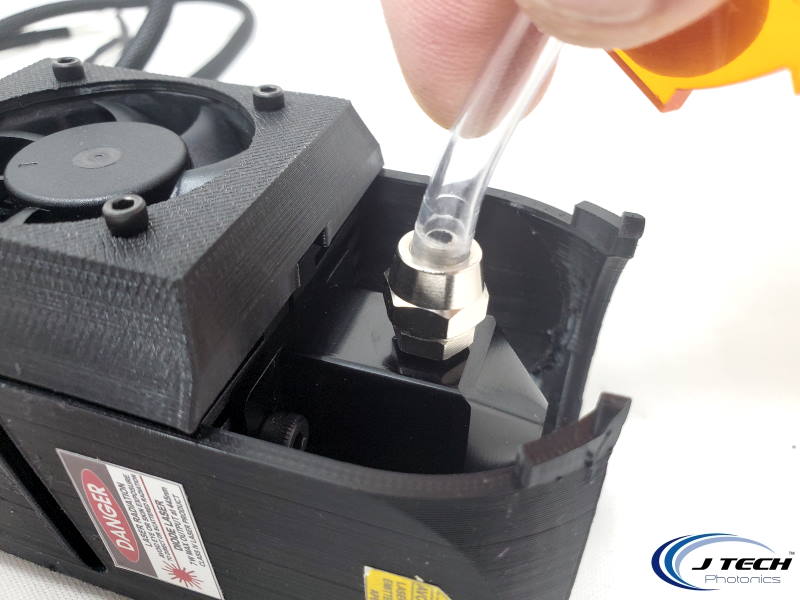
8. Put the shielding piece in the tab on the top and press it into place. You can use your fingers to push out the sides to allow the plastic to hold under the tabs. Make sure you get it over the air nozzle for it to fit correctly.

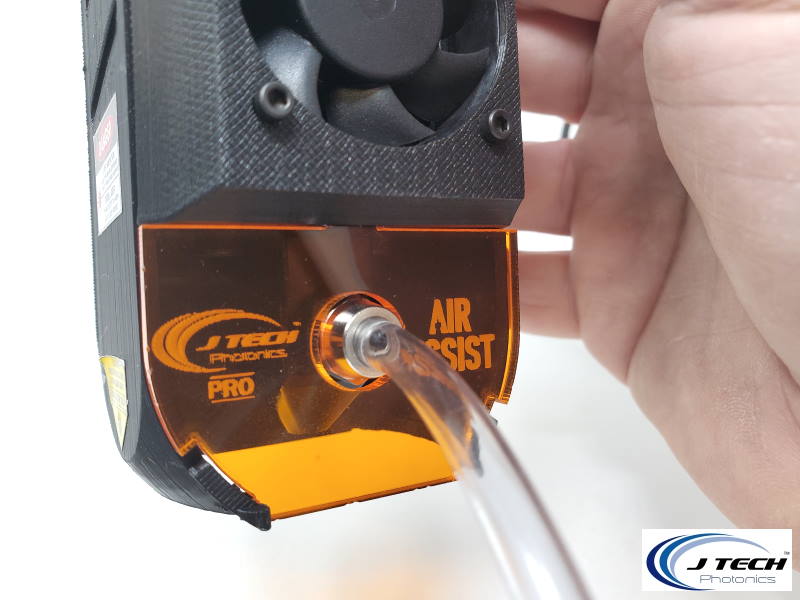
- Finished! You are now ready to install it back on your magnetic mount on your machine and hook the other end to your air source.
Recommendations for Use
- Select a pump with correct air flow for your application. If you are just engraving, then a lower volume air pump will work because you are just trying to get the smoke away from the burn area. If you are trying to cut though a material, then a higher volume pump will be required to achieve better cut results.
- If cutting, lift the material off the waste board using the material risers. This will allow the smoke to exit the bottom of the cut as well as through the top.
- If cutting and you don’t want to ruin your waste board, put a piece of metal under the material so it won’t mark the MDF waste board.
Adding air can be dangerous. Here are some things to follow to make it safer:
- Never cut or engrave on anything flammable using the air assist. This includes cutting such items as foam and thermoplastics like Lexan and ABS. If you have issues when not using the air assist for flare ups, it is just going to be worse with the air assist.
- Never leave the machine unattended when using the air assist, especially when going slow.
- Do not go under 10 inch/min when using the air assist. Going too slow will cause flare ups in the material.
- Turn off the air immediately when finished with a cut or move the laser from the cut area. If you leave the laser with the air on at the end of the cut it can fuel embers that can start a fire.
- Do not leave it unattended. Did I say never leave it unattended already?
- If you have to go to the bathroom, pause the program and turn the laser off. Do not leave it unattended.

Eric (verified owner) –
Kit contains parts of good quality. The air hose isn’t what I imagined – it’s a little stretchy. I found a 1/8″ ID brass hose barb to fit the hose well – part number from Sioux Chief is 903-41021001.