
*Disclaimer*
All instructions for upgrading machines are all done at the buyers or viewers own risk. Lasers are inherently dangerous and all safety measures are the responsibility of the buyer or viewer. While we provide some safety features on our laser kits, it is not a complete laser machine, so all additional features are up to you when you build your machine including interlocks, fume extraction, and fire prevention. Inventables is not affiliated with J Tech Photonics Inc. and they in no way endorse these instructions.
These are the instructions for the newest models of the X Carve with the Controller. We no longer mount the laser driver on top of the Z Axis. We figured this allows for more upgrades of the Z Axis, including the Z axis slider upgrades. It also just cleans up the upgrade and makes it easier to install. We just did our install in under 10 minutes.
If you have the older mounting kit with the laser driver mounted on the top of the Z Axis, then you can find them here: OLD VERSION OF MOUNTING INSTRUCTIONS
Let’s now get started with the upgrade!
In order to complete the following instructions, you need to purchase the laser and mounting kit. You can get them here:
Purchase Laser Bundle HERE
44W Metal Mount Instruction Update
If you purchased the new 44W laser and are watching the video below, there will be two changes.
- The extension cables are now just one black 4 pin molex cable. Ignore the two cables in the video.
- The metal mount attaches to a different area. Look below here how to install it.
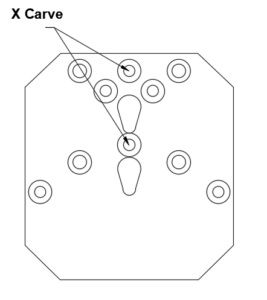
The metal mount has two screw holes for the mounting. Install the metal mounting plate on the left side of the router holder. There are two screws included in the kit for this. Note, if you have a dust boot, you need to take off the side rails.
For normal operation, use the two lower holes to mount. For using the rotary, then use the two higher holes.
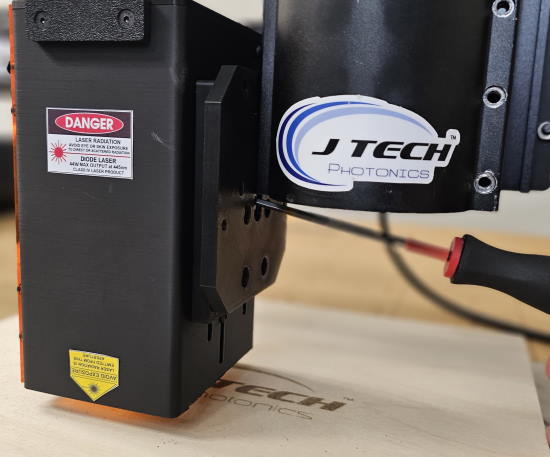
You can tighten the screws to hold the laser onto the mount tighter for more stability.
We are working on the new video instructions now. If you have any questions about how to install the laser, please contact us.
Paw Paw’s Installation Video Guide
This video will walk you through the installation steps. You can also look below for the step by step instructions as well.
Lightburn Software Setup Video
We recommend lightburn software for running your laser. Here is how to set it up on your X Carve.
Mechanical
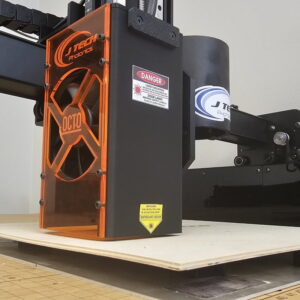
You have the choice in the X Carve Kit option to either have a shrouded laser or not. Also, there is the option to have either the standard or a dust boot. There are two options to choose from:
- Standard Front Mount
- Dust Boot Mount
The standard mount will work with a dust boot, but you need to take off the bottom part and leave the rails. The dust boot mount will have the laser off to the side so you don’t need to remove anything, including the bottom of the dust boot from the machine to use the laser.
If you want an older mount, just let us know and we will get it for you. We have been offering the X Carve laser kit since the beginning, so there have been multiple iterations.
Electrical
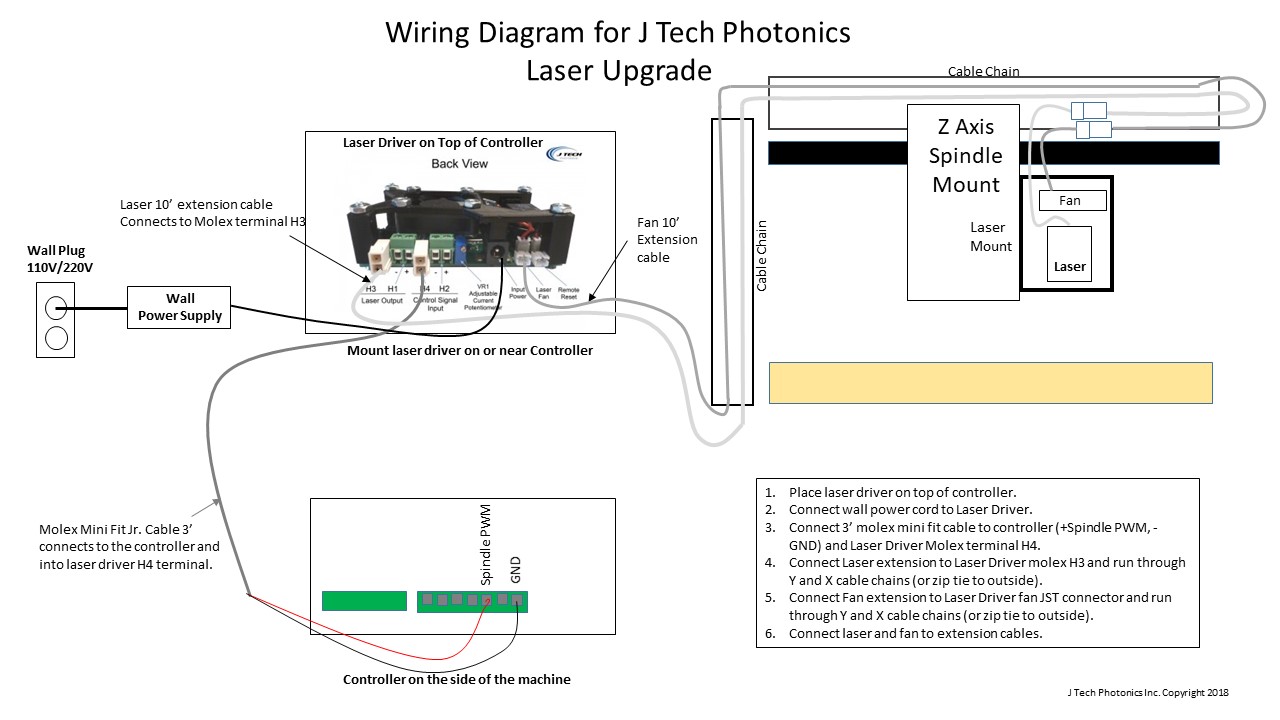
The wiring is pretty easy on the upgrade. You will need to start with the 10′ extension cables at the gantry and route them back to the laser driver on top of the controller.
For the input signal, simply connect the Molex mini fit Jr. 3′ cable included in the Mounting kit from the laser driver to the controller. You can shorten the cable if there is a lot of extra. There are two signals you need to connect to: SPINDLE PWM and GND.
Wire the cable to the Controller:
- Red Wire (Laser + Signal) to SPINDLE PWM on controller
- Black Wire (Laser GND) to GND on X Controller
Here is the wiring diagram for the newer machine:
Laser Commands
Using the pre-loaded GRBL
The newest controllers coming out with the X Carve come pre-loaded with GRBL 1.1, which will have our laser code in it already. No need to upgrade to anything else to be able to run and even do pictures.
It is best to check to make sure your settings are correct though. You can send a “$$” command to list your settings. The ones you need to check are:
$30 = 255 (max Laser Power)
$31 = 0 (min Laser Power)
$32 = 1 (Laser Mode Enabled)
You can change the values by just sending the setting and the value you want. For example, to change the max laser power you send “$30 = 255” and press send.
To turn on and off the laser the command is:
- Laser ON: M03
- Laser OFF: M05
If you want to use power control for the laser (via Pulse Width Modulation) the laser command is:
M03 SXXXXX
Where the “XXX” is a number between 0 and 255. So, some examples are:
- Laser ON 100%: M03 255
- Laser ON 50%: M03 S127
- Laser ON low power: M03 S11
- Laser OFF: M03 S0 (or M05 will work as well…)
Running the Machine
We recommend not using Easel to control your machine when using the laser. If you are using the firmware installed on your machine (the firmware that came with your machine) then you can use Easel when routing.
There are a lot of different “sender” programs that will work with your machine. In the inside of your machine is something called “GRBL” that directs how the machine moves and interprets the G Code file. The G Code file is the “instructions” and GRBL just needs some program to “send” it to the GRBL that is in the firmware of your control board.
We now recommend using Lightburn Software. It is an all in one solution for doing vectors, pictures, and running the machine in the same program. Here is how to set up the Lightburn software:
Step By Step Upgrade Instructions
So now that you have the overview on how to complete the upgrade, lets get into the details on how to put it all together. These instructions show the 1000mm kit installation. On the 500mm machine you will probably not need the power cord extender.
Let’s get started!
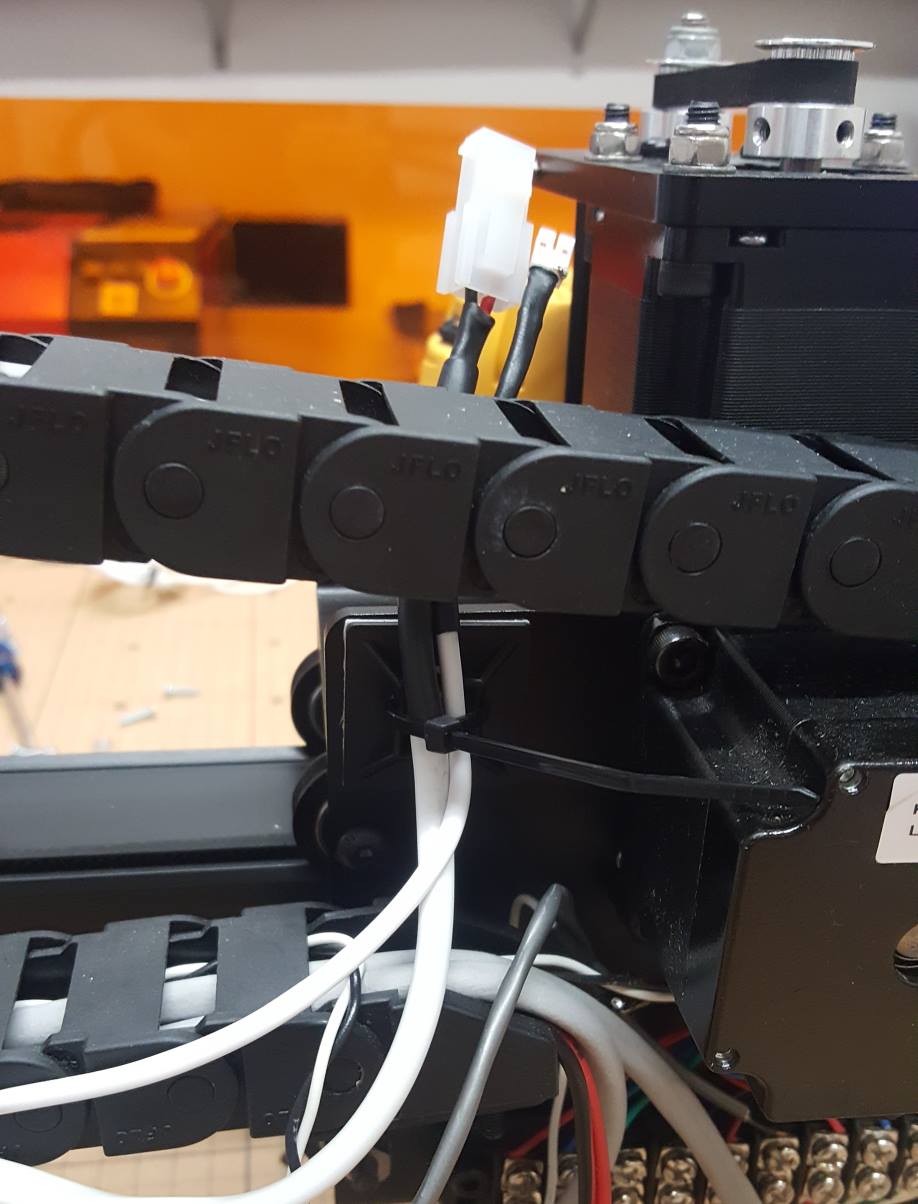
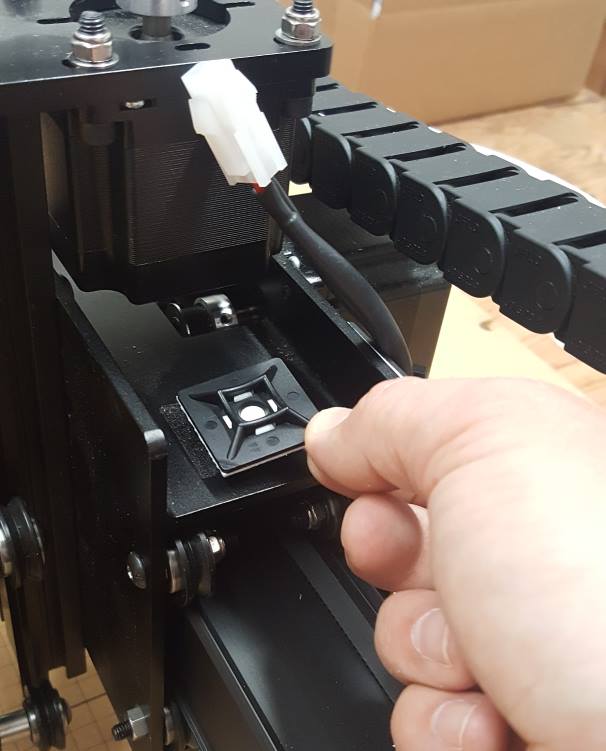
STEP 1: Put a Zip Tie Holder on the Back of the Z Gantry Plate
We are going to start by routing the laser and fan extension cables. This zip tie holder will hold the ends of the extension cables in place.
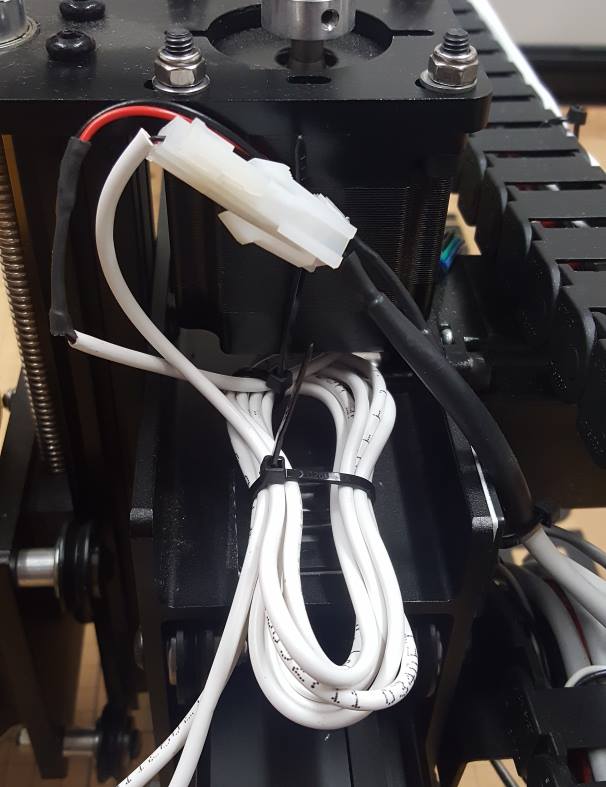
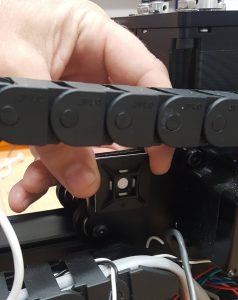 STEP 2: Zip tie the End of the Extension Cables to the Holder

This will make sure your ends are in the right place.
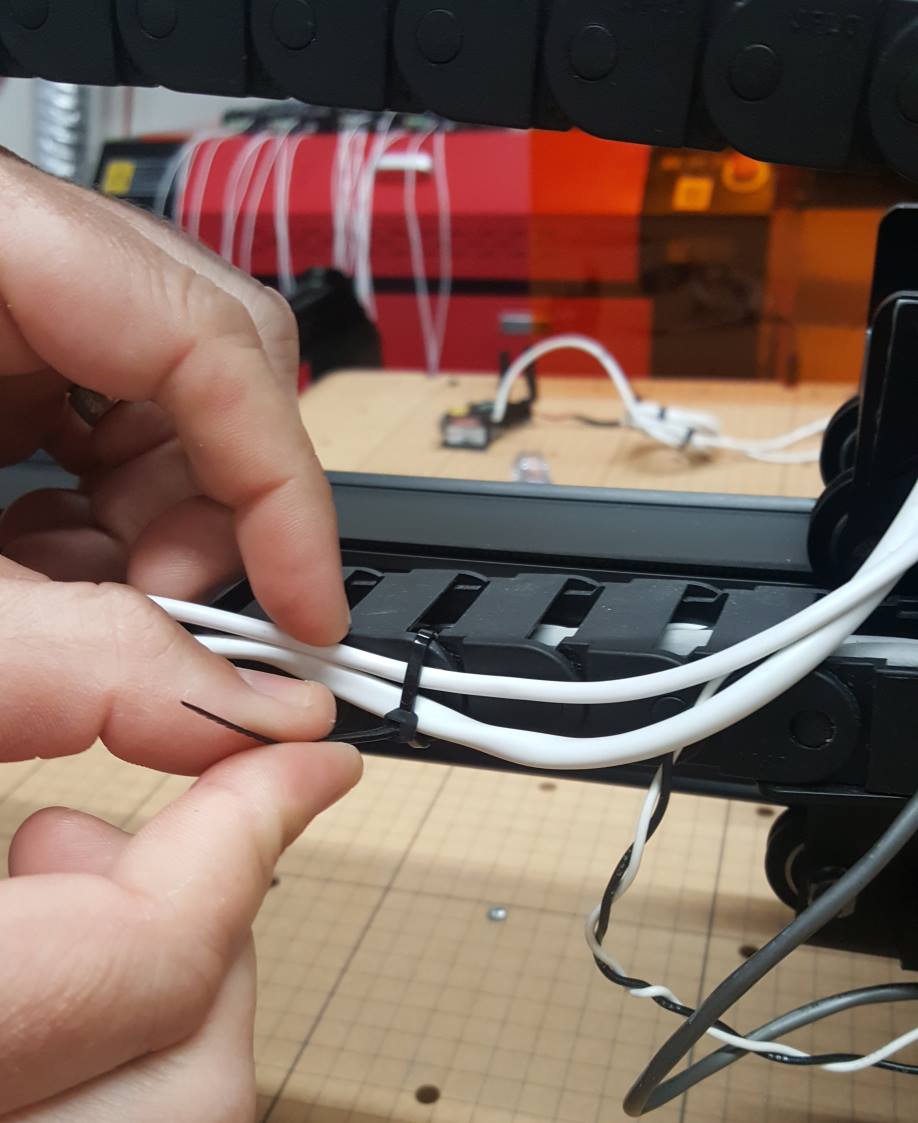
STEP 3: Zip Tie the Extension Cables to the Drag Chain
Put Zip Ties on the outside of the cable chain and attach the extension cables to it. If you have not started building your X Carve, put the extension cables on the INSIDE of the cable chain. If you have already built yours, it is very hard to get them inside the chain, so we opt to just put them on the outside.
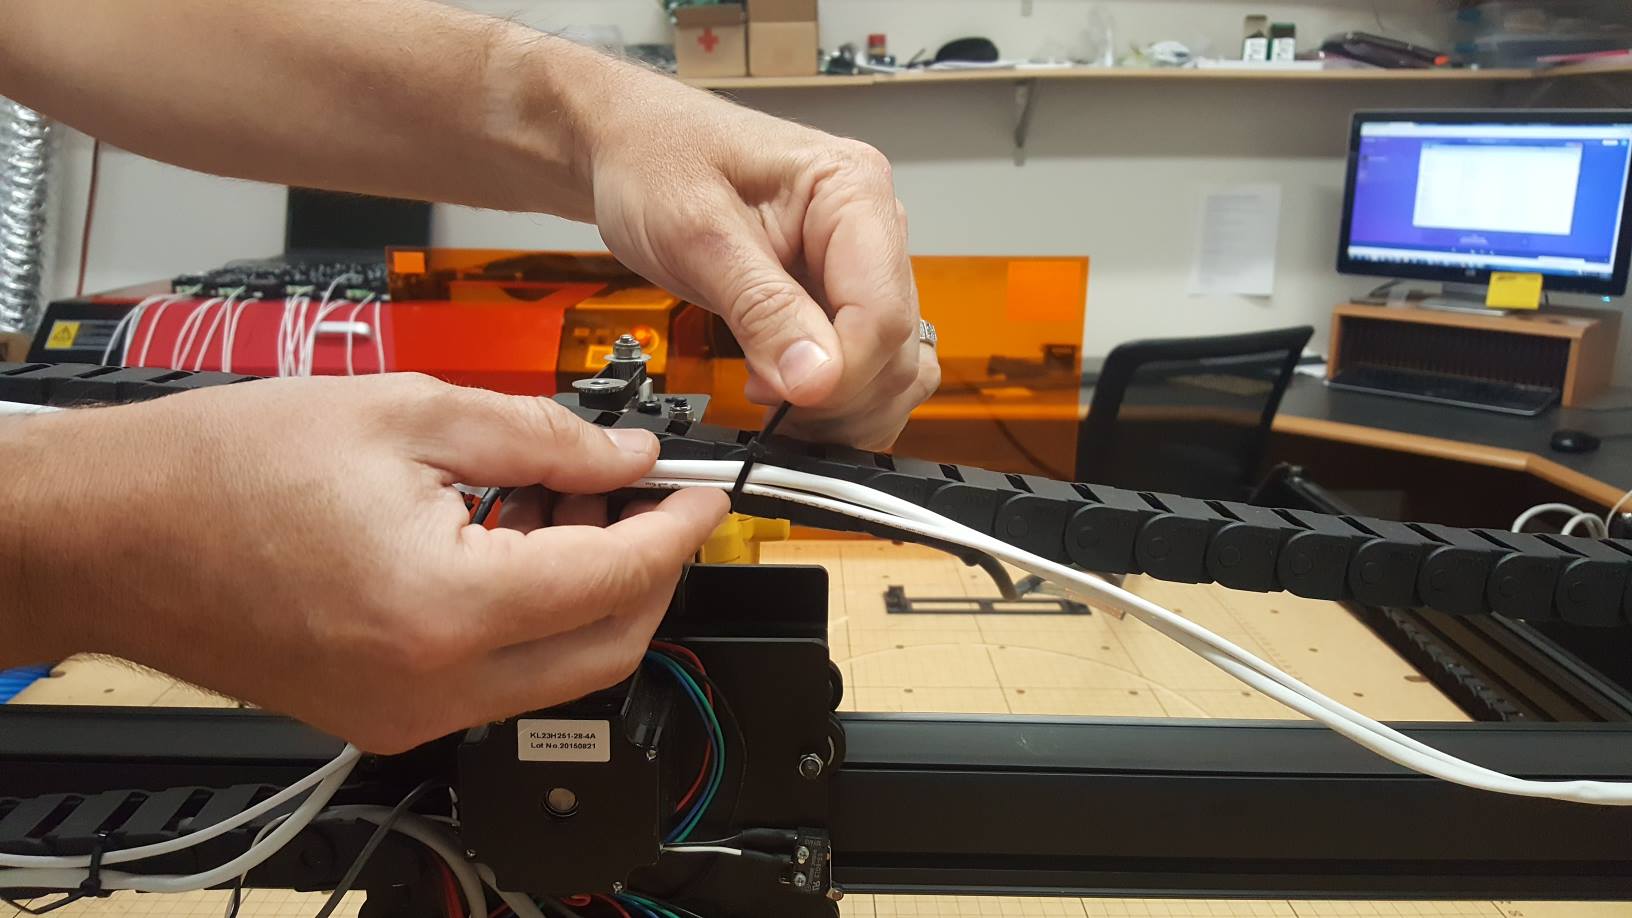
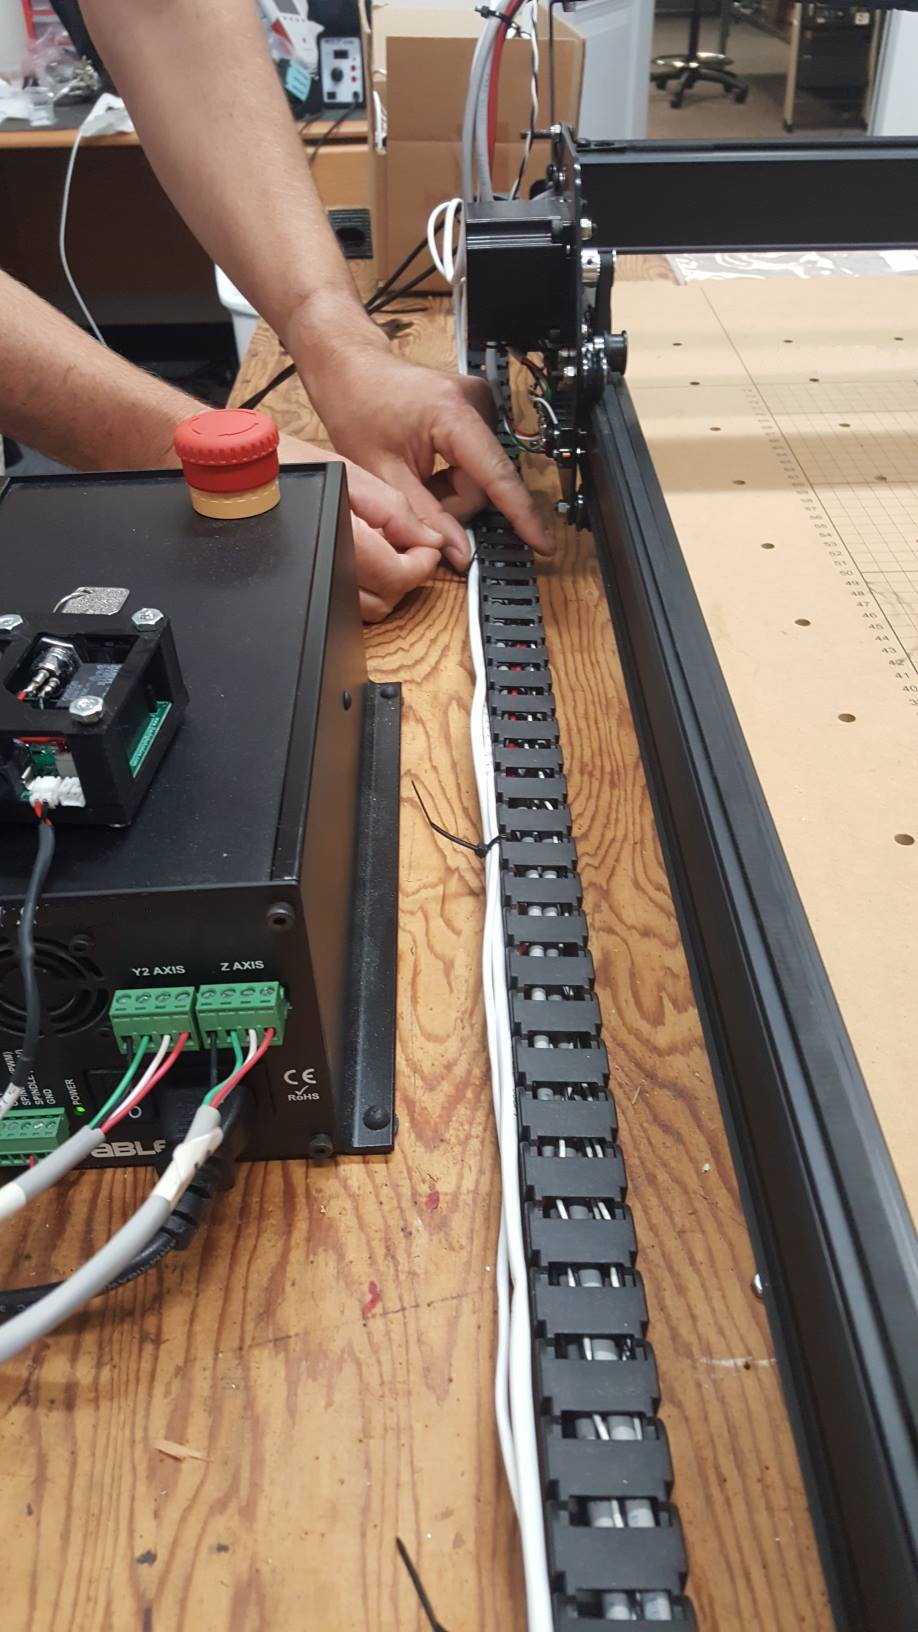
STEP 4: Keep Doing Zip Ties on the Side
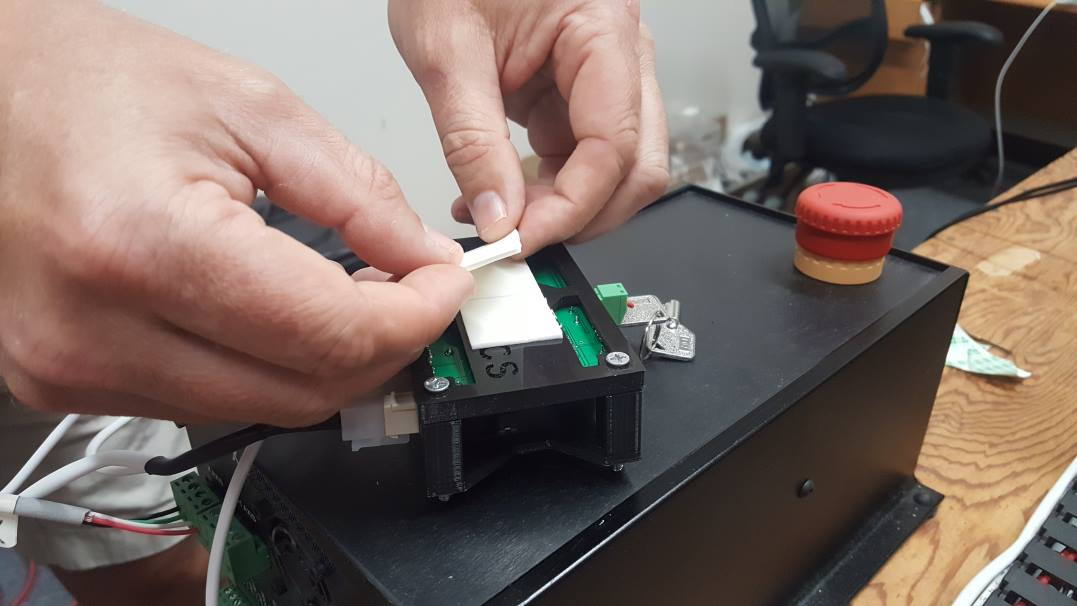
STEP 5: Put Sticky Tape on the Bottom of the Laser Driver (you can skip this if you want)
Not needed, but maybe nice to keep the laser driver from moving around. You can put the sticky tape on the bottom of the laser driver and then place it on top of the X Controller.
STEP 7: Connect the Fan cable to the Laser Driver
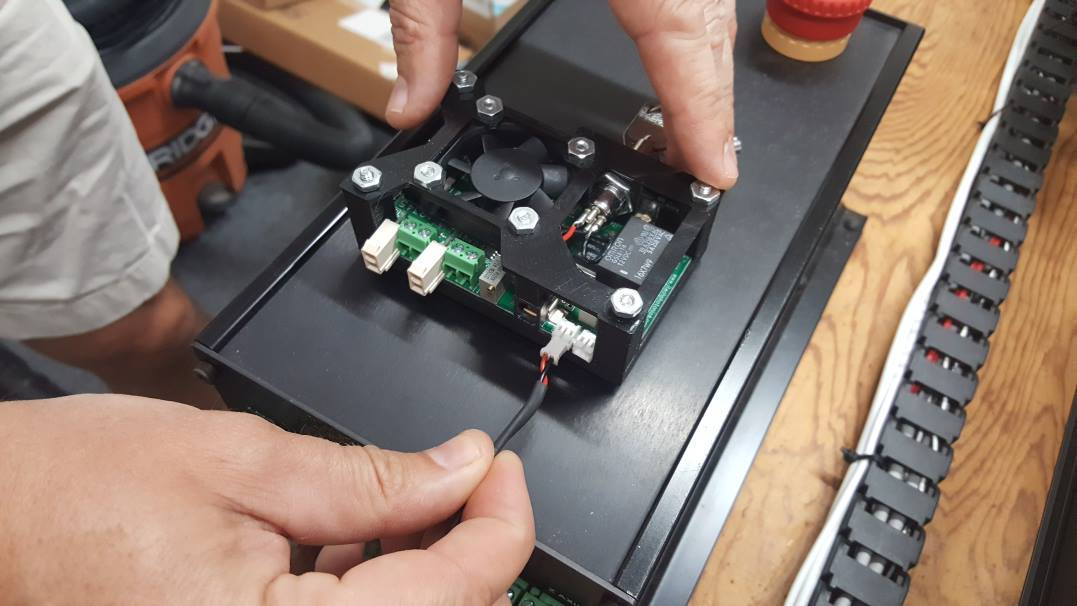
STEP 8: Connect the Laser Cable
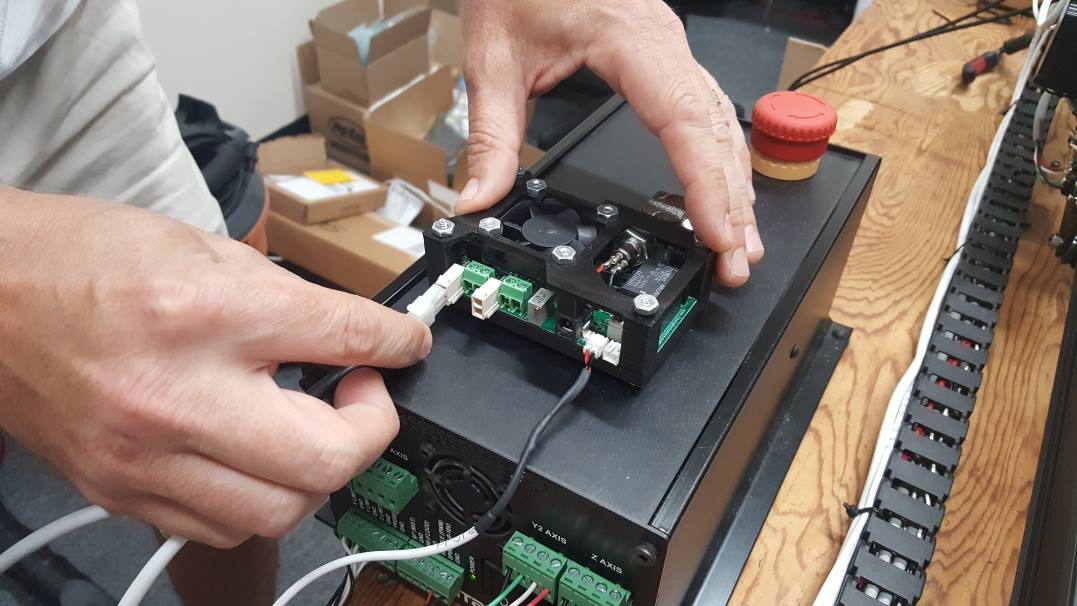
STEP 9: Connect the Laser Driver Input to the X Controller
Take the Molex Mini Fit Jr. 3′ cable and connect it to the X Controller back side signals. You can shorten the Molex Cable if needed. Connect them:
RED WIRE -> SPINDLE (PWM)
BLACK WIRE -> GND

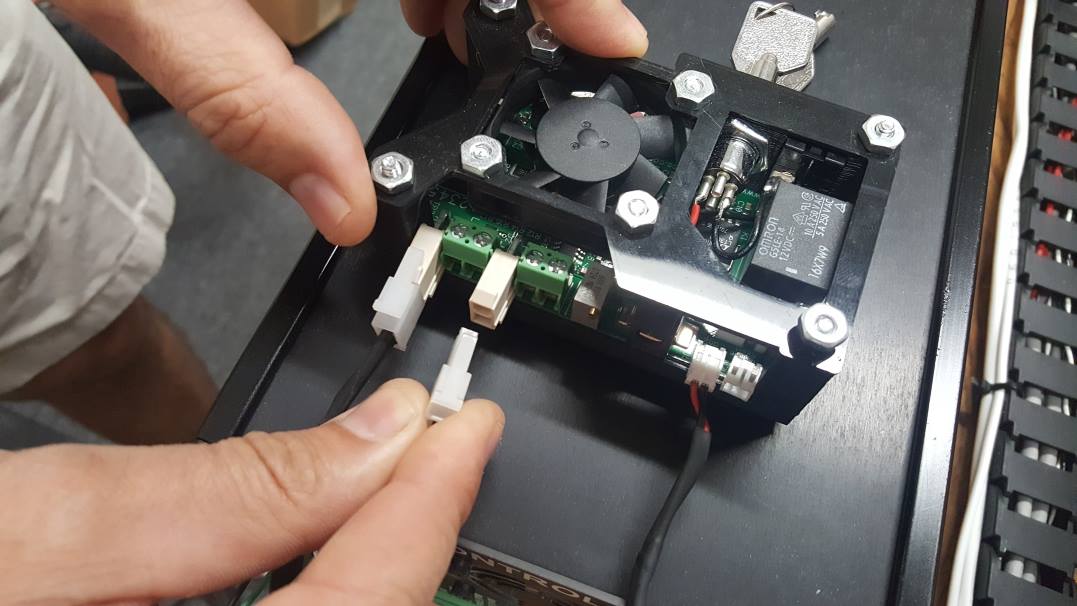
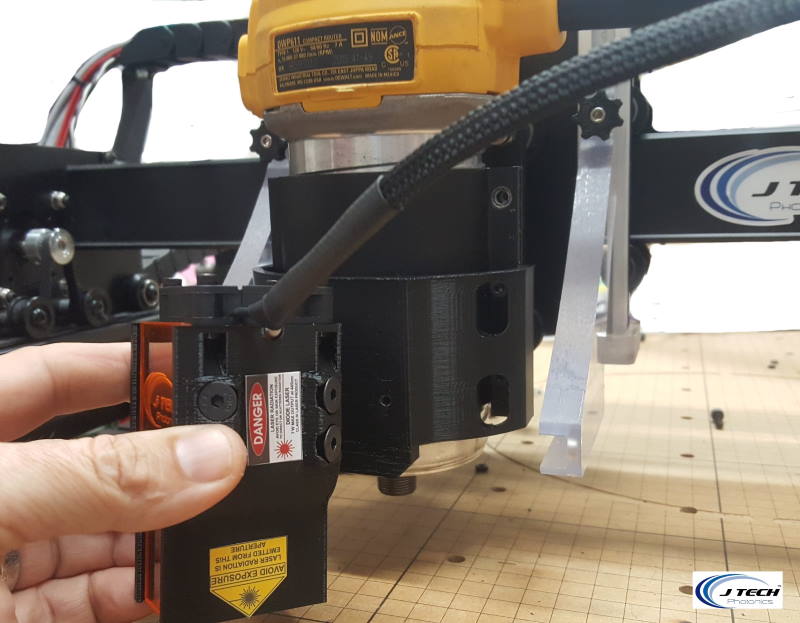
STEP 10: Connect Input Cable to Laser Driver
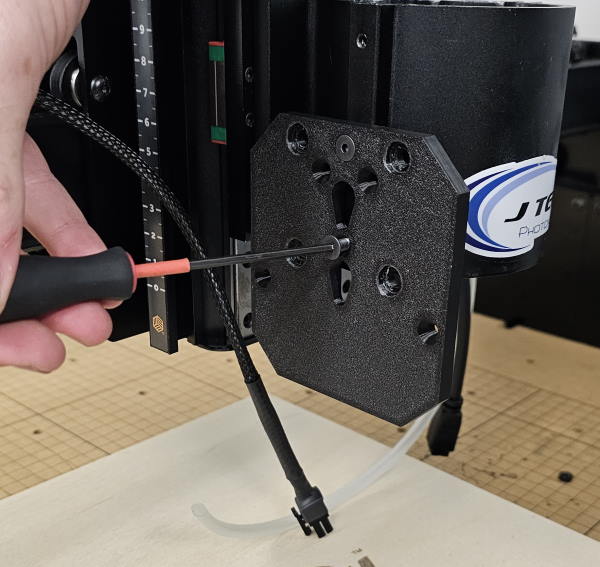
STEP 11: Attach the laser mount
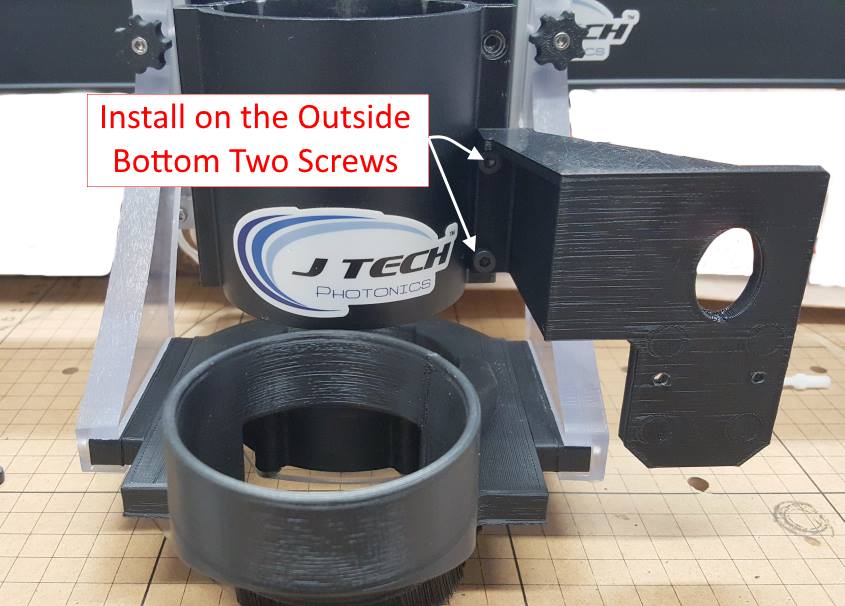
Dust Boot Installation:
To mount the magnetic dust boot mount, put it on the bottom two holes on the OUTSIDE of the spindle holder slot.
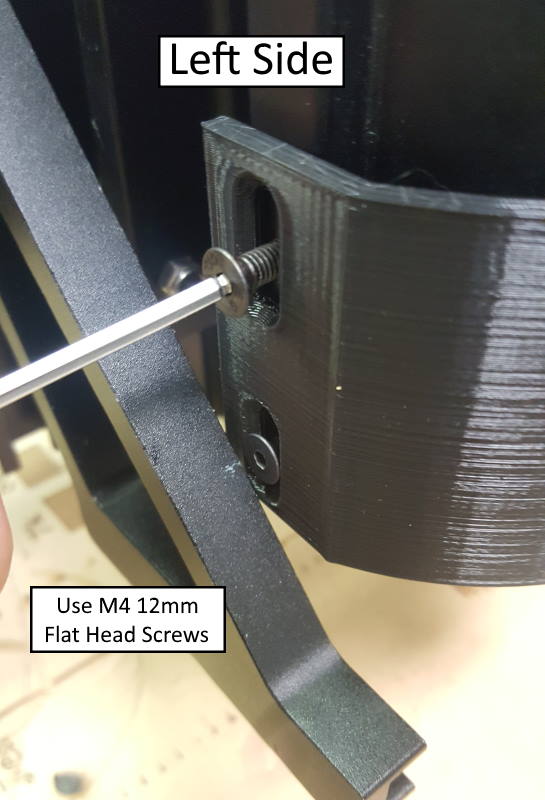
Front Mount Installation:
For the newest front mount, use the M4 12mm screws for the left side and the M4 16mm screws for the right side. Put the RIGHT side in front of the slot for the spindle hold down and use the two M4 20mm Screws and Nuts to hold it in.


STEP 12: Put Zip Tie Holder on Gantry Top
Place a zip tie holder on the top of the gantry to clean up the laser and fan cables. You don’t need to do this if you want to be able to remove the laser quickly.
STEP 12: Clean up the Cables and Connect Extensions to Laser and Fan
You can attach the extra cable to the zip tie holder on the top of the gantry. Then, connect the extension cables to the laser and fan cables.
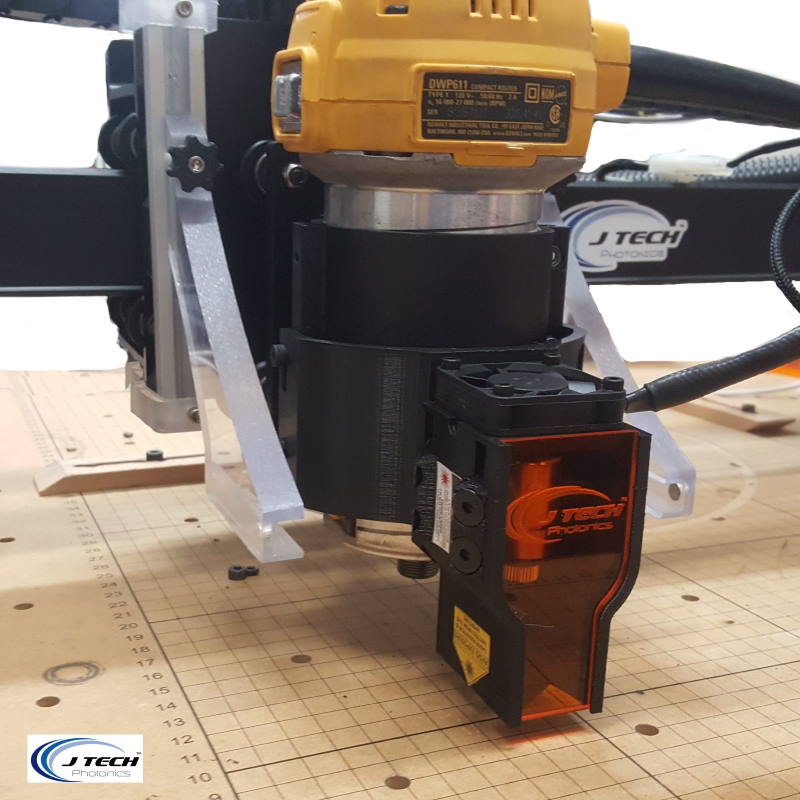
STEP 13: Focus the laser
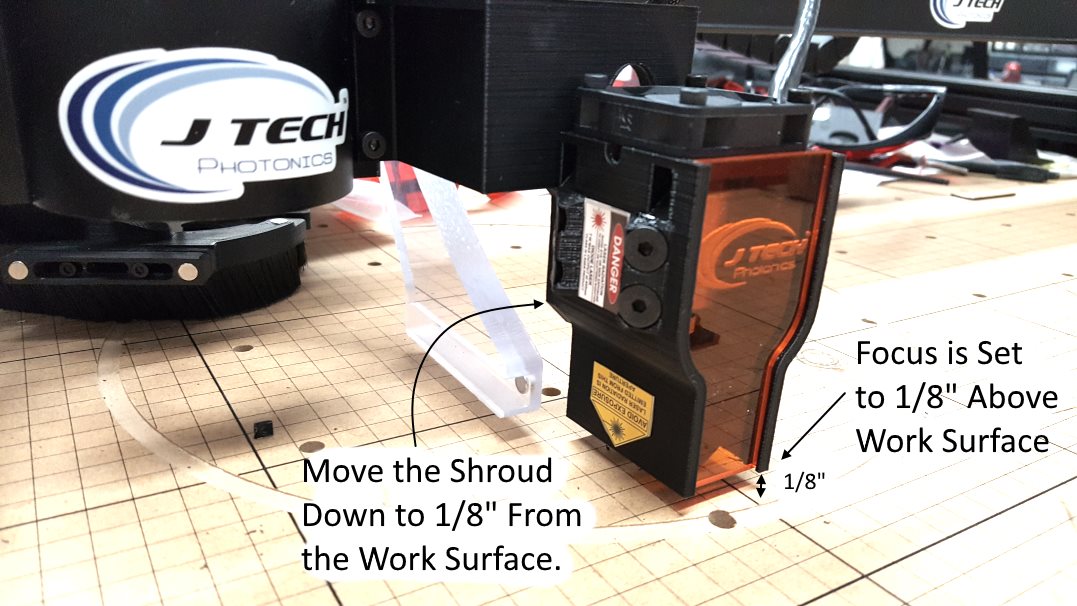
Laser Shroud Focus
If you purchased the laser shroud, then your laser came pre-focused to 1/8″ above the work surface.
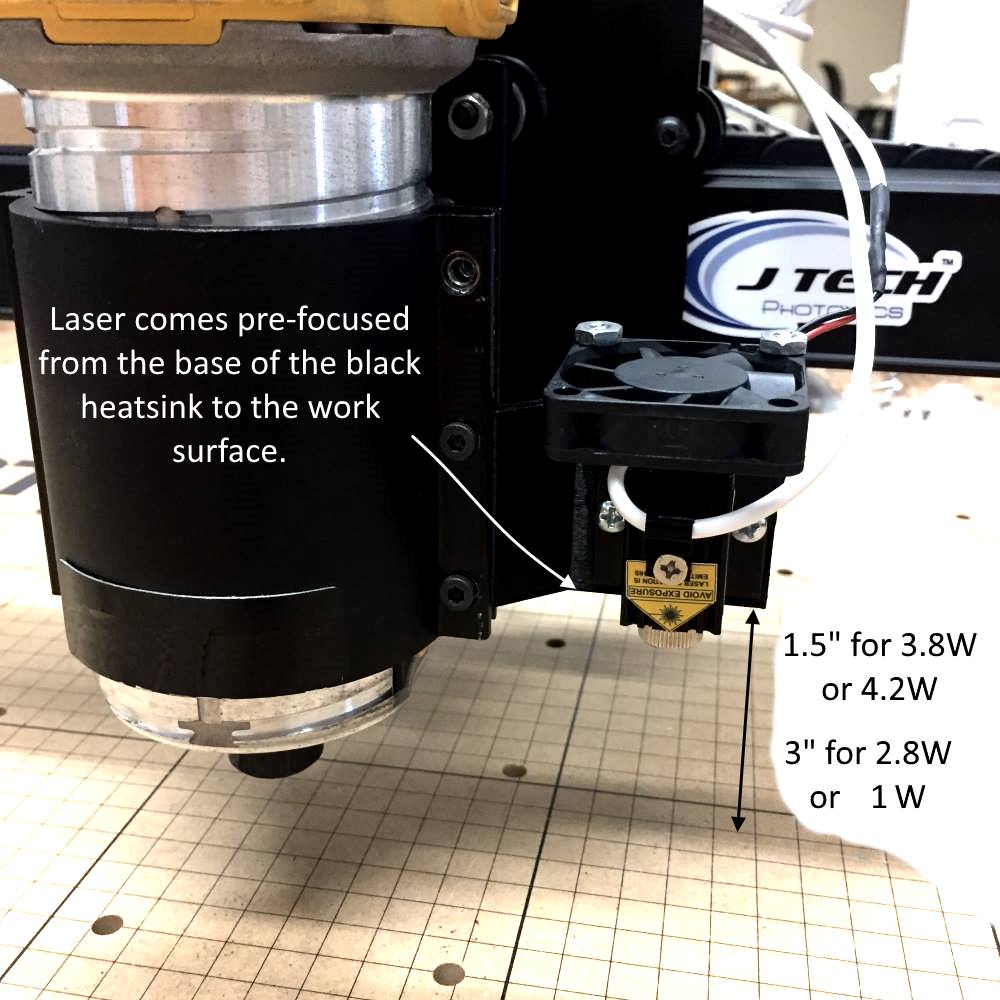
If you did not get the shroud, then the focus is set to the bottom of the base of the black heatsink.
You are now DONE!
Additional Upgrades:
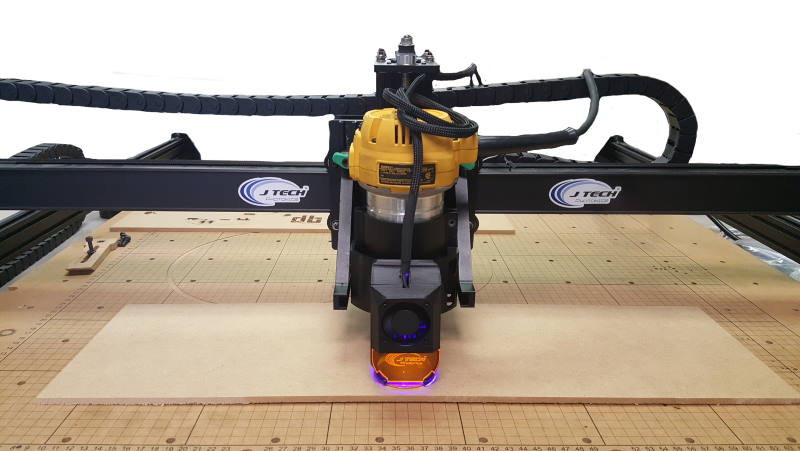
We put a FEIN Turbo vacuum on our machine to suck the fumes out, and we mounted two lasers to our machine so we can do testing here easily with both the 2.8W laser and the 3.8W laser. You can see ours doing an image engraving in the picture. Of course you can add laser shielding to your machine for more protection!
Running your X Carve with a Laser
Make sure to press the red reset button to enable the laser driver:

You can read on how to focus the machine in the following blog post here:
Make sure you have all your safety equipment and goggles on before you start your laser. Always keep a fire extinguisher available as well close by. We have not had any problems, but it is always a good idea to know where on is when using lasers.
You should not need to do anything to change between using your router and using your laser. Just make sure you have your laser driver turned OFF so you don’t accidentally burn something when using just the router.
So there it is! Now you are ready to start creating!
Purchase Laser and Mounting Kit HERE
Remember Safety First!
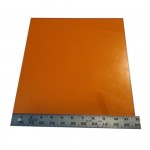
We sell laser shielding to block laser radiation and reflections!
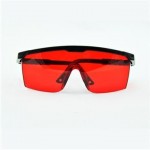
Laser Goggles are also a must!
Disclaimer
The laser used in this project is very powerful and all safety precautions must be taken. Use proper safety eyewear to prevent injury to eyes. This is a project and J Tech Photonics, Inc. is not responsible or liable for any and all damage or injury caused to people or property. The use of these instructions to make a laser cutter is under your own discretion and all safety precautions should be followed. J Tech Photonics, Inc. is not affiliated in any way with X Carve or Inventables and they may change hardware and software at any time making these instructions invalid.
I need to be able to laser cut 1/8 thick to 3/8 thick balsa. Which wattage lasers can handle that?
Also how long for delivery if I order by Jan 15th?
All of the lasers will be able to cut balsa wood. The higher the power the faster (and less passes) you will need. The 3.8W laser kit will be the best at cutting.
Hello will your 3.8w laser kit work with the x carve i am very interested and I want to buy this setup i believe you guys are the first to do this to the x carve
thanks
All of our laser kits will work with the X Carve. Yes, I think we are the first for this. We have been selling upgrade kits for four years now and have been successfully upgrading the Shapeoko kits before the X Carve.
Which parts do you recommend taking off while using the router? I see the laser driver is easy to remove and reattach, but the laser itself seems more difficult. Is it safe to leave the laser attached while using the router? Will the dust not clog the lens?
Hi Steven,
You can take both the driver and the laser off if you want, especially if you are doing a large routing project. It is not that hard to take the two screws off the router mount for the laser mount and remove everything.
If you are just doing small routing jobs, you can keep the laser on the machine. I put a bag over the laser to protect it. If you leave it with nothing protecting it, then make sure you give the lens a little clean with some alcohol and a microfiber cloth (like you would use with your glasses) before you use it again. If the lens moves while routing, you can put some PTFE tape on the threads to make it stay in place better. If you do this, make sure you watch out for the spring when taking the lens out.
Just got my laser 2 week ago iy was supose to be use with my i3 printer but decided to wait for the x-carve that should be here by the end of the month. And foud todays these tutorial. I just hope i made the right choise for my carve i decided to get the new x-controler. from my basic electronic knowledge i think i see all the necessary pinout but there is no arduino on this one they made their own controler but look like it’s loaded with the same version has the arduino will the 0.9g GRBL Firmware work? or should i change my order to a less powerfull controler on the xcarve?
thank you
Yes, the laser will work with the new X Controller. Connect the laser “+” signal to the front panel “Spindle PWM” on the X Controller. Connect the laser “-” signal to the “GND” on the X controller. You can use the installed firmware for most things. Full power will be M03 S10000. 10% power will be M03 S1000. If you want to do grey scale picture engraving, our firmware should work as well. Make sure you copy your settings in GRBL before you upload the new firmware. We will be testing this out soon on our own X Controller to verify everything works.
Here is a picture of how to install: X Controller Laser Connections
my JTechPhotonics used to work using M03 S10000 for full power and M03 S1000 for a lower power, but since a few months ago, all the commands are full power, and now I can not have grey engraving. Can you please help me troubleshooting this?
Can it cut aluminum
Hey!
I want to engrave cork with the laser, and I can’t decide wether the 2.8 or 3.8W laser would be best. I would take the 3.8W one because it would go faster, but do you think it will be too intense?
Hello
I read this many times, but the wiring between Arduino and laser and other wires not clear for me, can you please upload a diagram for this connections it better.
Added the new wiring diagram to the instruction page. It is here:
X Carve Laser Wiring Diagram
I really cannot imagine being more pleased with this product; the kit the diode, everything. Pick up an extra set of goggles of you want to show this off to people. No, seriously, don’t even let your shop guests glance at the output without protective glasses on. It is fairly reckless to do otherwise.
If you’ve read this far, then you’re probably a maker. And you should know about the eye thing.
Rant over:
This product is not only easy. But I have to admit that it was fun, too. My Z belt needed cleaning and tightening anyway. It is a very fast assemble. Go for it!
There are keys. So you can jangle around the shop like a big shot while you’re not using the laser
And I’m not even going to touch the coolness factor of having a “frickin laser” on my gantry.
If I were to list a fault that might be helpful, the extension that holds the diode does jitter like the bug of the same name when you’re drawing complex and/or jerky paths. Perhaps an upgrade that enhances the integrity of the spot vs gantry’s (relative) 0,0,0.
And if you’re persistent enough to have read this far, they actually have a pretty cool upgrade coupon. If you’ve purchased a kit from them previously, enter “laserupgrade” to get the $100 discount on a 2.8 or 3.8 laser diode.
I am a very pleased customer.
hello. i am stuck with uploading old grbl settings after i flaseh jtech 0.9g,,,
Will my z-probe and limit switches, still work if i update the firmware on my X Controller to J TECH GRBL 0.9g
I posted this on the X-Carve Mounting as well.
This worked out great. I hit one hiccup. I don’t know if what JTech based their files off is the same exact setup I have. I originally had a Shapeoko 2, and did Inventables upgrade to the X-Carve and X-Controller. My guess is the motor sizes that were standard are different between the too. That being said, my Z axis is mounted on a kite format (diamond) compared to the square format that is provide here. It is also mounted with different size screws. Lucily, I had extras to use the 4 corner mounts provided. I will need to make spacers, since the driver mount is sort of floating about a 1/4 off my Z Axis Plate. JTech, if I can some help with improving your product, please let me know. Other then that, so far I am loving having a laser. Just got it Focused to my machine.
will 1.0c allow to adjust as it goes, or will it work like 0.9i where it stops all the time? Also what is the difference in the HEX files from 1.0c to 0.9g so i can switch back and forth? Also i noticed a mention about working on 1.0c to make it work better with your laser. Any update on this? I just got it, and fought it for a week before i could get it working right as far as moving at all.
I am using a tinyg for controlling the xcarve. Do you have a diagram for the wiring to the tinyg? Which codes would be used to control power?
I have a GRBL 0.9, using UniversalGCodeSender 2.0 and was able to use PWM using M03 S12000 or M03 S4000 for engraving, but now if I use, for example, M03 S4000 it turns on at full power, how can I set the laser to use PWM at lower power to engrave again?
Can this come with a 240v/250 power supply for NZ
Can this come with a 240v/250 power supply for NZ and will this cut acrylic
Hi, I am trying to run your inkscape plug-in with universal gcode sender on the X-carve. I am using inkscape 0.91 and the corresponding plug-in from jtech. It looks like a very powerful toolset
I have two problems:
1. the Scale: For the laser to engrave a 10mm square I need to draw a 1.7mm square in inkscape.
2. the z-axis seems to be inverted. If I program in 5 passes of 0.1mm depth cut the laser moves up rather than down.
Could you point me in the right direction as to how to fix these issues?
Hello,
Considering one of these kits for my X-Carve. Can any of these lasers cut single-layers of either carbon fiber fabric, Kevlar fabric or fiberglass fabric?
Hi,
Sorry to ask a dumb question. I read the instruction many times, but still not sure how do I start. I already install the laser to my 500mm xcarve, but don’t know the first step to do like turn on the laser, load the file and engrave.
I’m interested in this product but I’m not sure it will do what I need it to. I need to cut up to 0.5 in HIPS (High Impact PolyStyrene) can it do that?
Hello guys, i have followed all of your installation instructions and my laser works. I have not been able to use it with any of the software. Is there a software for the laser that is easy to use as Inventable’s Easel?
Sorry for the delay- Lightburn is the software we recommend for using the laser. It is here: https://lightburnsoftware.com/pages/trial-version-try-before-you-buy
I have a X-Carve 700mm machine. What is the best upgrade kit I can purchase. I was looking at the 4.2W and I was wondering is there any other equipment that I need to purchase is I get the upgrade packet.
Order under the X Carve All in One Bundle Here: https://jtechphotonics.com/?product=xcarve-all-in-one-laser-and-mounting-kit-bundle
It will have everything you need to get started.
When I connect to lightburn it only give me the option for COM5 not COM4 and I cannot connect?
I have the 14W laser on my X-carve. Is there a basic setting document for different materials to use in LightBurn?
How do you use the two extra M3 screws and nuts to attach the laser shroud permanently? The provided screws are too long and clash with the spindle holder. The standard screws are too short. I have found some that are the correct length, but you cannot fit them using the captive nuts as the shroud covers two of the four laser mounting holes. My conclusion is you cannot permanently mount the shroud, which is a problem as the magnets are not strong enough to prevent the laser moving during accel and decel. What am I missing?
I have a 7w laser and struggling to cut 3mm plywood. Have 1/8 inch distance checked prior every job and have tried different speeds and power. Max power 600mm/s 30 passes and still not a thorough cut. 200m/s full power 6 passes but I don’t like the cut burn… any suggestion ?
Do you have a laser upgrade for the X-carve pro?
I have the X-Carve 1000mm with the Z-Axis, belts and stiffner upgrade kit. Will the 64 watt pro all in one kit work with this upgrade?