
 CNC Dust Boot
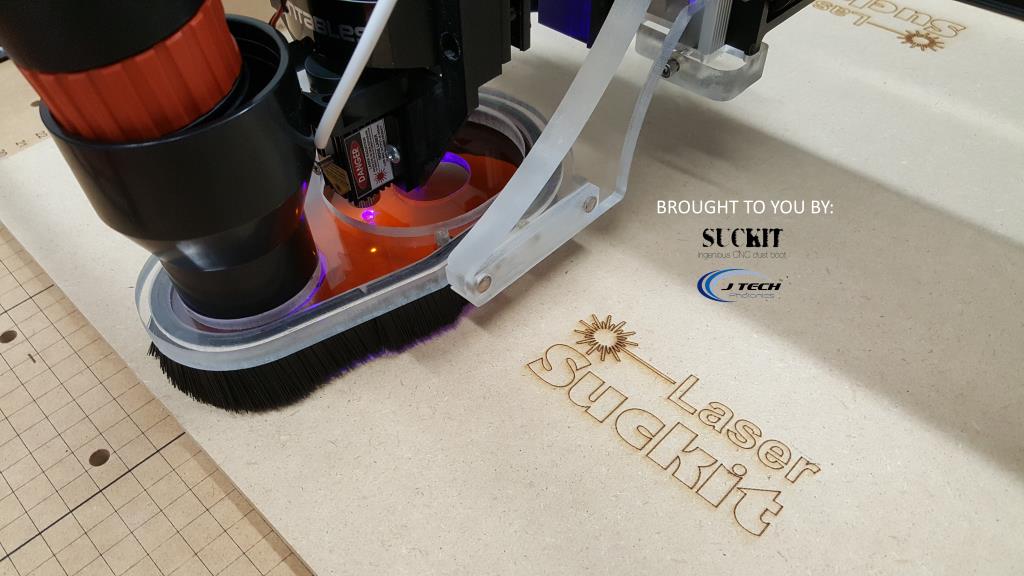
The guys over at Suckit Dust Boot have made a very nice dust boot for the X Carve and are working on the Shapeoko3 and Shapeoko2. We got our hands on one of the X Carve versions and decided it would make a great addition to our machine! First thing we thought was if you replace the clear plastic with one of our laser shielding pieces, then it will reduce the laser reflections and be much safer than just the exposed beam. You can also use a vacuum system to suck up the smoke from laser processing. We have converted our shop vac into a carbon filter system for the laser only. We do not recommend using the same vacuum system on carving wood as you do with the laser as there is a possibility of small dust particles catching fire in the vacuum.
You can either download the files and make your own parts, or you can buy them here in the shop:
Buy the LaserSuckit™ Cover Plate
Buy the LaserSuckit™ X Carve Mounts:
Side Mount
Bottom Mount
Check out the demo using the bottom mount:
It is a pretty cool addition to your CNC, so let’s get onto making!
Suckit Laser Shield Conversion
One of the big benefits of a dust shoe is that it will keep all of the debris off of your table. In the case of the laser, it will also help to remove smoke and keep debris off the laser lens, but also it can be converted into a safety shield for eye protection.
In the following instructions, you can either cut out your own laser suckit cover from our shielding pieces found here, or you can buy your own pre-cut piece here: Buy the LaserSuckit™ shield.
Let’s look at how to convert your Suckit into a LaserSuckit™!
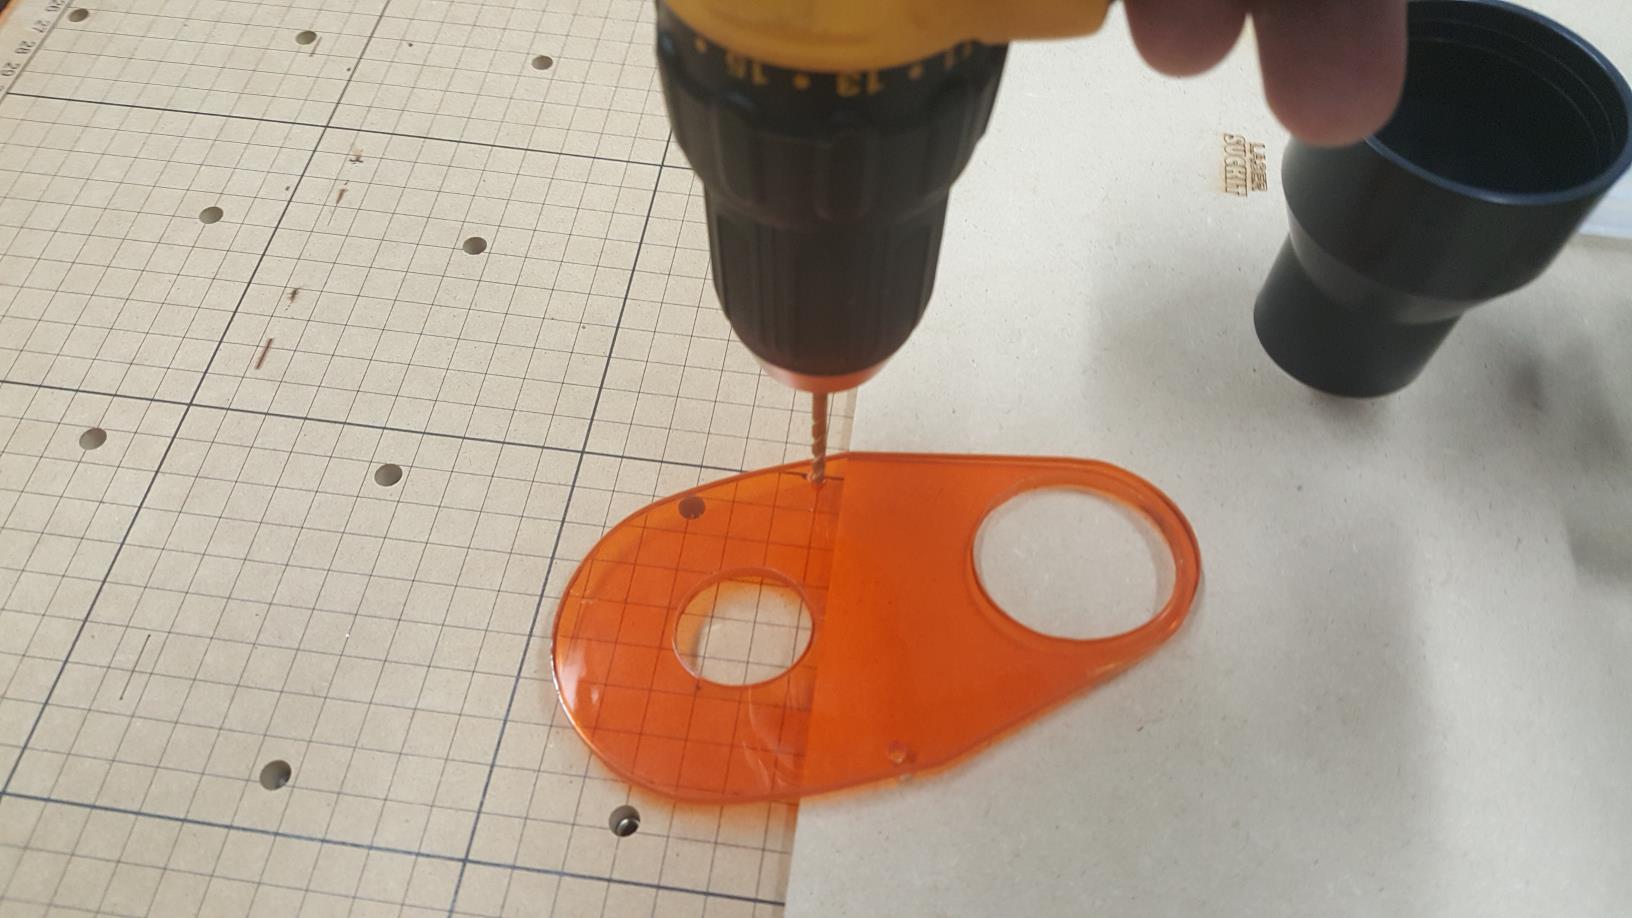
- Cut out a new laser shield piece. We used our 3.8W laser to do this. The G Code file is here: Laser Suckit Shielding Cut
2. Remove the clear plastic from the suckit by removing the two screws.

There is a small piece of plastic for the router shroud. Remove this.
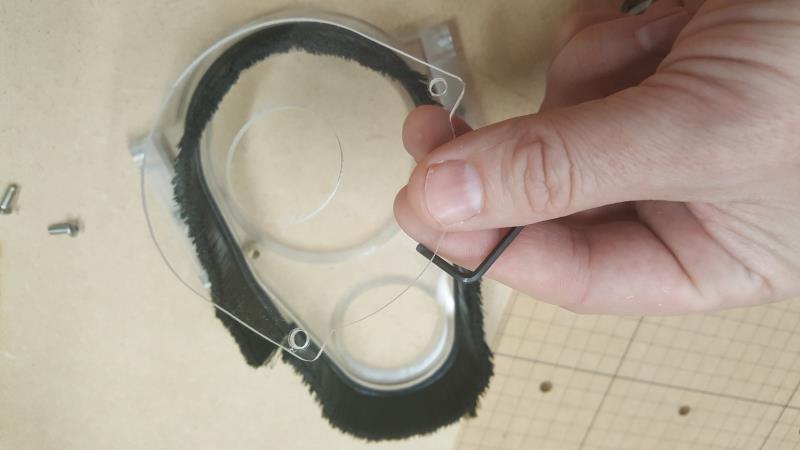
3. Take a 9/64″ drill bit and drill out the holes a bit more to make sure they fit the screws.
4. Put the new shielding piece on the bottom of the suckit and make sure you have the dust boot entirely away from under the shielding. Use the two screws to attach the new shielding piece on the suckit.
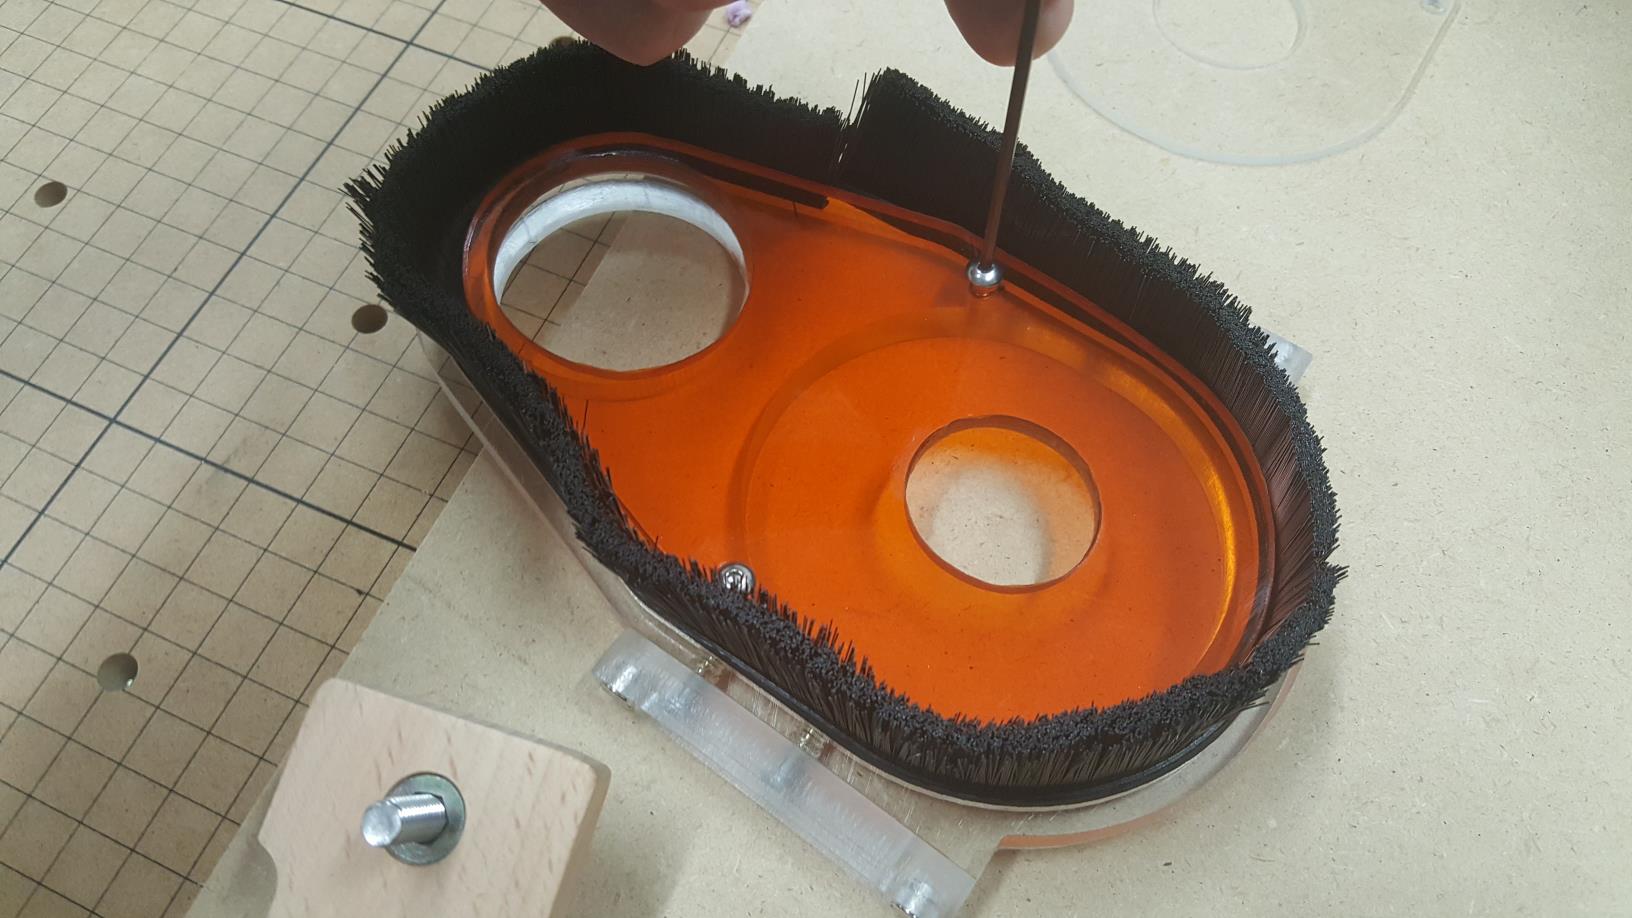
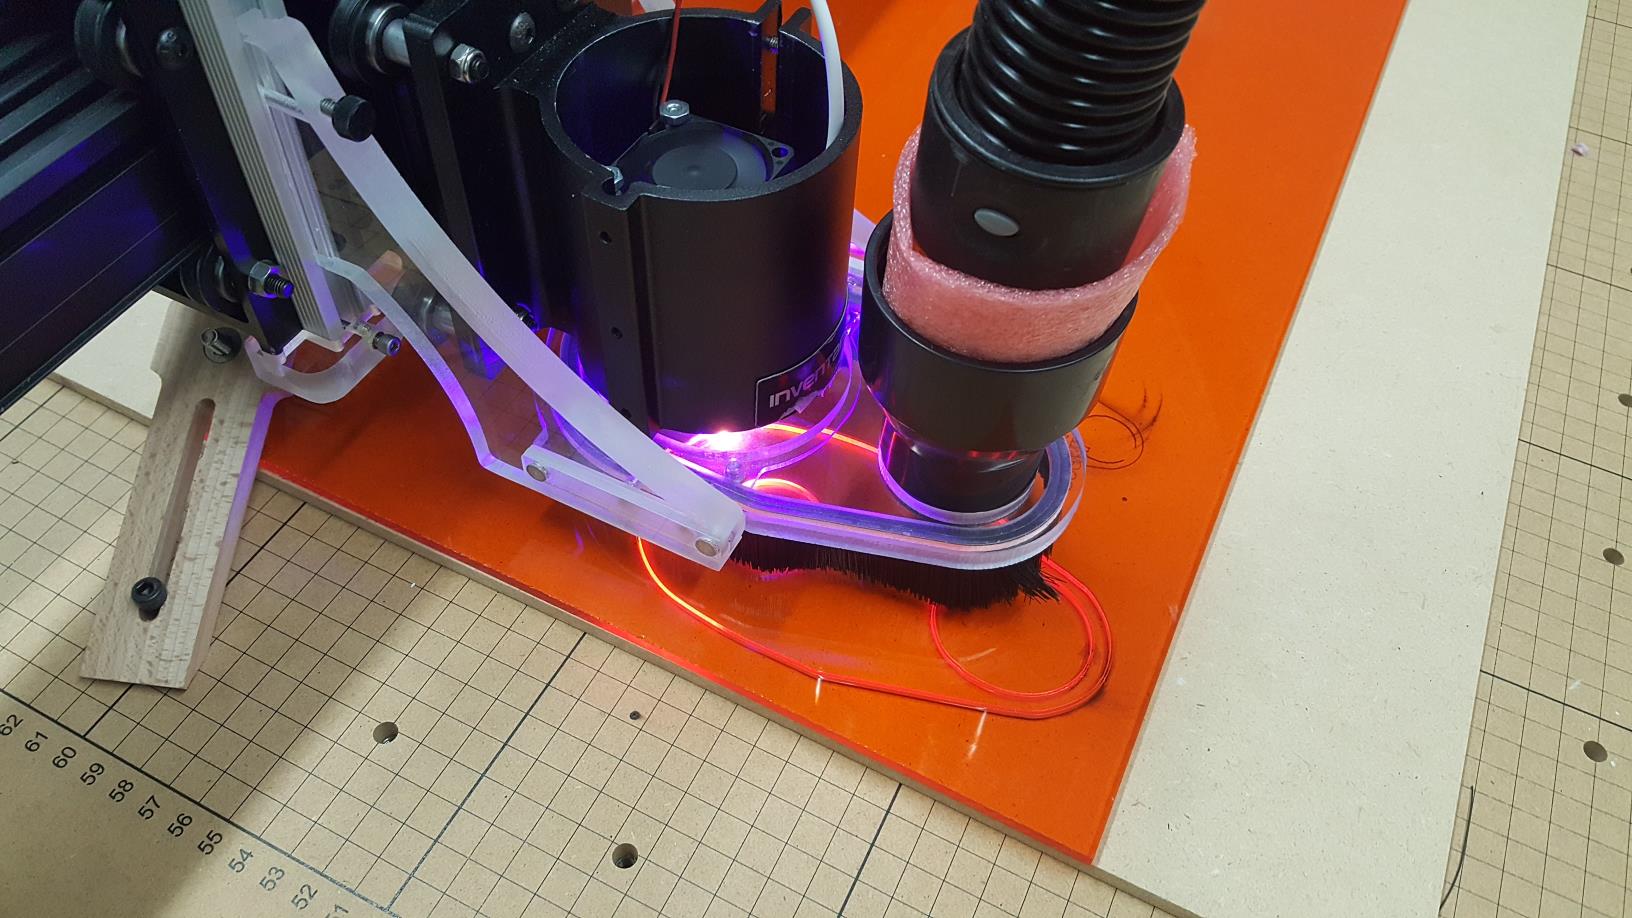
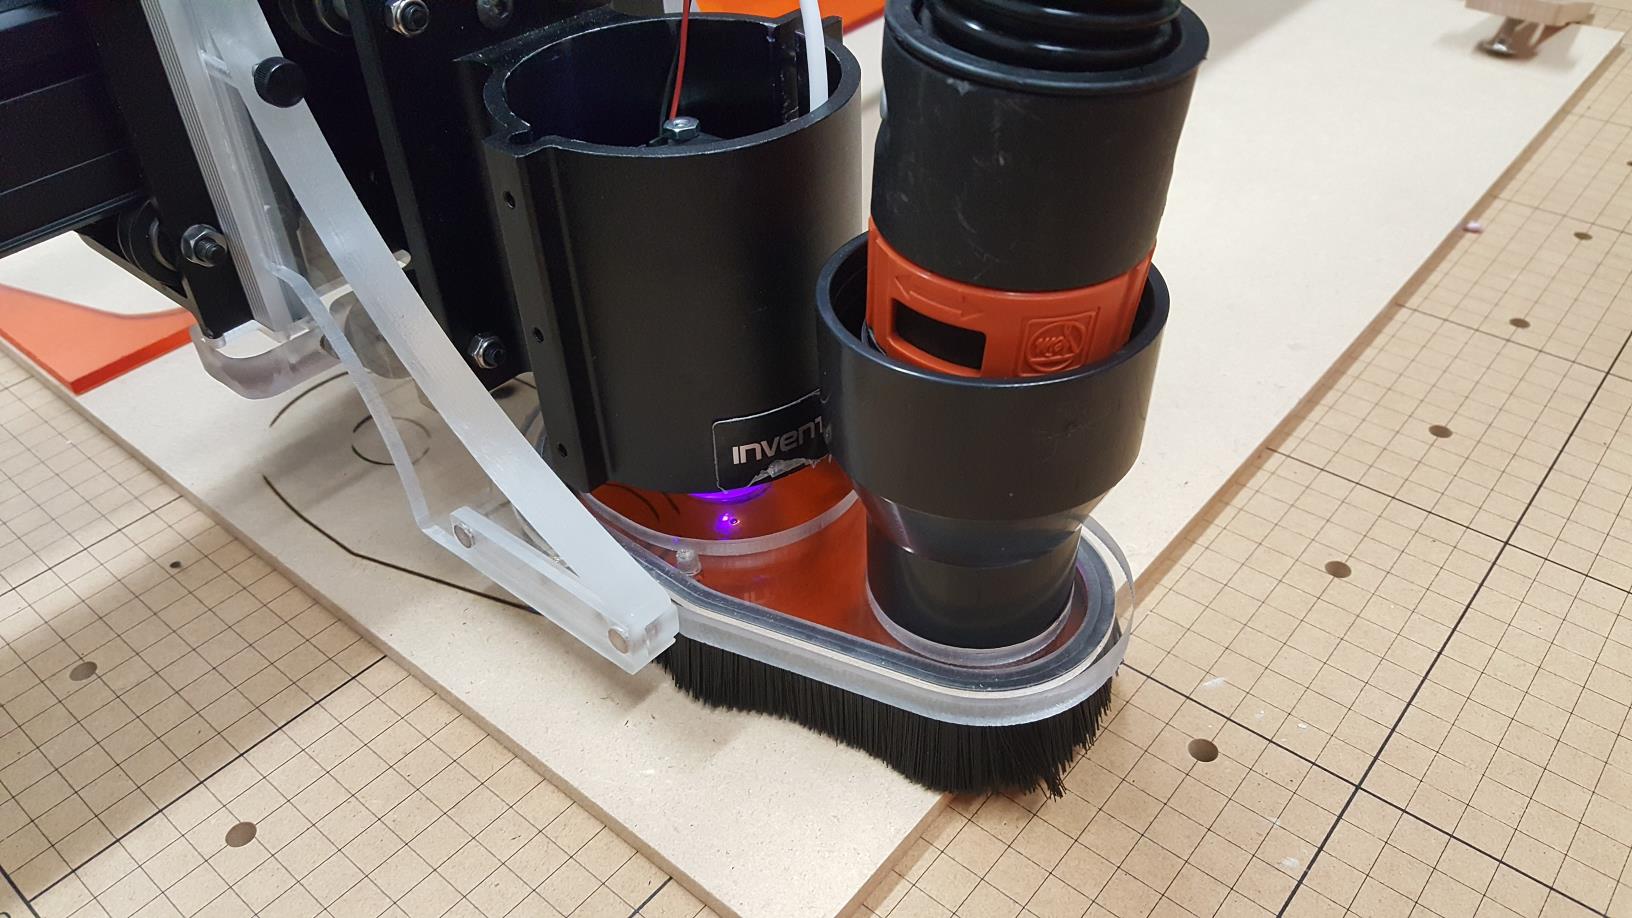
Here is the final product with the laser shield replaced and the dust boot installed.
Now, how are we going to mount our laser to it? That is a good question, so we will go over it in this post.
Three ways to mount a laser…
It would be great to have both the laser and the suckit working in conjunction to remove all of the smoke and debris from the laser process. So, we have made an effort to find a solution that not only allows the use of the laser but also the suckit at the same time, as well as one solution that allows for keeping the router and laser on the system at all times . There will be three options for using the laser and the suckit:
1. Just the laser and suckit (no router)
2. Laser and router together with removable laser
3. Laser and router together with no removing anything, but limited use of the suckit.
So, lets get started!
1. Just the laser and no router attached
In this method, we will take the router off the machine. This way is good if you are using your X Carve mostly for a laser machine and don’t do much routing. You will be using the standard laser mount that comes in the X Carve mounting kit to attach it to the dewalt 611 spindle holder. Instead of having it off the side, we are going to have the laser mounted in the spindle holder.
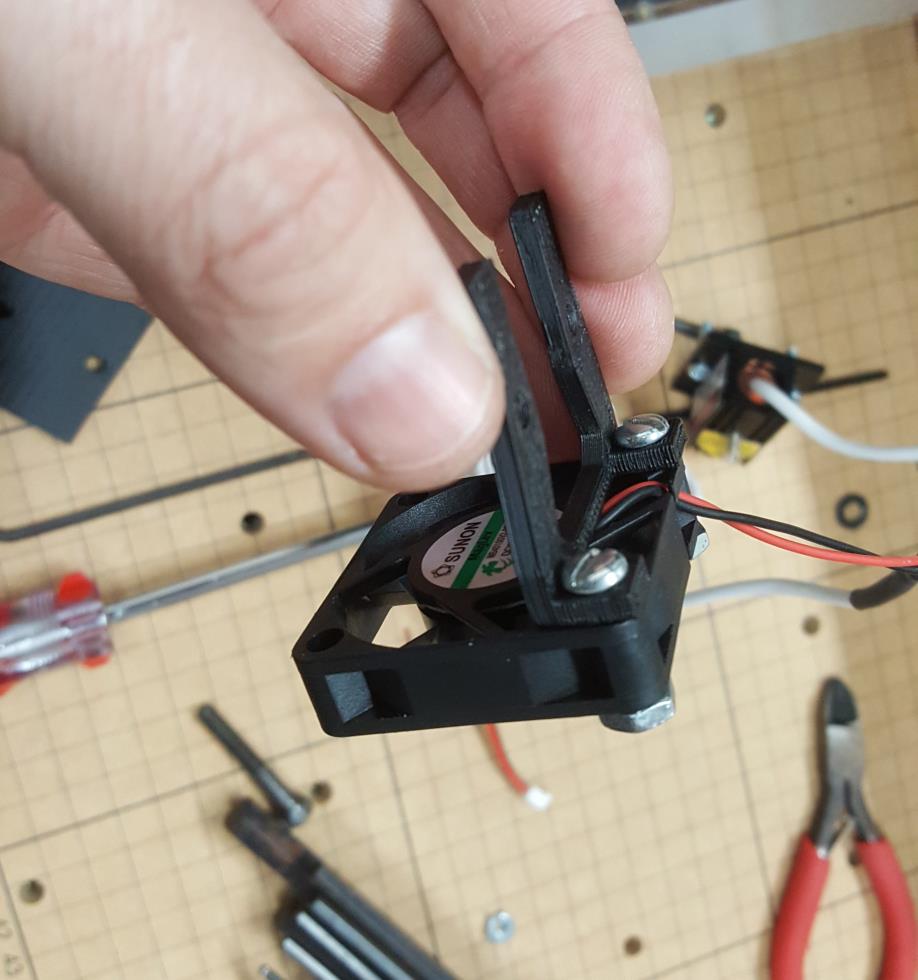
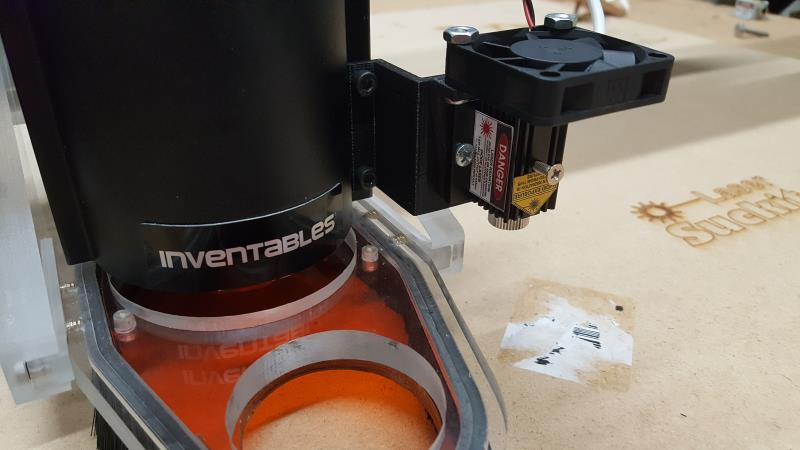
First, the fan mount needs to be assembled to fit in the spindle area. Note the orientation of the fan and the mount.
Put the fan on the bottom of the X Carve mount and then mount the laser on the top. Note the orientation of the X Carve mount as well.

Put the laser on the inside of the spindle holder on the bottom two screw points. Tighten the M8 screws that were included in the X Carve Mounting kit.
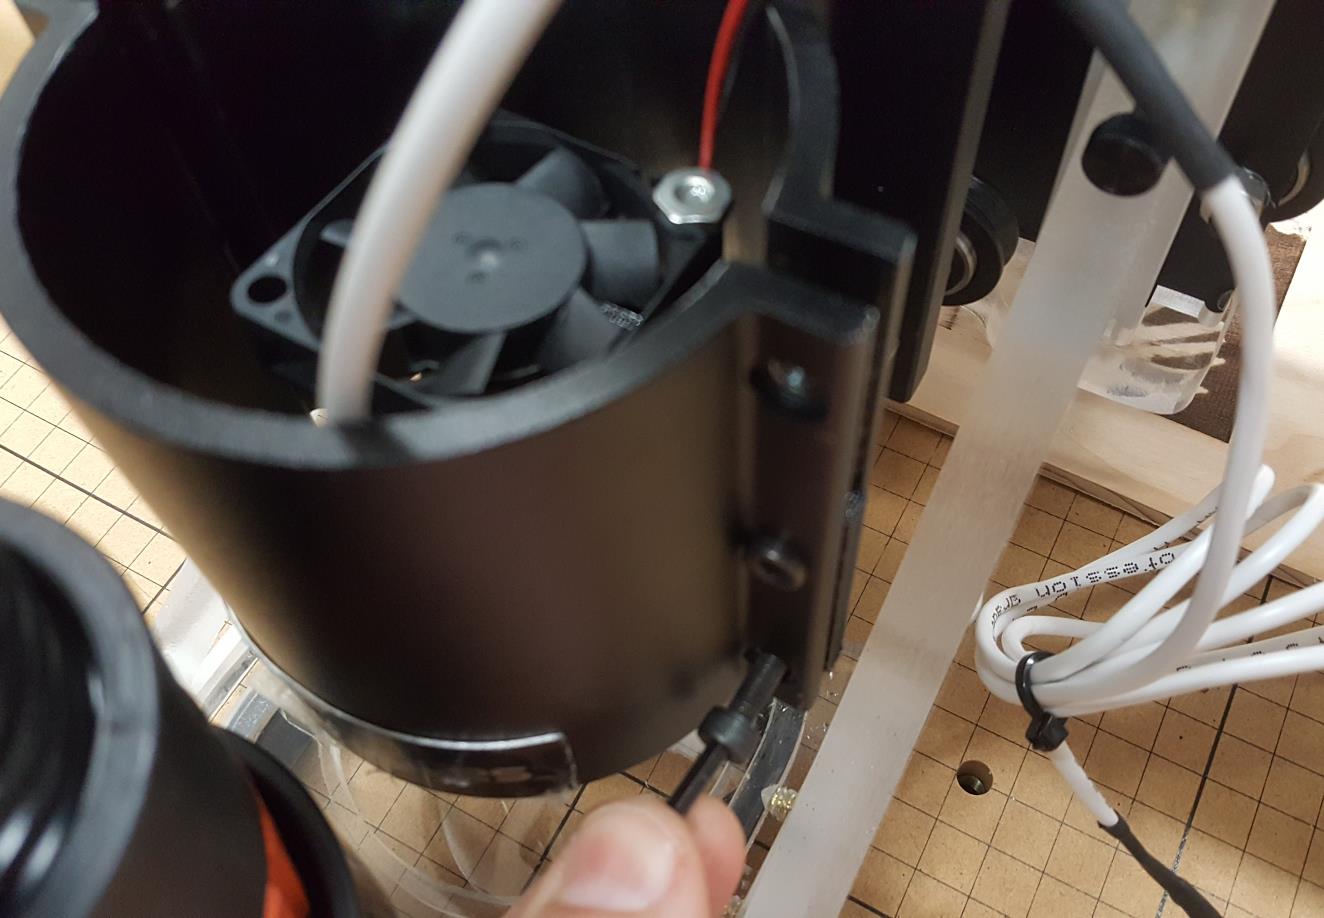
The laser will fire into the hole for the router. It is best to set your focus on the laser, then slide the dust boot on and insert the vacuum. You are now ready to go! Your laser fumes will get extracted through the vacuum as well.
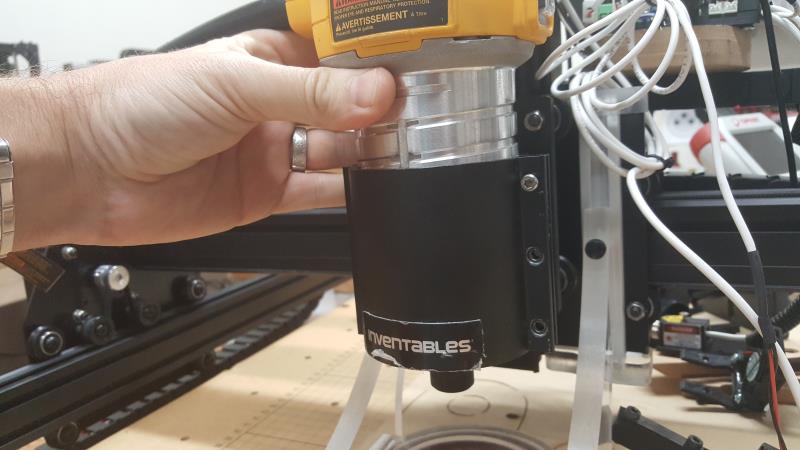
2. Laser Mounted under the Router
In this case, you can pop the laser mount under the router and utilize the laser shielding protection as well as not needed to completely remove the router. We don’t have our router in the cable chain, but I am sure many people do, and it is a pain to get it out. It only takes a couple of minutes to screw in the mount to the router and get it going. So let’s see how it is done!
- Either print out the mount or purchase it in our shop. DOWNLOAD STL MOUNT HERE
- Put the M8 screws in the mount.
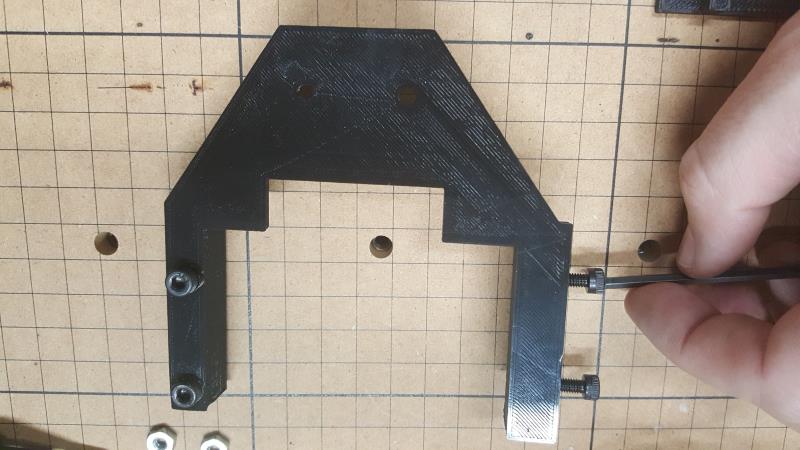
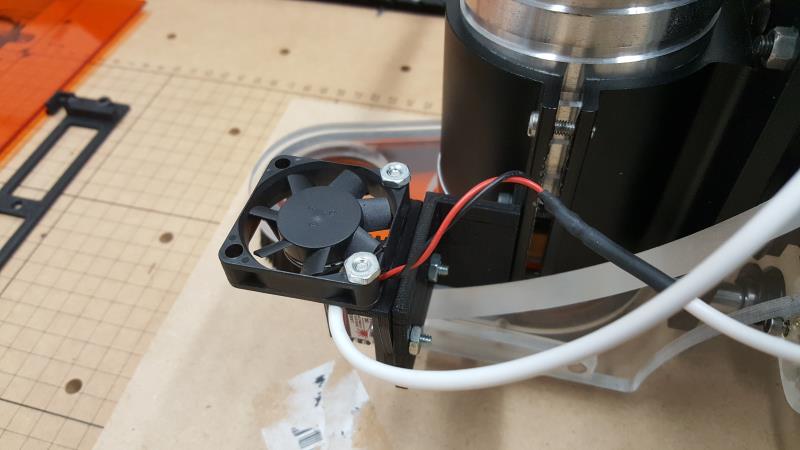
3. Mount the fan to the mount. Note the orientation of the Sunon logo.

4. Mount the laser to the plastic mount with the two screws.

5. Lift up the router slightly. Just enough so the chuck is just below the spindle mount.
6. Screw in the M8 screws into the Inventables spindle mount on the bottom two screw positions. The laser mount will fit snugly under the metal mount, pressed slightly against the spindle chuck.
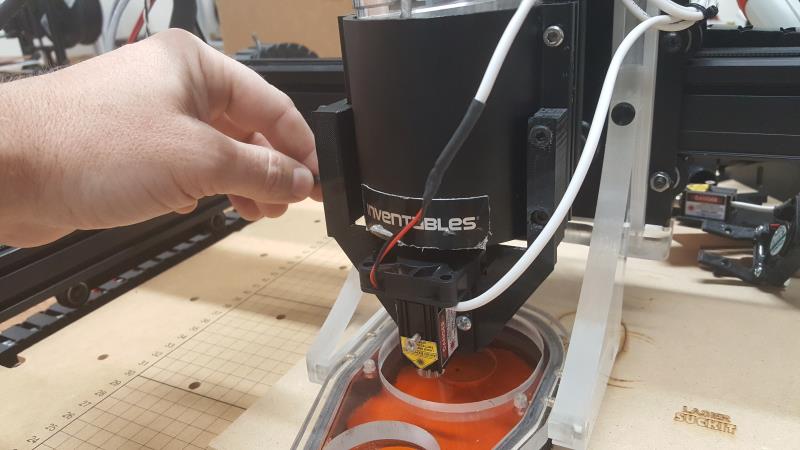
7. Mark a hole with the laser and drill out a hole in the laser shielding. Make it big enough so the laser will go through it and leave enough room for some movement when you take on and off the boot.

Put the dust boot back in and insert the vacuum hose. The laser fan will be touching the vacuum hose slightly. You are now ready to use the laser!
3. Laser Mounted next to the Router
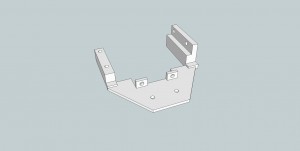
In this case, you can keep your router on and your laser on. No need to uninstall anything to use the router or the laser. The downside is that you don’t get to have the shielding protection of the laser suckit. This method will be very similar to the original X Carve mount that was in the mounting kit, but modified slightly to put the laser in front of the side rails so it doesn’t hit it.
You can purchase the mount in the store or you can print it out yourself. Here is the link to the .stl file: DOWNLOAD SIDE LASER SUCKIT HOLDER

Mounting is pretty straight forward. Use the M8 screws to attach it to the bottom two screw post positions. Attach it to the front on the spindle holder and not on the inside.
Here are some pictures of the mounting:
The spindle is still pushed up pretty good to allow for the laser to be about 1.5″ off the work surface using the HF lens. You can also lift off the dust boot slightly to get some vacuum from the side as well. Or you can just take off the boot while using the laser.
So there it is! The links to the mounts and shielding pieces are here.